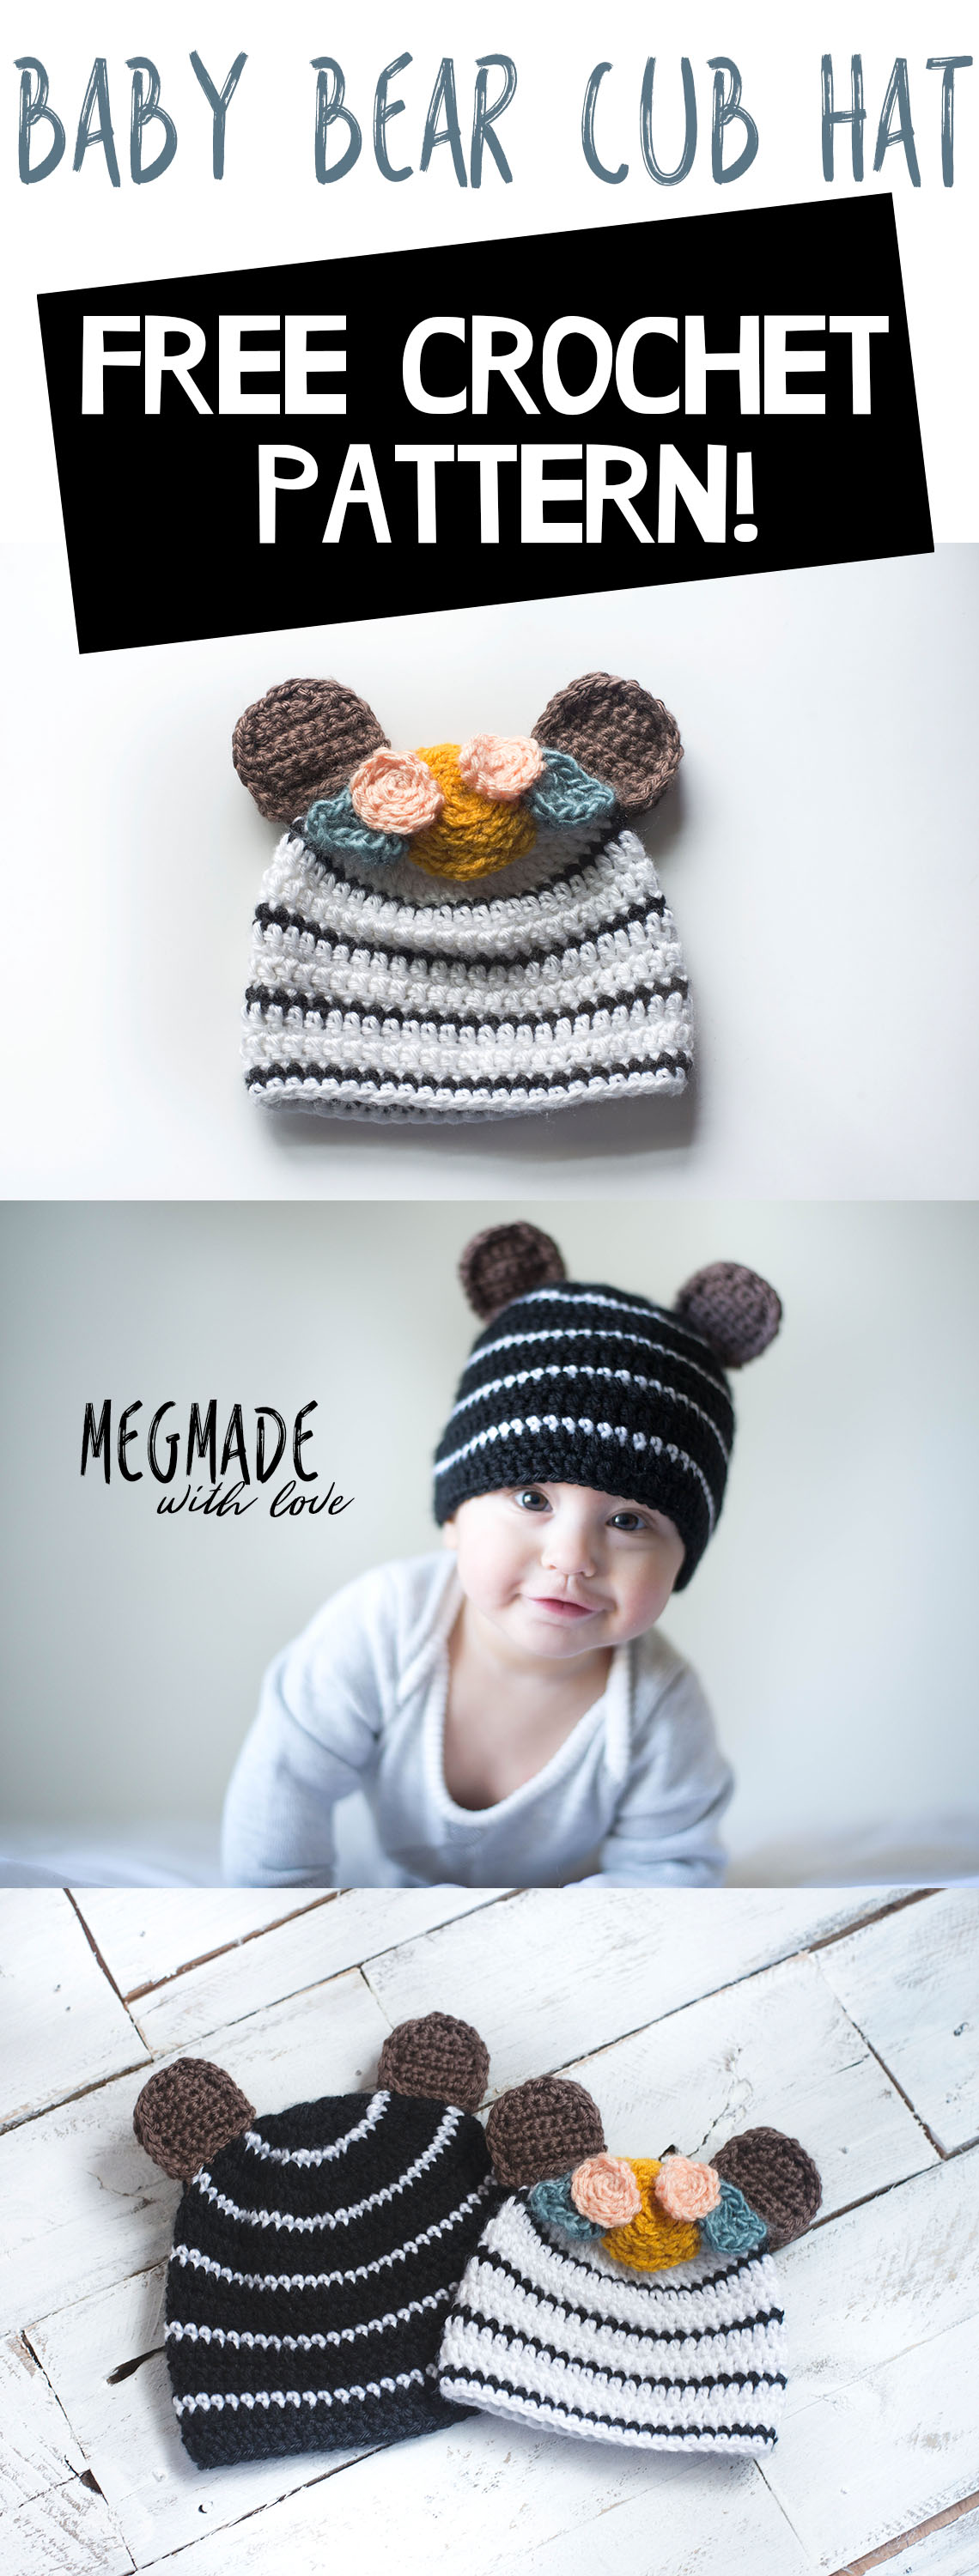
Baby Bear Cub Hat
/
So I've been a little obsessed with making baby hats here lately...
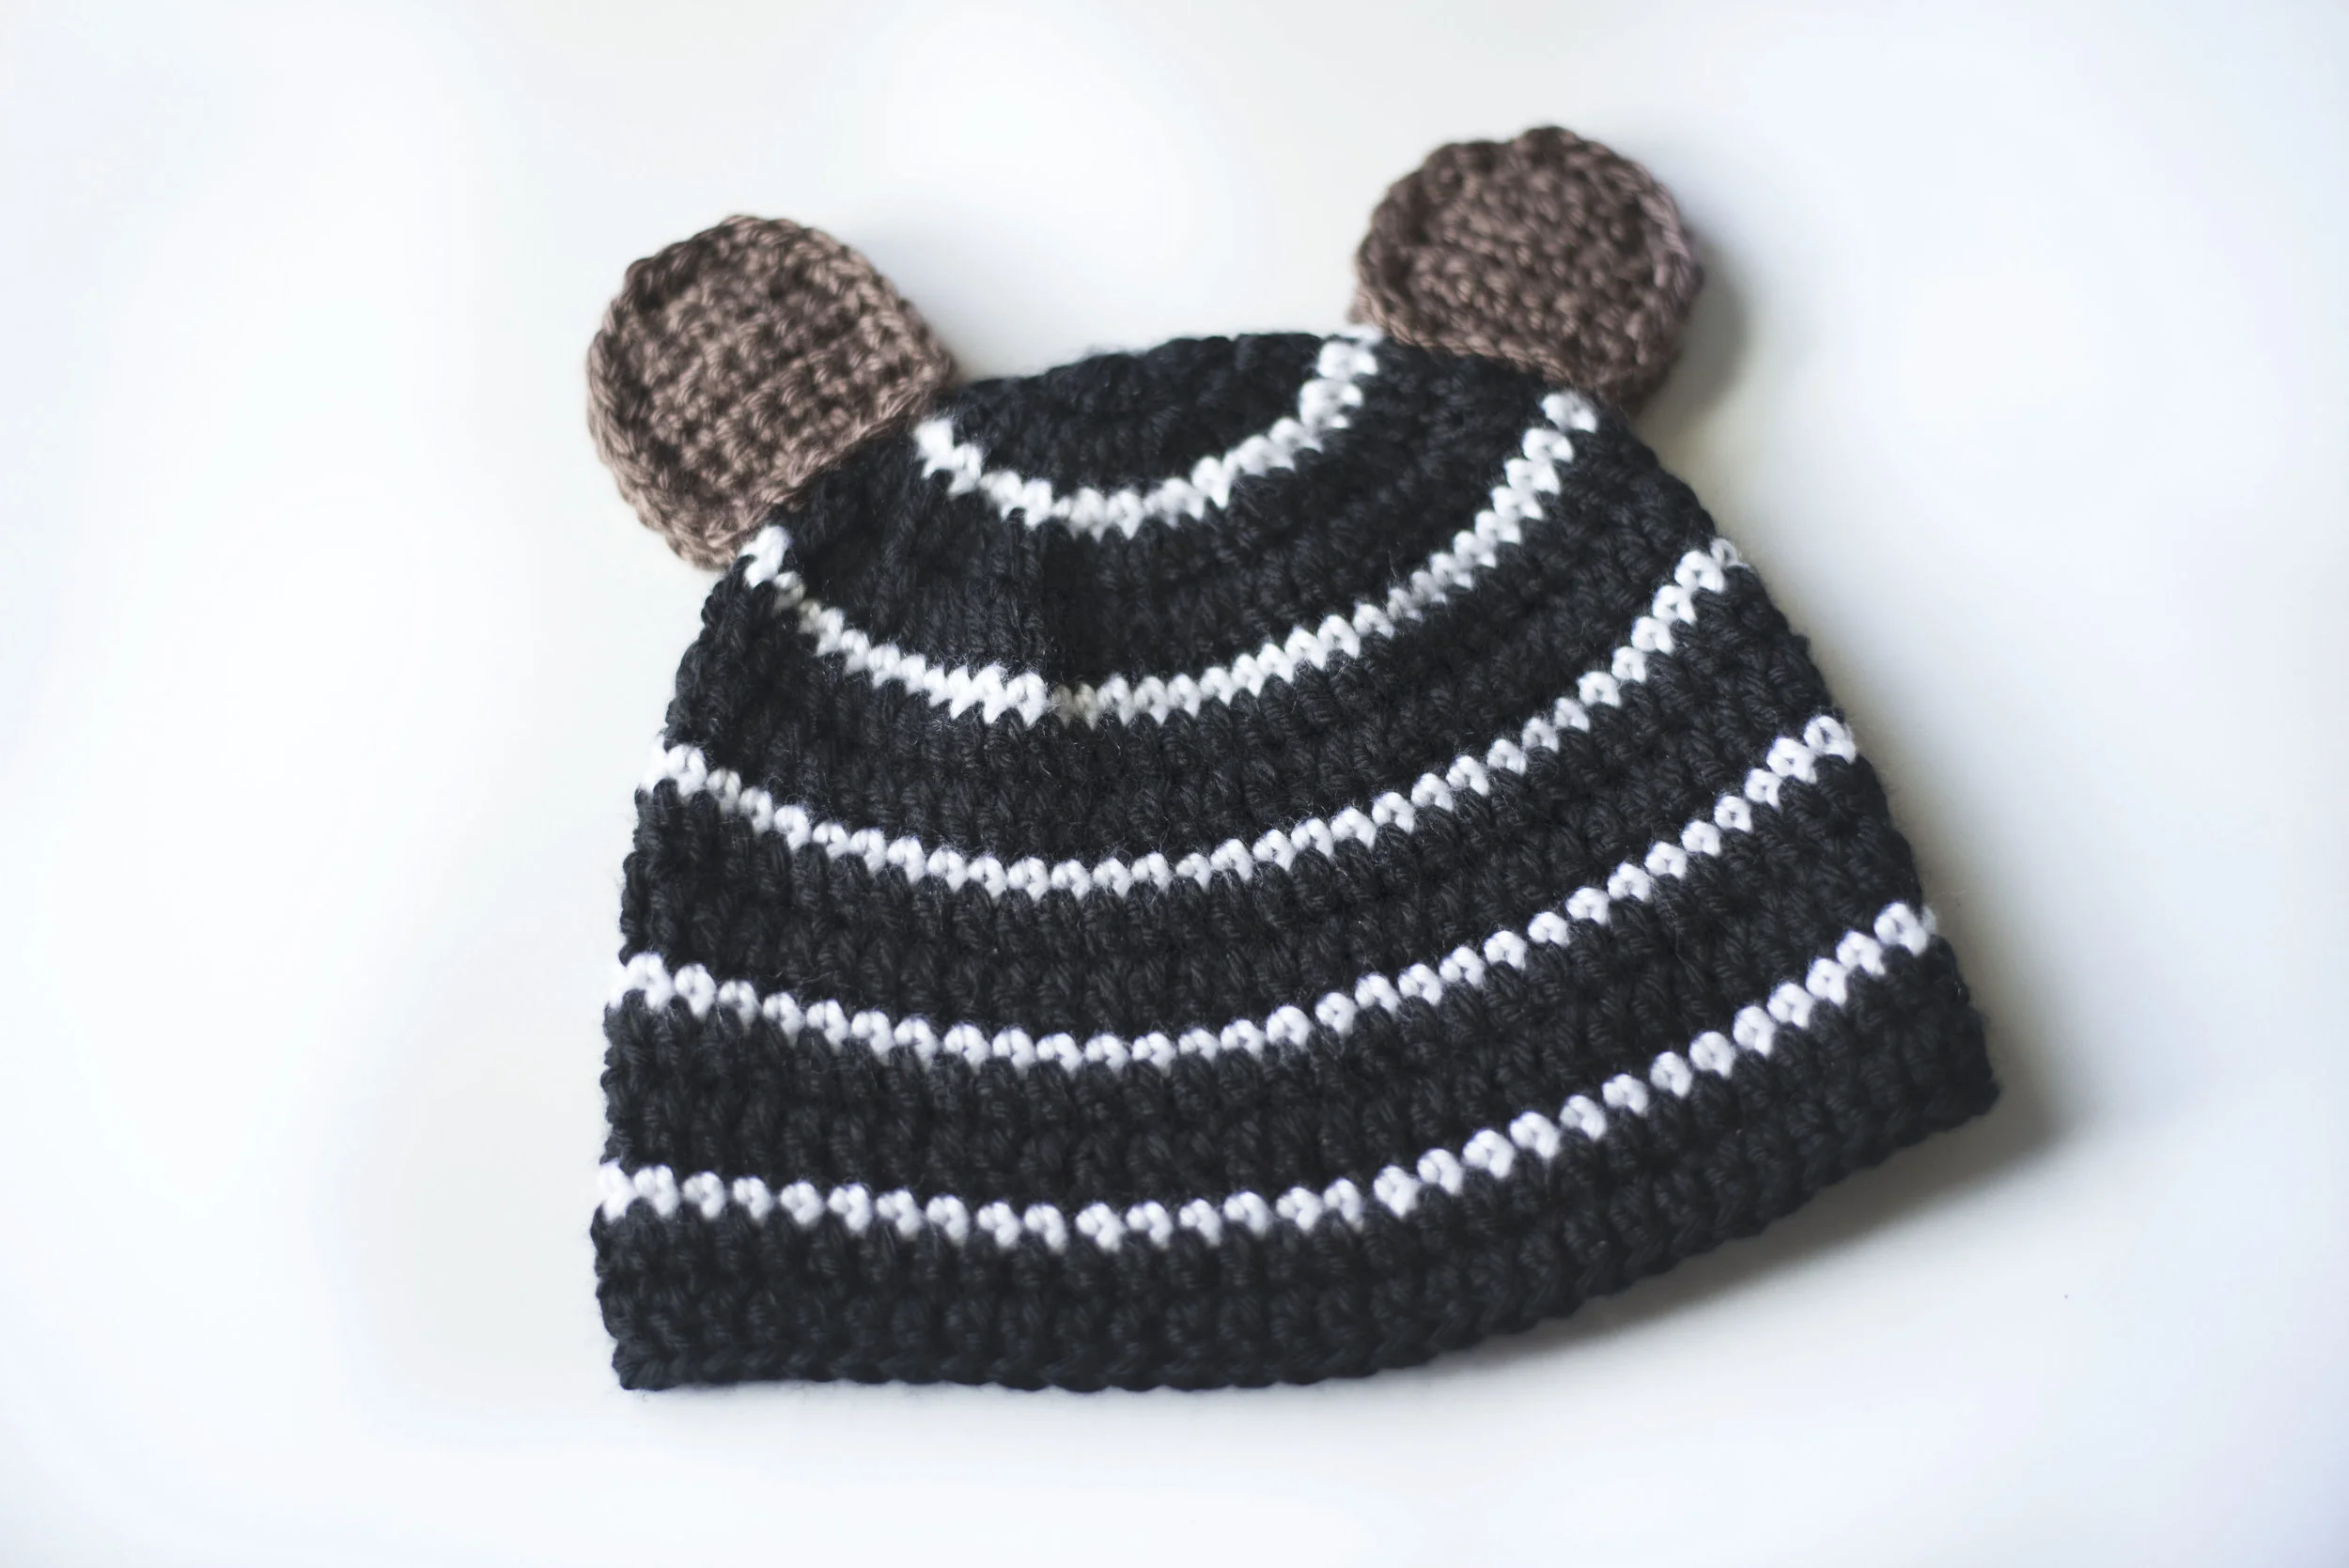
While making hats for my son is fun and all, part of me wants him to be a girl so I can put him in cute hats like the girl version of this baby bear cub hat! Oh my word. The flowers. The cuteness. (insert crying emoji)

This hat was originally inspired by some photo I saw on Facebook (I wish I could remember where!) of a dress that was white and black striped with floral material accent. I loved it, and decided I needed to transform it into something crochet. The hats are the same pattern- I just switched the blacks and whites!
This would make a great baby shower gift or even a fun and easy project for your own babe. The hat is simple-- using a mix of double and single crochets. And I created the cute little flowers crocheting in the "3rd loop". I also decided to make the ears double thick for sturdiness, otherwise they're a little too floppy in my opinion!
I designed the pattern in two sizes: 0-6 months and 6-12 months. Although I feel as if the 6-12 month hat could stretch to fit a toddler!
Without further ado here's the pattern for this adorable hat:

Baby Bear Cub Hat
What you'll need:
worsted weight yarn of choice [I used Caron Simply Soft in White(A), Black(B), Taupe(C), and Light Country Peach(D), and Red Heart Super Saver in Gold (E), the color I used for the leaves was a scrap I had and I can't for the life of me figure out what brand of yarn that was, so sorry!! I just liked the color so much I had to use it, but any worsted weight green would work. That color will be abbreviated (F)] **note that Caron Simply Soft is lighter than other yarns it's weight. so you may have to use a smaller hook to obtain gauge if you use a different yarn**
Size G 4MM Hook (or size needed to obtain gauge)
tapestry needle
stitch markers
sewing pins
Gauge:
16 dc and 9 rows equals a four inch square
Abbreviations:
ch=chain, st(s)=stitch(es), sl=slip, sc=single crochet, dc=double crochet, R=round, sc2tog=single crochet two together
Notes:
When making the flowers, I work in the "3rd Loop", which is behind the usual two loops that you typically insert your hook into. See photo below for assistance:

Pattern:
*I will write this pattern using the colors I used for the girl hat-- to make the boy hat you will switch the colors A and B.*
Size 0-6 months (fits up to 16" head):
R1) using A- ch 2, work 12 dc into circle, join to 2nd ch with sl st (12)
R2) ch 2, 2 dc into each st around, join to 2nd ch with sl st (24)
R3) change to B- ch 1, *2 sc, sc into next st, repeat from * around, join to ch with sl st (36)
R4) change to A- ch 2, *2 dc, dc into next 2 sts, repeat from * around, join to 2nd ch with sl st (48)
R5) ch 2, dc around, join to 2nd ch with sl st
R6) change to B- ch 1, sc around, join to ch with sl st
R7-8) change to A- ch 2, dc around, join to 2nd ch with sl st
R9) repeat R6
R10-11) repeat R7-8
R12) repeat R6
R13-14) repeat R7-8
R15) repeat R6
R16) change to A- ch 1, sc around, join to ch with sl st
fasten off and weave in ends with needle
Size 6-12 months (fits up to 18" head):
make a magic circle
R1) using A- ch 2, work 12 dc into circle, join to 2nd ch with sl st (12)
R2) ch 2, 2 dc into each st around, join to 2nd ch with sl st (24)
R3) change to B- ch 1, *2 sc, sc into next st, repeat from * around, join to ch with sl st (36)
R4) change to A- ch 2, *2 dc, dc into next 2 sts, repeat from * around, join to 2nd ch with sl st (48)
R5) ch 2, 2dc, dc into next 3 sts, repeat from * around, join to 2nd ch with sl st (60)
R6) change to B- ch 1, sc around, join to ch with sl st
R7-8) change to A- ch 2, dc around, join to 2nd ch with sl st
R9) repeat R6
R10-11) repeat R7-8
R12) repeat R6
R13-14) repeat R7-8
R15) repeat R6
R16-17) repeat R7-8
fasten off and weave in ends with needle
Ears(make 4):
using C- ch 8
1) sc into 2nd ch from hook and across row (7)
2-4) ch 1, turn, sc across row (7)
5) ch 1, turn, sc2tog, sc into next 3 sts, sc2tog (5)
6) ch 1, turn, sc2tog, sc into next st, sc2tog (3)
ch 1, and work sc's around the entire ear- begin working down the left side, and work 2 sc into the bottom two corners:
sew two ears together "wrong sides" facing each other using your needle:

Sew ears to the top of the hat, lining up evenly between rows 3-6 (see below) with the seam at the back. Make sure they're on there securely! If you're making the boy hat, you're done after this step!
Small flowers (make 2): (worked in continuous round-use stitch markers)
using D- make magic circle
R1) ch 1, work 6 sc into circle (6)
R2) 2 sc into 3rd loop around row (12)
R3) sc into 3rd loop around row (12)
sl st into next st and fasten off, leave long tail to sew to hat
Large flower: (worked in continuous round-use stitch markers)
using E- make magic circle
R1) ch 1, work 6 sc into circle (6)
R2) 2 sc into each 3rd loop around row (12)
R3) *2 sc into 3rd loop, sc into 3rd loop, repeat from * around (18)
R4) sc around in 3rd loop (18)
R5) 2 sc in 3rd loop of first 2 sts, work sl st in 3rd loop of next 3 sts, 2 sc in 3rd loop of next 4 sts, sl st in 3rd loop of next 2 sts, 2 sc in 3rd loop of next 5 sts, sl st in 3rd loop of last 2 sts (29)
fasten off, leave long tail to sew to hat
Leaves (make 2):
using F- ch 6
in 2nd ch from hook, in back loop only sl st, sc, sc, dc, 3 dc in last st.
then working on the other side of the original ch 6: 3 dc into first st, dc, sc, sc, sl st into last st
fasten off, leave long tail to sew to hat
Arrange the flowers on the hat how you would like them, and then pin them on (I made the mistake of putting on the first small flower before the leaf and had to rip it off and redo it--oops!). Sew with the long tail and needle in between the rows of "v's" of the flowers so they stay lookin' pretty! Also, a tip for sewing them on: don't sew all the way to the edge of the flower, and the edges will be raised and more realistic and "3D" looking.

And that's it! I'm a fan! And apparently so is Sawyer (nom nom):

If you have any questions or comments feel free to leave them below, I'll get back with you as soon as possible. :)