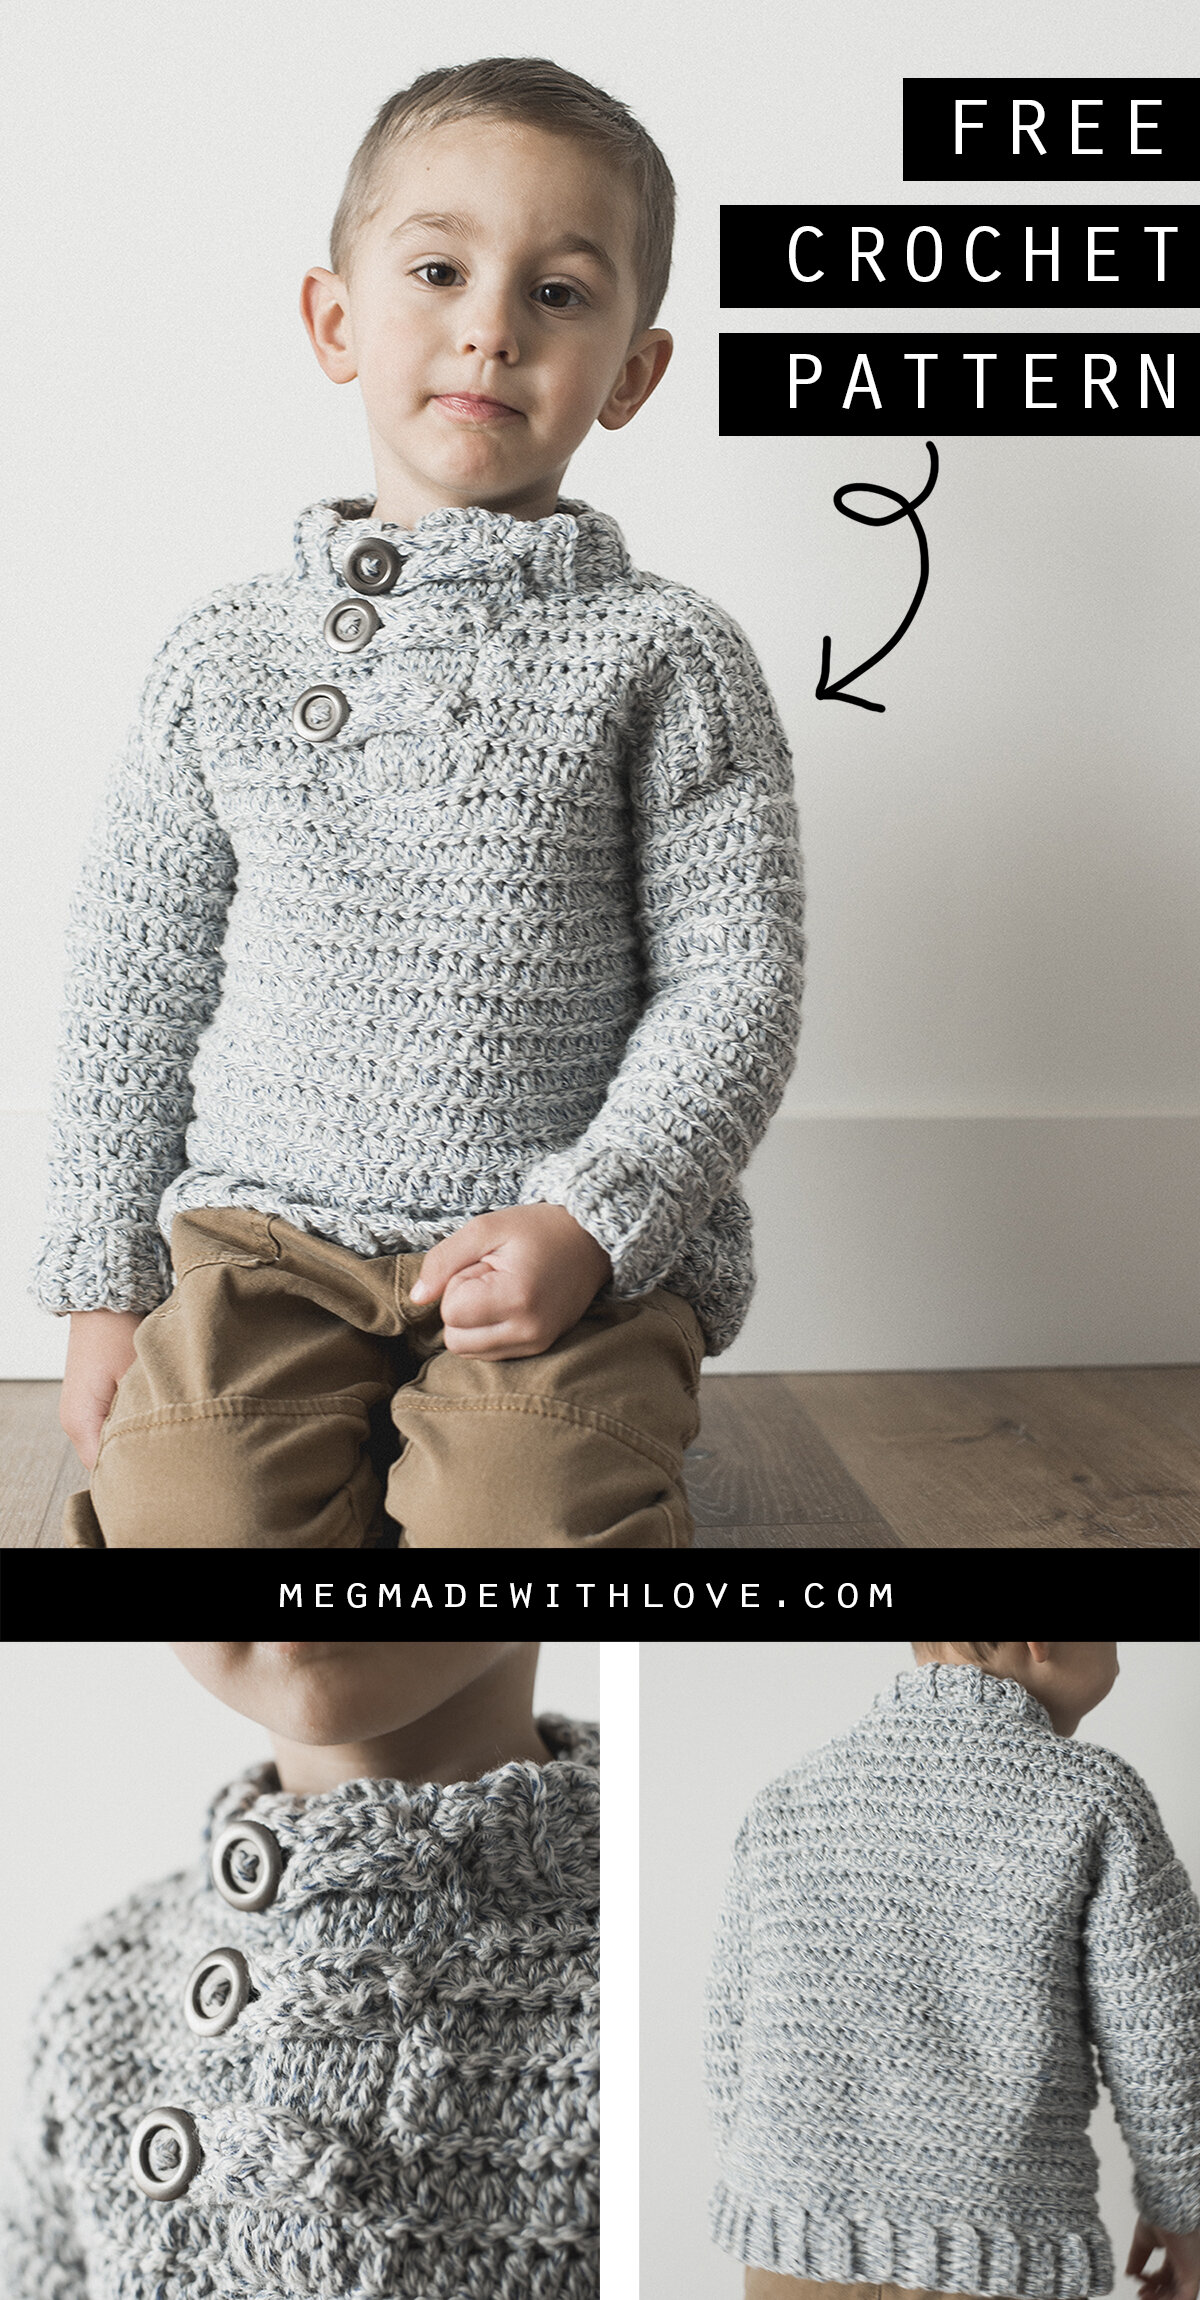
Toddler Boy Crochet Sweater - Free Crochet Pattern
/
***You can find the PDF version of this pattern by clicking HERE. Ad-free, and printer-friendly! For the free version, scroll down within this post.***
Boy oh boy, have I got a cute new pattern to share with you today… making a sweater for my son has been a goal of mine for quite some time, but I just hadn’t got the chance to do it. Finally the stars aligned and his sweater is complete! And I’ve written a detailed pattern so you could make one for the little in your life!

I’ve written the pattern for sizes 2T, 3T and 4T. And I’m thinking if you size up one for your kiddo, you’d get lots of extra wear out of it.. ya know since they grow like weeds.
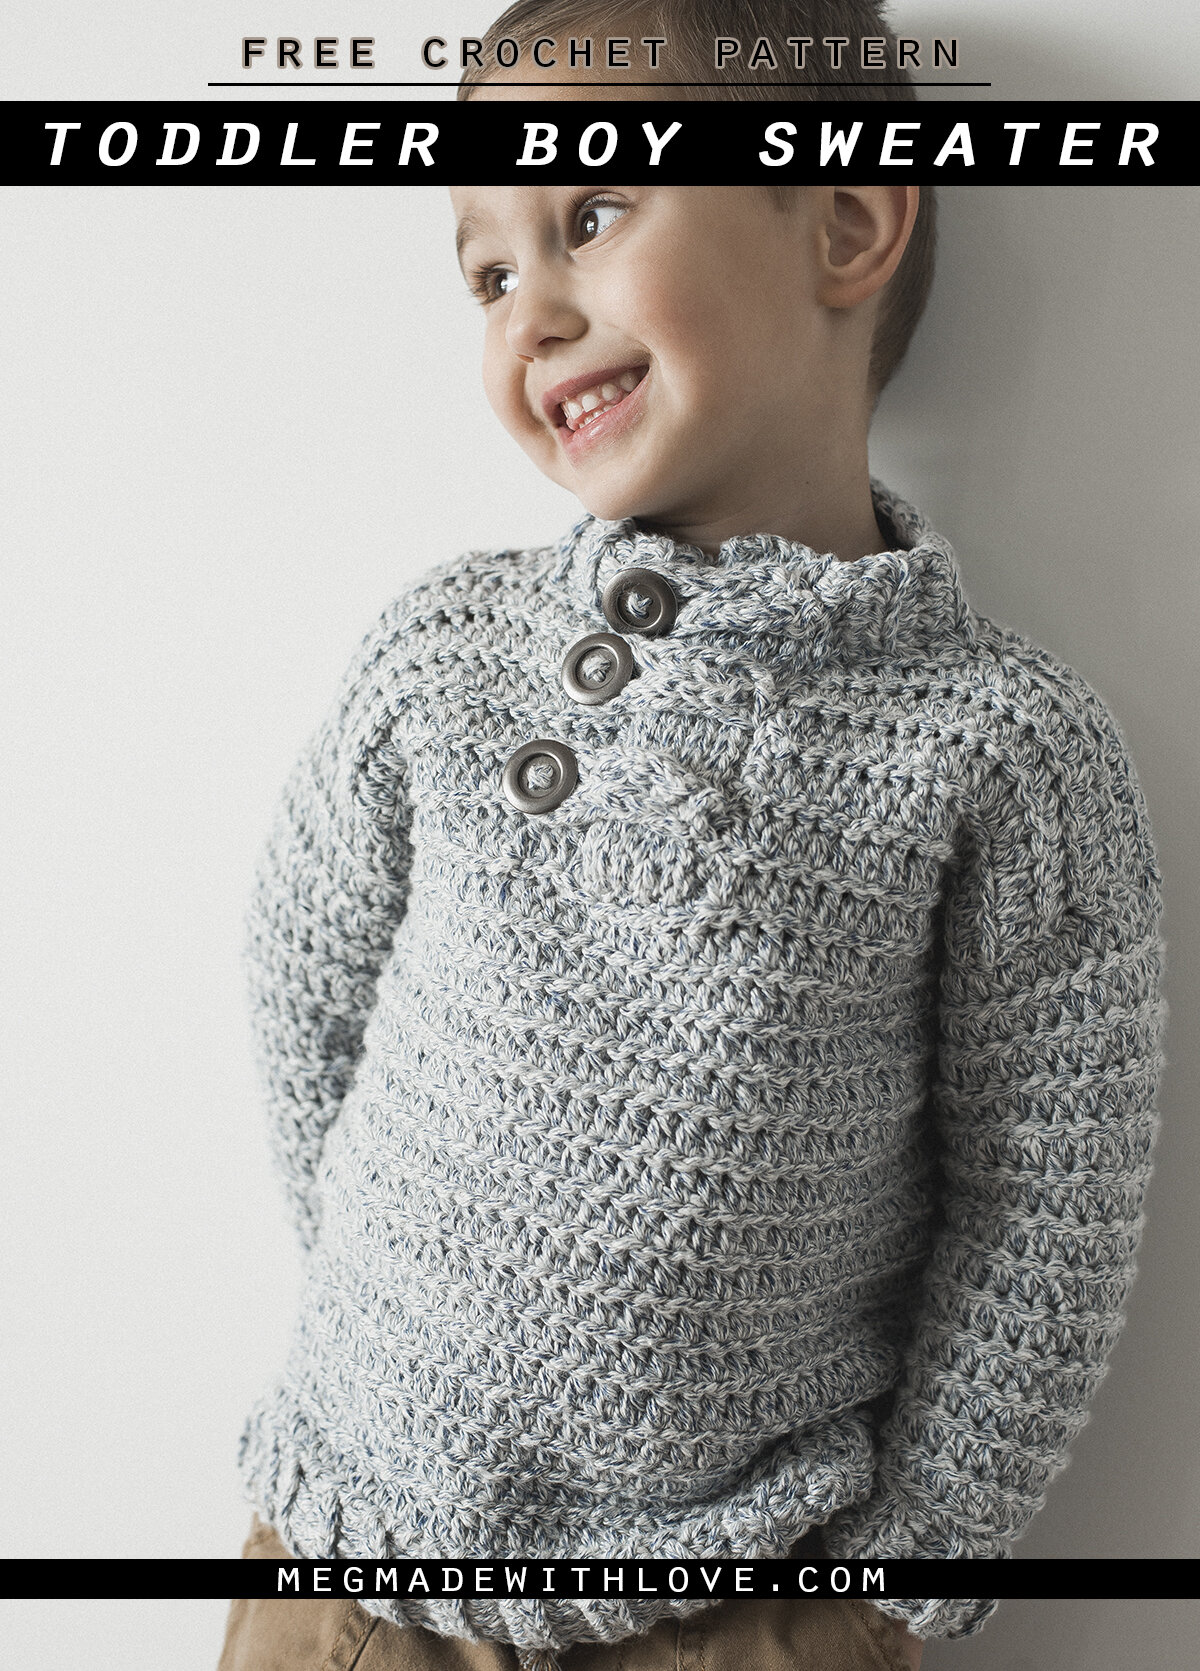
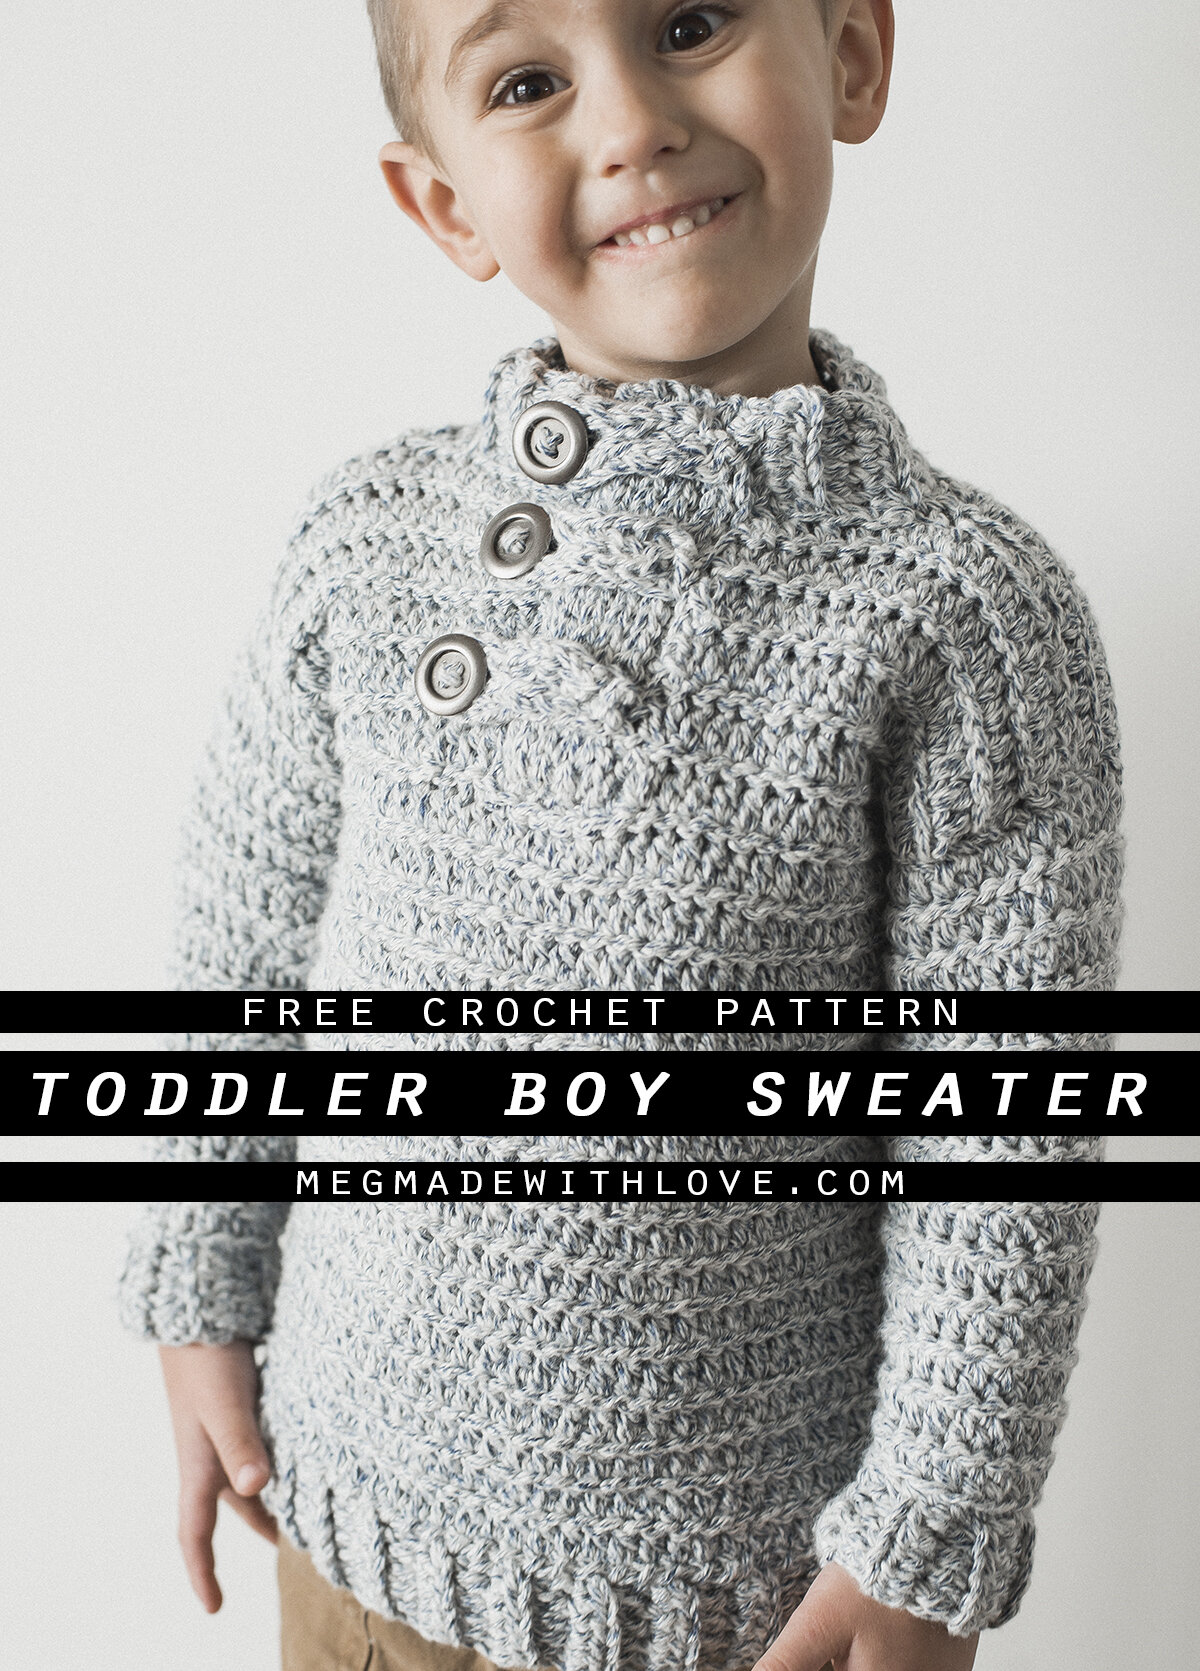
I love the little elements of this sweater that make it unique, mostly the fun button feature on the top that closes with little i-cords. I kinda wish I had one in my size… hmmm……

There’s quite a bit of assembly instructions involved, as there are multiple pieces that make up the sweater, but I’ve got your back with TONS of photos for assistance. Since there’s so many details, I’d rate this sweater as more of an “intermediate” pattern rather than beginner.

I used Hobby Lobby’s Denim in Color yarn, which was perfect for a sweater in my opinion, because it’s a 50/50 blend of acrylic and cotton. It’s a bit on the thicker side for a worsted (4) weight yarn, so I think you could get away with using a bulky (5) weight yarn, just checking gauge for accuracy.

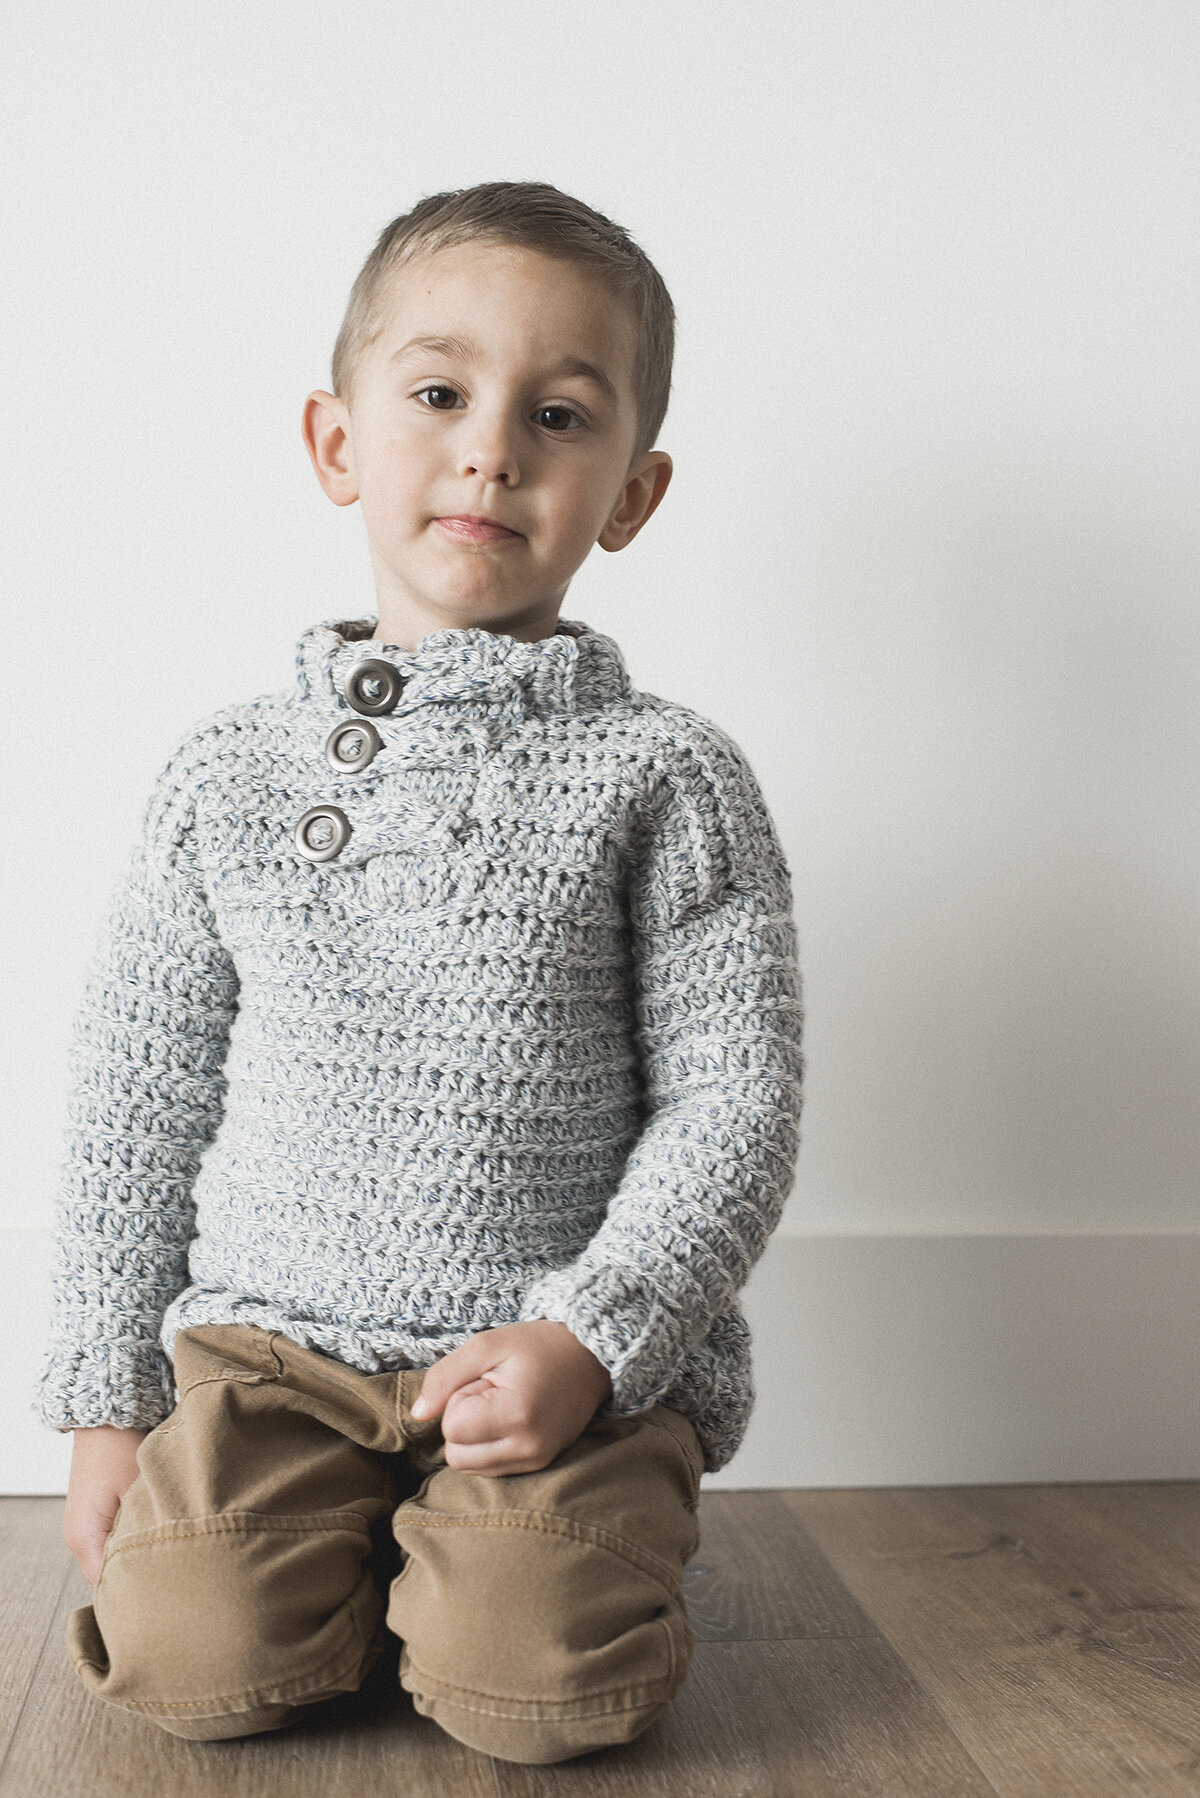
I’m very happy/proud to have this sweater out in the world, and I think Sawyer looks so freakin’ cute in it. If you end up making the sweater, I hope you enjoy!
Toddler Boy Crochet Sweater
***You can find the PDF version of this pattern by clicking HERE. Ad-free, and printer-friendly! For the free version, scroll down within this post.***
What you’ll need:
-category 4 (worsted) weight yarn, I used Yarn Bee Denim in Color in the color “Denim”, see notes for yardage and other info
-7mm crochet hook
-3 one-inch buttons
-yarn needle
-sewing pins
Abbreviations:
ch=chain, hdc=half double crochet, sl=slip, BLO=back loop only, st(s)=stitch(es) slst2tog= slip stitch two together
Gauge:
12 hdc by 9 rows equals a four-inch square
Notes:
———SIZING & YARDAGE———
2T:
11.5” wide, 13.5“ long (shoulder to bottom)
approximately 425 yards of yarn
3T: 12.5” wide, 14.5” long (shoulder to bottom)
approximately 450 yards of yarn
4T: 13.5” wide, 15.5” long (shoulder to bottom)
approximately 475 yards of yarn
-------------------------------------------
-ch at the beginning of each row do not count as stitches
-the yarn I used seemed to be a bit bulkier than other 4 weight yarns I’ve worked with before, I say that because you could probably get away with using a bulky (5) weight yarn, just be sure to check gauge!
-when working the sl st rows, I made sure to have a loose hand so it wouldn’t be too difficult to insert the hook back into the sts on the way back. I did the sl st in two motions: draw yarn through, and pull it a bit, then pull through loop. I found this made it not so tight.
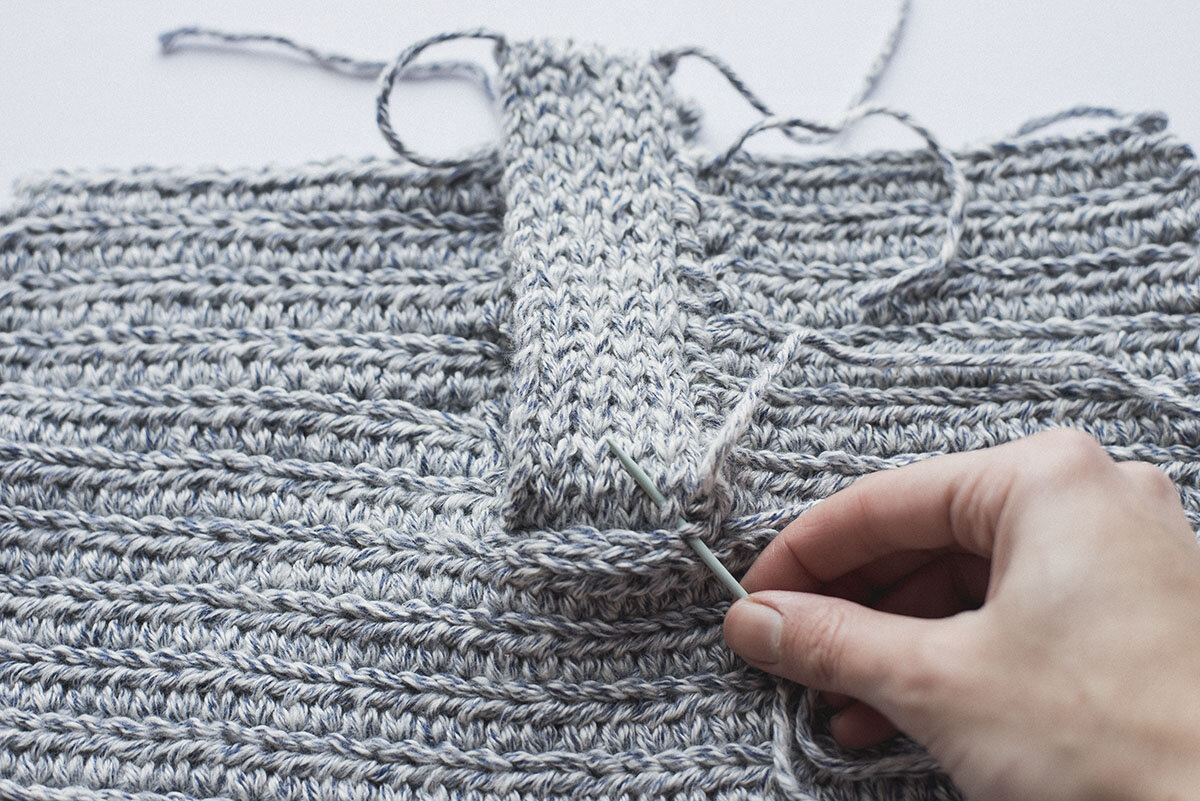
-sweater is made up of multiple pieces: front and back panel, middle neck piece, little i-cords for joining to buttons, sleeves, and ribbing for the bottom of the sweater & sleeves as well as ribbing for the neck top. Below you can see the different pieces.

Pattern:
-—---Back Panel--—--
(worked bottom-up)
***Size 2T
Row 1) ch 35, hdc in 2nd ch from hook and across (34 total sts)
Row 2) ch 1, turn, sl st in BLO across row, see notes about keeping loose tension (34 total sts)
Row 3) ch 1, turn, hdc across row (34 total sts)
Rows 4-37) repeat rows 2 & 3 consecutively
finish off
***Size 3T
Row 1) ch 39, hdc in 2nd ch from hook and across (38 total sts)
Row 2) ch 1, turn, sl st in BLO across row, see notes about keeping loose tension (38 total sts)
Row 3) ch 1, turn, hdc across row (38 total sts)
Rows 4-41) repeat rows 2 & 3 consecutively
finish off
***Size 4T
Row 1) ch 43, hdc in 2nd ch from hook and across (42 total sts)
Row 2) ch 1, turn, sl st in BLO across row, see notes about keeping loose tension (42 total sts)
Row 3) ch 1, turn, hdc across row (42 total sts)
Rows 4-45) repeat rows 2 & 3 consecutively
finish off
--—--Front Panel—----
(worked bottom-up)
***Size 2T
repeat instructions from back panel through row 26, after that you will begin to work one side of the front panel
Row 27) ch 1, turn, hdc in 14 sts (14 total sts)
Row 28) ch 1, turn, sl st in BLO across row (14 total sts)
Row 29) ch 1, turn, hdc across row (14 total sts)
Rows 30-37) repeat rows 28 & 29 consecutively
finish off
now you will start on the other side of the front panel, you will pick back up on row 27 (now considered row 27b), skipping 6 sts in the middle of the panel, and inserting your hook in the next st, draw up loop (see “photo A” below for assistance)
Row 27b) ch 1, work hdc in same st you drew up in and across to the edge (14 total sts)
Row 28b) ch 1, turn, sl st in BLO across row (14 total sts)
Row 29b) ch 1, turn, hdc across row (14 total sts)
Rows 30b-37b) repeat rows 28b & 29b consecutively
finish off
***Size 3T
repeat instructions from back panel through row 30, after that you will begin to work one side of the front panel
Row 31) ch 1, turn, hdc in 16 sts (16 total sts)
Row 32) ch 1, turn, sl st in BLO across row (16 total sts)
Row 33) ch 1, turn, hdc across row (16 total sts)
Rows 34-41) repeat rows 32 & 33 consecutively
finish off
now you will start on the other side of the front panel, you will pick back up on row 31 (now considered row 31b), skipping 6 sts in the middle of the panel, and inserting your hook in the next st, draw up loop (see“photo A” below for assistance)
Row 31b) ch 1, work hdc in same st you drew up in and across to the edge (16 total sts)
Row 32b) ch 1, turn, sl st in BLO across row (16 total sts)
Row 33b) ch 1, turn, hdc across row (16 total sts)
Rows 34b-41b) repeat rows 32b & 33b consecutively
finish off
***Size 4T
repeat instructions from back panel through row 34, after that you will begin to work one side of the front panel
Row 35) ch 1, turn, hdc in 18 sts (18 total sts)
Row 36) ch 1, turn, sl st in BLO across row (18 total sts)
Row 37) ch 1, turn, hdc across row (18 total sts)
Rows 38-45) repeat rows 32 & 33 consecutively
finish off
now you will start on the other side of the front panel, you will pick back up on row 35 (now considered row 35b), skipping 6 sts in the middle of the panel, and inserting your hook in the next st, draw up loop (see “photo A” below for assistance)
Row 35b) ch 1, work hdc in same st you drew up in and across to the edge (18 total sts)
Row 36b) ch 1, turn, sl st in BLO across row (18 total sts)
Row 37b) ch 1, turn, hdc across row (18 total sts)
Rows 38b-45b) repeat rows 36b & 37b consecutively
finish off

PHOTO A
-—---Middle Neck Piece -—---
(worked side to side)
***All sizes
Row 1) ch 39, sl st in BLO of 2nd ch from hook and in BLO of all ch’s across (38 total sts)
Rows 2-10--or until it fits into gap between two top sides of front panel) ch 1, sl st in BLO across row (38 total sts)
finish off
-—---Sleeves (make 2) -—---
(worked top-down)
***Size 2T
Row 1) ch 29, hdc in 2nd ch from hook and across (28 total sts)
Row 2) ch 1, turn, sl st in BLO across (28 total sts)
Row 3) ch 1, turn, hdc across row (28 total sts)
Row 4) ch 1, turn, slst2tog, hdc across until last two sts-- slst2tog in last two (26 total sts)
Row 5) ch 1, turn, hdc across row (26 total sts)
Row 6) ch 1, turn, sl st in BLO across (26 total sts)
Row 7) ch 1, turn, hdc across row (26 total sts)
Row 8) repeat row 4 (24 total sts)
Rows 9-11) repeat rows 5-7 (24 total sts)
Row 12) repeat row 4 (22 total sts)
Rows 13-15) repeat rows 5-7 (22 total sts)
Row 16) repeat row 4 (20 total sts)
Rows 17-19) repeat rows 5-7 (20 total sts)
Row 20) repeat row 4 (18 total sts)
Rows 21-23) repeat rows 5-7 (18 total sts)
Row 24) repeat row 4 (16 total sts)
Row 25) ch 1, turn, hdc across row (16 total sts)
finish off
***Size 3T
Row 1) ch 31, hdc in 2nd ch from hook and across (30 total sts)
Row 2) ch 1, turn, sl st in BLO across (30 total sts)
Row 3) ch 1, turn, hdc across row (30 total sts)
Row 4) ch 1, turn, slst2tog, hdc across until last two sts-- slst2tog in last two (28 total sts)
Row 5) ch 1, turn, hdc across row (28 total sts)
Row 6) ch 1, turn, sl st in BLO across (28 total sts)
Row 7) ch 1, turn, hdc across row (28 total sts)
Row 8) repeat row 4 (26 total sts)
Rows 9-11) repeat rows 5-7 (26 total sts)
Row 12) repeat row 4 (24 total sts) Rows
13-15) repeat rows 5-7 (24 total sts)
Row 16) repeat row 4 (22 total sts)
Rows 17-19) repeat rows 5-7 (22 total sts)
Row 20) repeat row 4 (20 total sts)
Rows 21-23) repeat rows 5-7 (20 total sts)
Row 24) repeat row 4 (18 total sts)
Row 25) ch 1, turn, hdc across row (18 total sts)
finish off
***Size 4T
Row 1) ch 33, hdc in 2nd ch from hook and across (32 total sts)
Row 2) ch 1, turn, sl st in BLO across (32 total sts)
Row 3) ch 1, turn, hdc across row (32 total sts)
Row 4) ch 1, turn, slst2tog, hdc across until last two sts-- slst2tog in last two (30 total sts)
Row 5) ch 1, turn, hdc across row (30 total sts)
Row 6) ch 1, turn, sl st in BLO across (30 total sts)
Row 7) ch 1, turn, hdc across row (30 total sts)
Row 8) repeat row 4 (28 total sts)
Rows 9-11) repeat rows 5-7 (28 total sts)
Row 12) repeat row 4 (26 total sts)
Rows 13-15) repeat rows 5-7 (26 total sts)
Row 16) repeat row 4 (24 total sts)
Rows 17-19) repeat rows 5-7 (24 total sts)
Row 20) repeat row 4 (22 total sts)
Rows 21-23) repeat rows 5-7 (22 total sts)
Row 24) repeat row 4 (20 total sts)
Row 25) ch 1, turn, hdc across row (20 total sts)
finish off
-—---Ribbing —----
***All sizes
Row 1) ch 6, hdc in 2nd ch from hook and across (5 total sts)
Rows 2-??) ch 1, turn hdc in BLO across row (5 total sts)
you will need to make four pieces of ribbing (you can see visual in notes):
1. one spanning the width of both front and back panels
2-3. two spanning the width of the bottom of each sleeve
4. one neck ribbing that is 11 inches long
-—---I-Cord Button Closures —----
***All sizes
You will make 3 crochet i-cords, each approximately 6 inches in length.
Assembly:

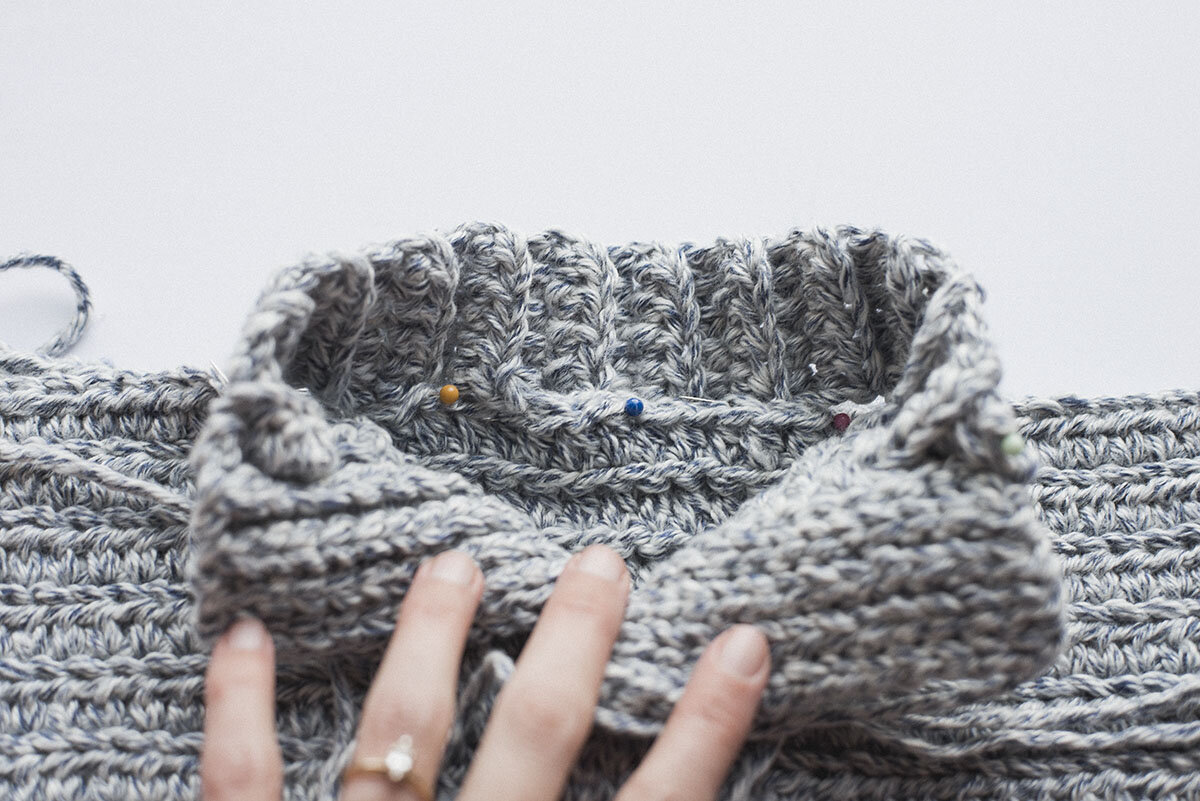
To begin assembly, you will grab your front panel and your middle neck piece. Place the front panel right side down, and place the folded middle neck piece in the little slot, folded side on the bottom, like shown in the photo above.

Next, you will pin the middle neck piece onto the front panel. The back of the middle neck piece connects to the left side of the front panel and the top side connects to the right side of the front panel, shown in photo above. The middle neck piece will stick out above the top of the front panel about 1.5”.

After it is pinned, you will sew using yarn needle and long strand of yarn. Use a loose-handed whip stitch along the right side of the middle neck piece, down until you reach the bottom folded part.
Then make your way across the bottom folded part of the middle neck piece, sewing it to the front panel.

Lift up the middle neck piece to sew the under side to the left side of the front panel, all the way up.

Next up you will attach the top neck ribbing to both the front and back panels and middle neck piece. Lay your back panel down, right side up then front panel on top of it, right side down.

First you will pin the neck ribbing to the top of the middle neck piece that extends over the top of the front panel.

Then wrap the neck ribbing around to pin the other short end to the under side of the middle neck piece, shown in photo above.
Then you will pin the rest of the ribbing around to form the neck hole. Shown in the photo above is the ribbing pinned to the back panel.
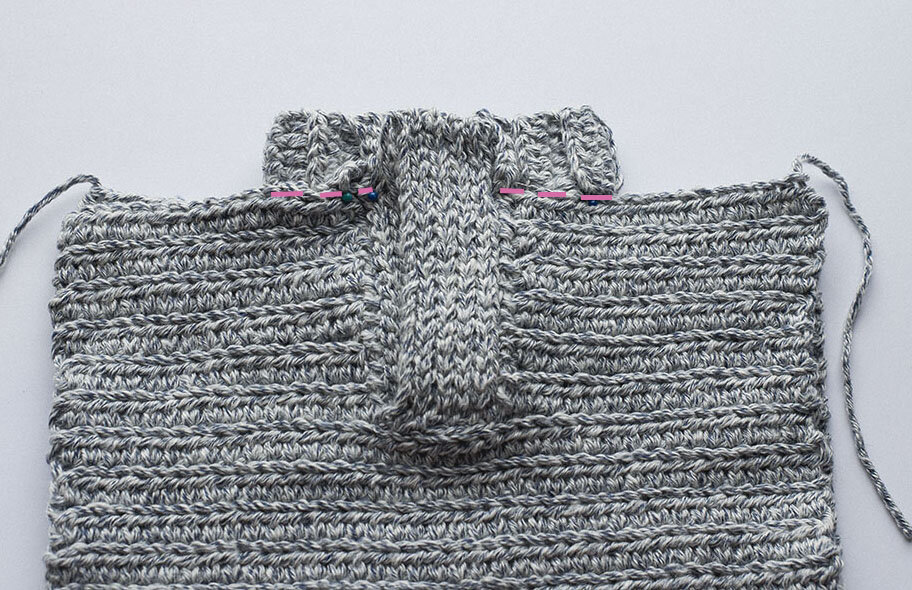
Also pin the neck ribbing to the front panel tops like shown in the photo above.

Sew all along the neck ribbing where you previously pinned attaching to both panels and the tops of the middle neck piece. You will use the same whip stitch technique with a loose hand.

Then, moving onto the sleeves you will pin and sew the ribbing onto each sleeve, again using the whip stitch with yarn needle.
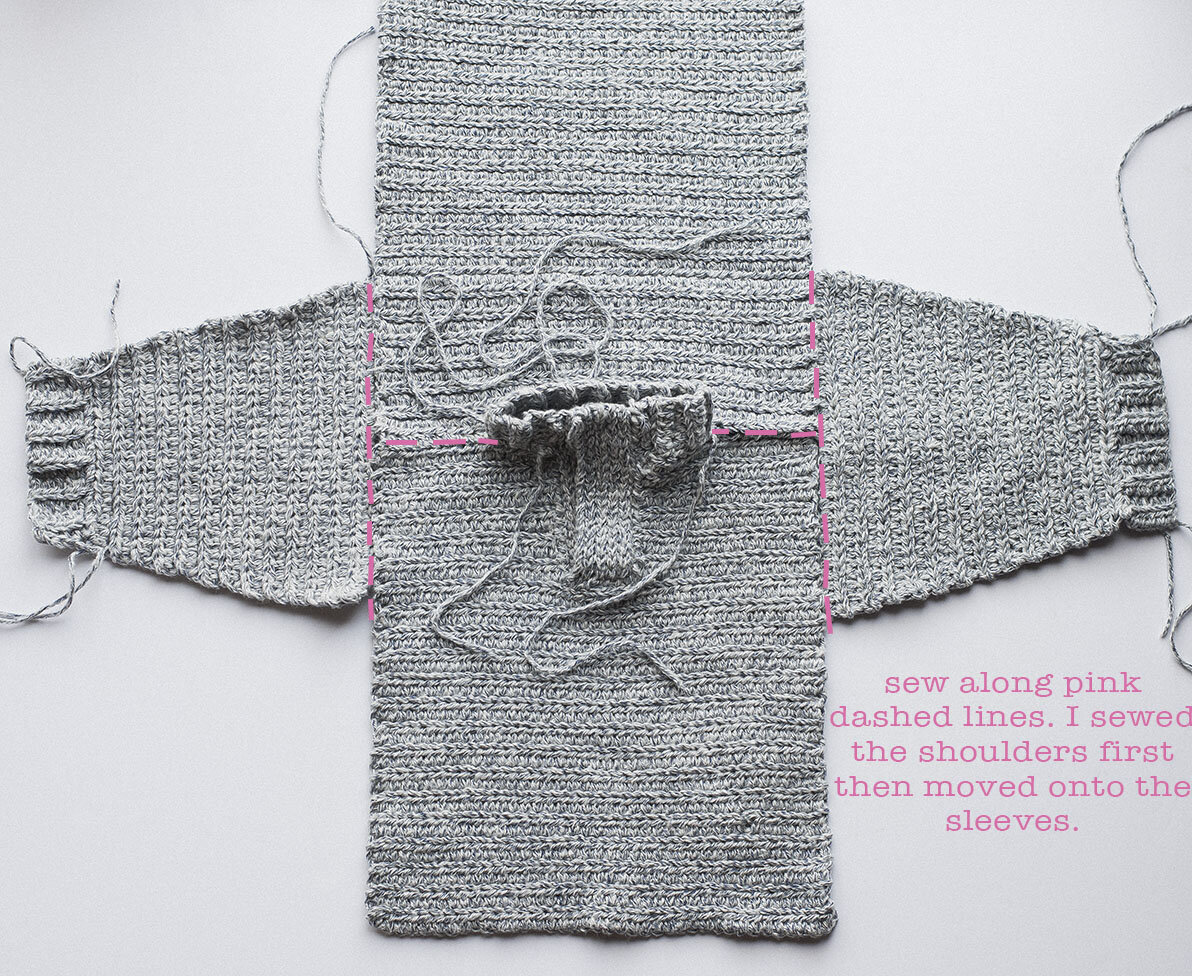
After the sleeves are done you will lay out your sweater pieces like in the photo above--all pieces right side down. The middle of the sleeves need to line up directly with the top seam where the front and back panel meet. Pin your pieces together. I sewed the the tops of the panels together first then attached the sleeves.
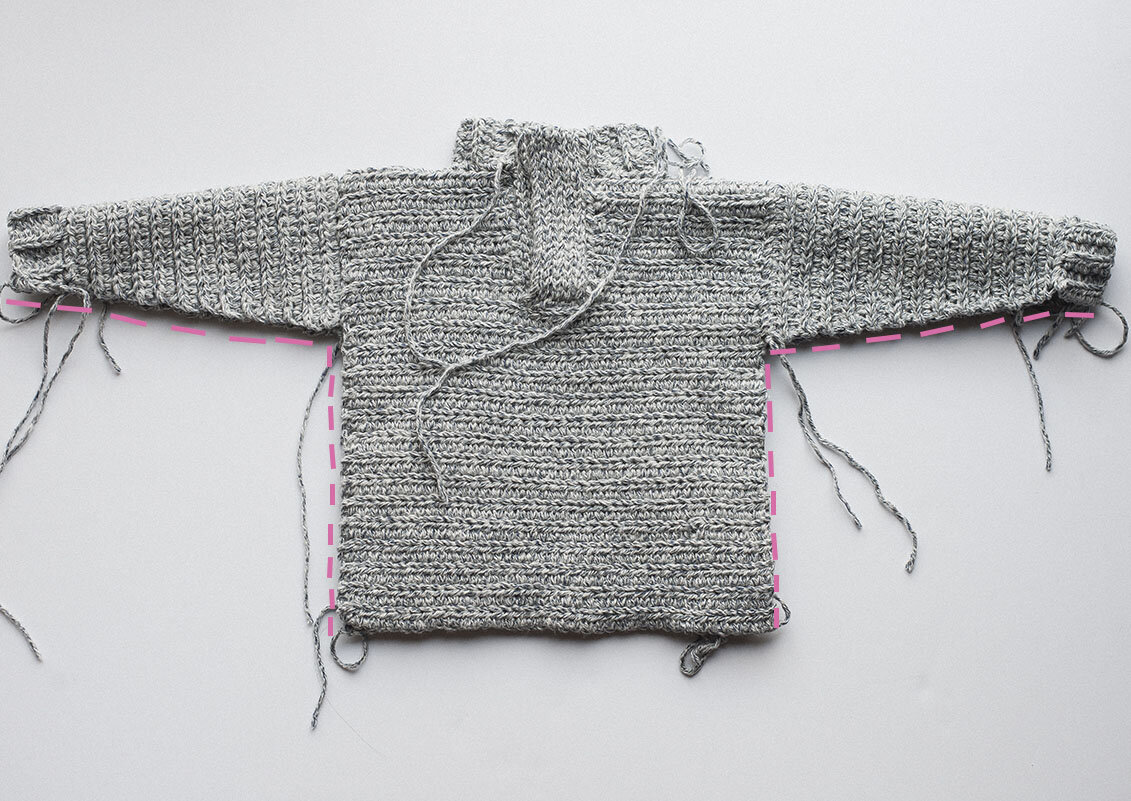
Next you will fold sweater over, matching all the edges, like shown in photo above (right sides still together). And you will sew along the bottoms of the sleeves and each side of the sweater.

Moving onto the bottom ribbing... sew the two short ends together using a whip stitch.

Moving onto the bottom ribbing... sew the two short ends together using a whip stitch.

Next you will begin on the button closures. Fold each i-cord in half and space them out evenly along the middle neck piece like in the photo above. You can play around with where you’d like your buttons to match up with them also.

Then sew each closure where you decided to place them. I made several passes with my needle to make sure they were very secure.

After all closures are added, you will sew on your buttons. I just played around with where they best matched up with the i-cords.

After all buttons are sewn on, you will want to sew the i-cord closures closed on the right side, leaving a small opening for the button to slip through--otherwise they will come loose with wear. I just drew needle and yarn through back and forth closing up the gap on all of them.

Once the i-cords are all closed up, you can loop each one around the button snugly. After that, you get the lovely pleasure of weaving in your ends. But after that you’ll have one cute sweater!
Whew!! Talk about some serious assembly… but in my opinion, 100% worth it. I love this little sweater. And I think it looks so dang adorable on my kiddo :) If you make one for the kiddo in your life, do please tag me over on Instagram! I’d love to admire :)
Until next time!
Meg