


Editing Photos: Info, Tips and Resources
/
***I want to set the record straight before I begin... I don't claim to be the queen of photography or editing. I just enjoy taking photos and sharing the stuff I've learned. That's what this post is all about--just sharing my take on editing, and hopefully help others get something from what I've got to say!***
It's been awhile since I've talked photos... I got a little side-tracked/busy so I didn't get to finish of my photography series I started a few weeks back. (You can see the other posts by clicking here)
So to conclude the series, today I'm talking about editing!
I think this may be my favorite part of the photography process. I really love bringing a new "life" to photos by post-processing (or editing). Now, I realize when it comes to editing, whether it is a "good edit" or not is entirely subjective. Everybody has different taste and style, which is why I think it is so fun. There are certain things, though, that really make a photo appeal to most-- like, for instance the correct amount of exposure and contrast. But even then, it's entirely up to what you're trying to go for stylistically. It's an art!
I think a good place to start when it comes to editing your photos is finding out what appeals to you and your style. If you haven't read the first post in this series about finding your style-- that'd be a great resource to help you find out where you could start with (post here). Probably my favorite suggestion from that article was starting a Pinterest board solely for your photo inspiration. And once you've got quite a few photos in there that pique your interest, then you can draw commonalities from them. And this can apply to the edit of the photo. Are the photos that you're drawn to really dark and moody, or bright and airy? Or are they very contrast-y? Colorful or more muted?

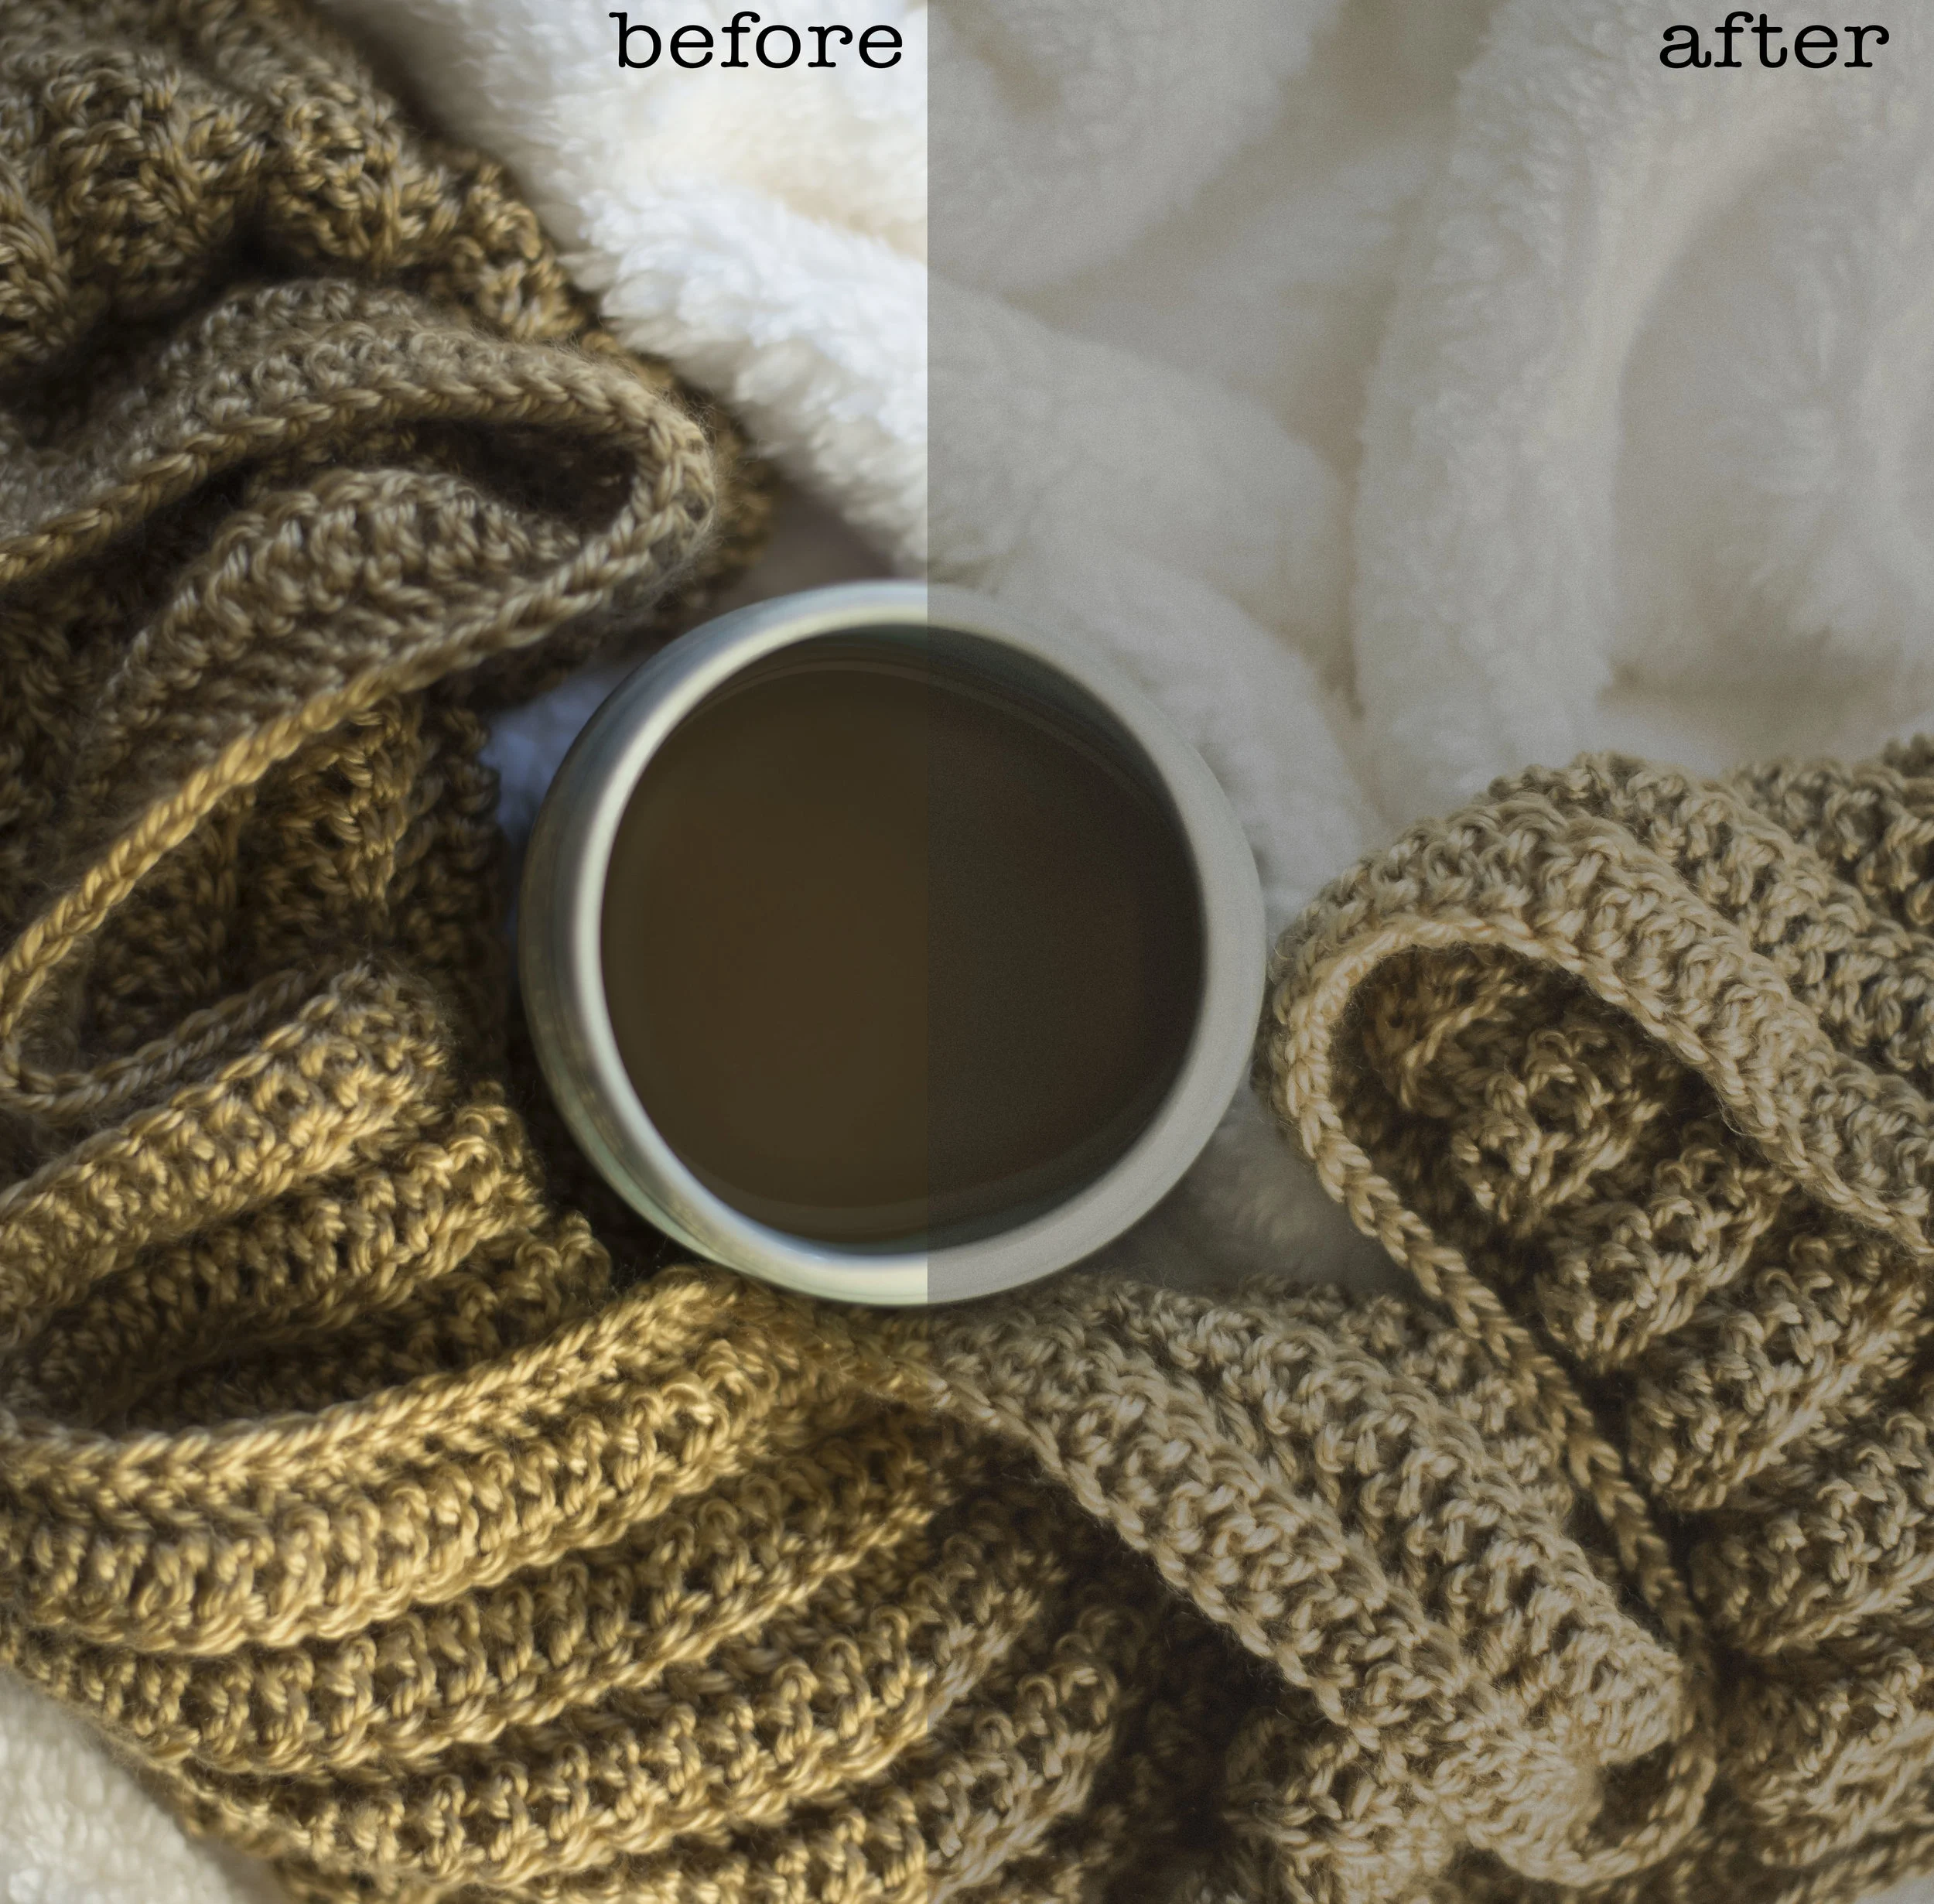
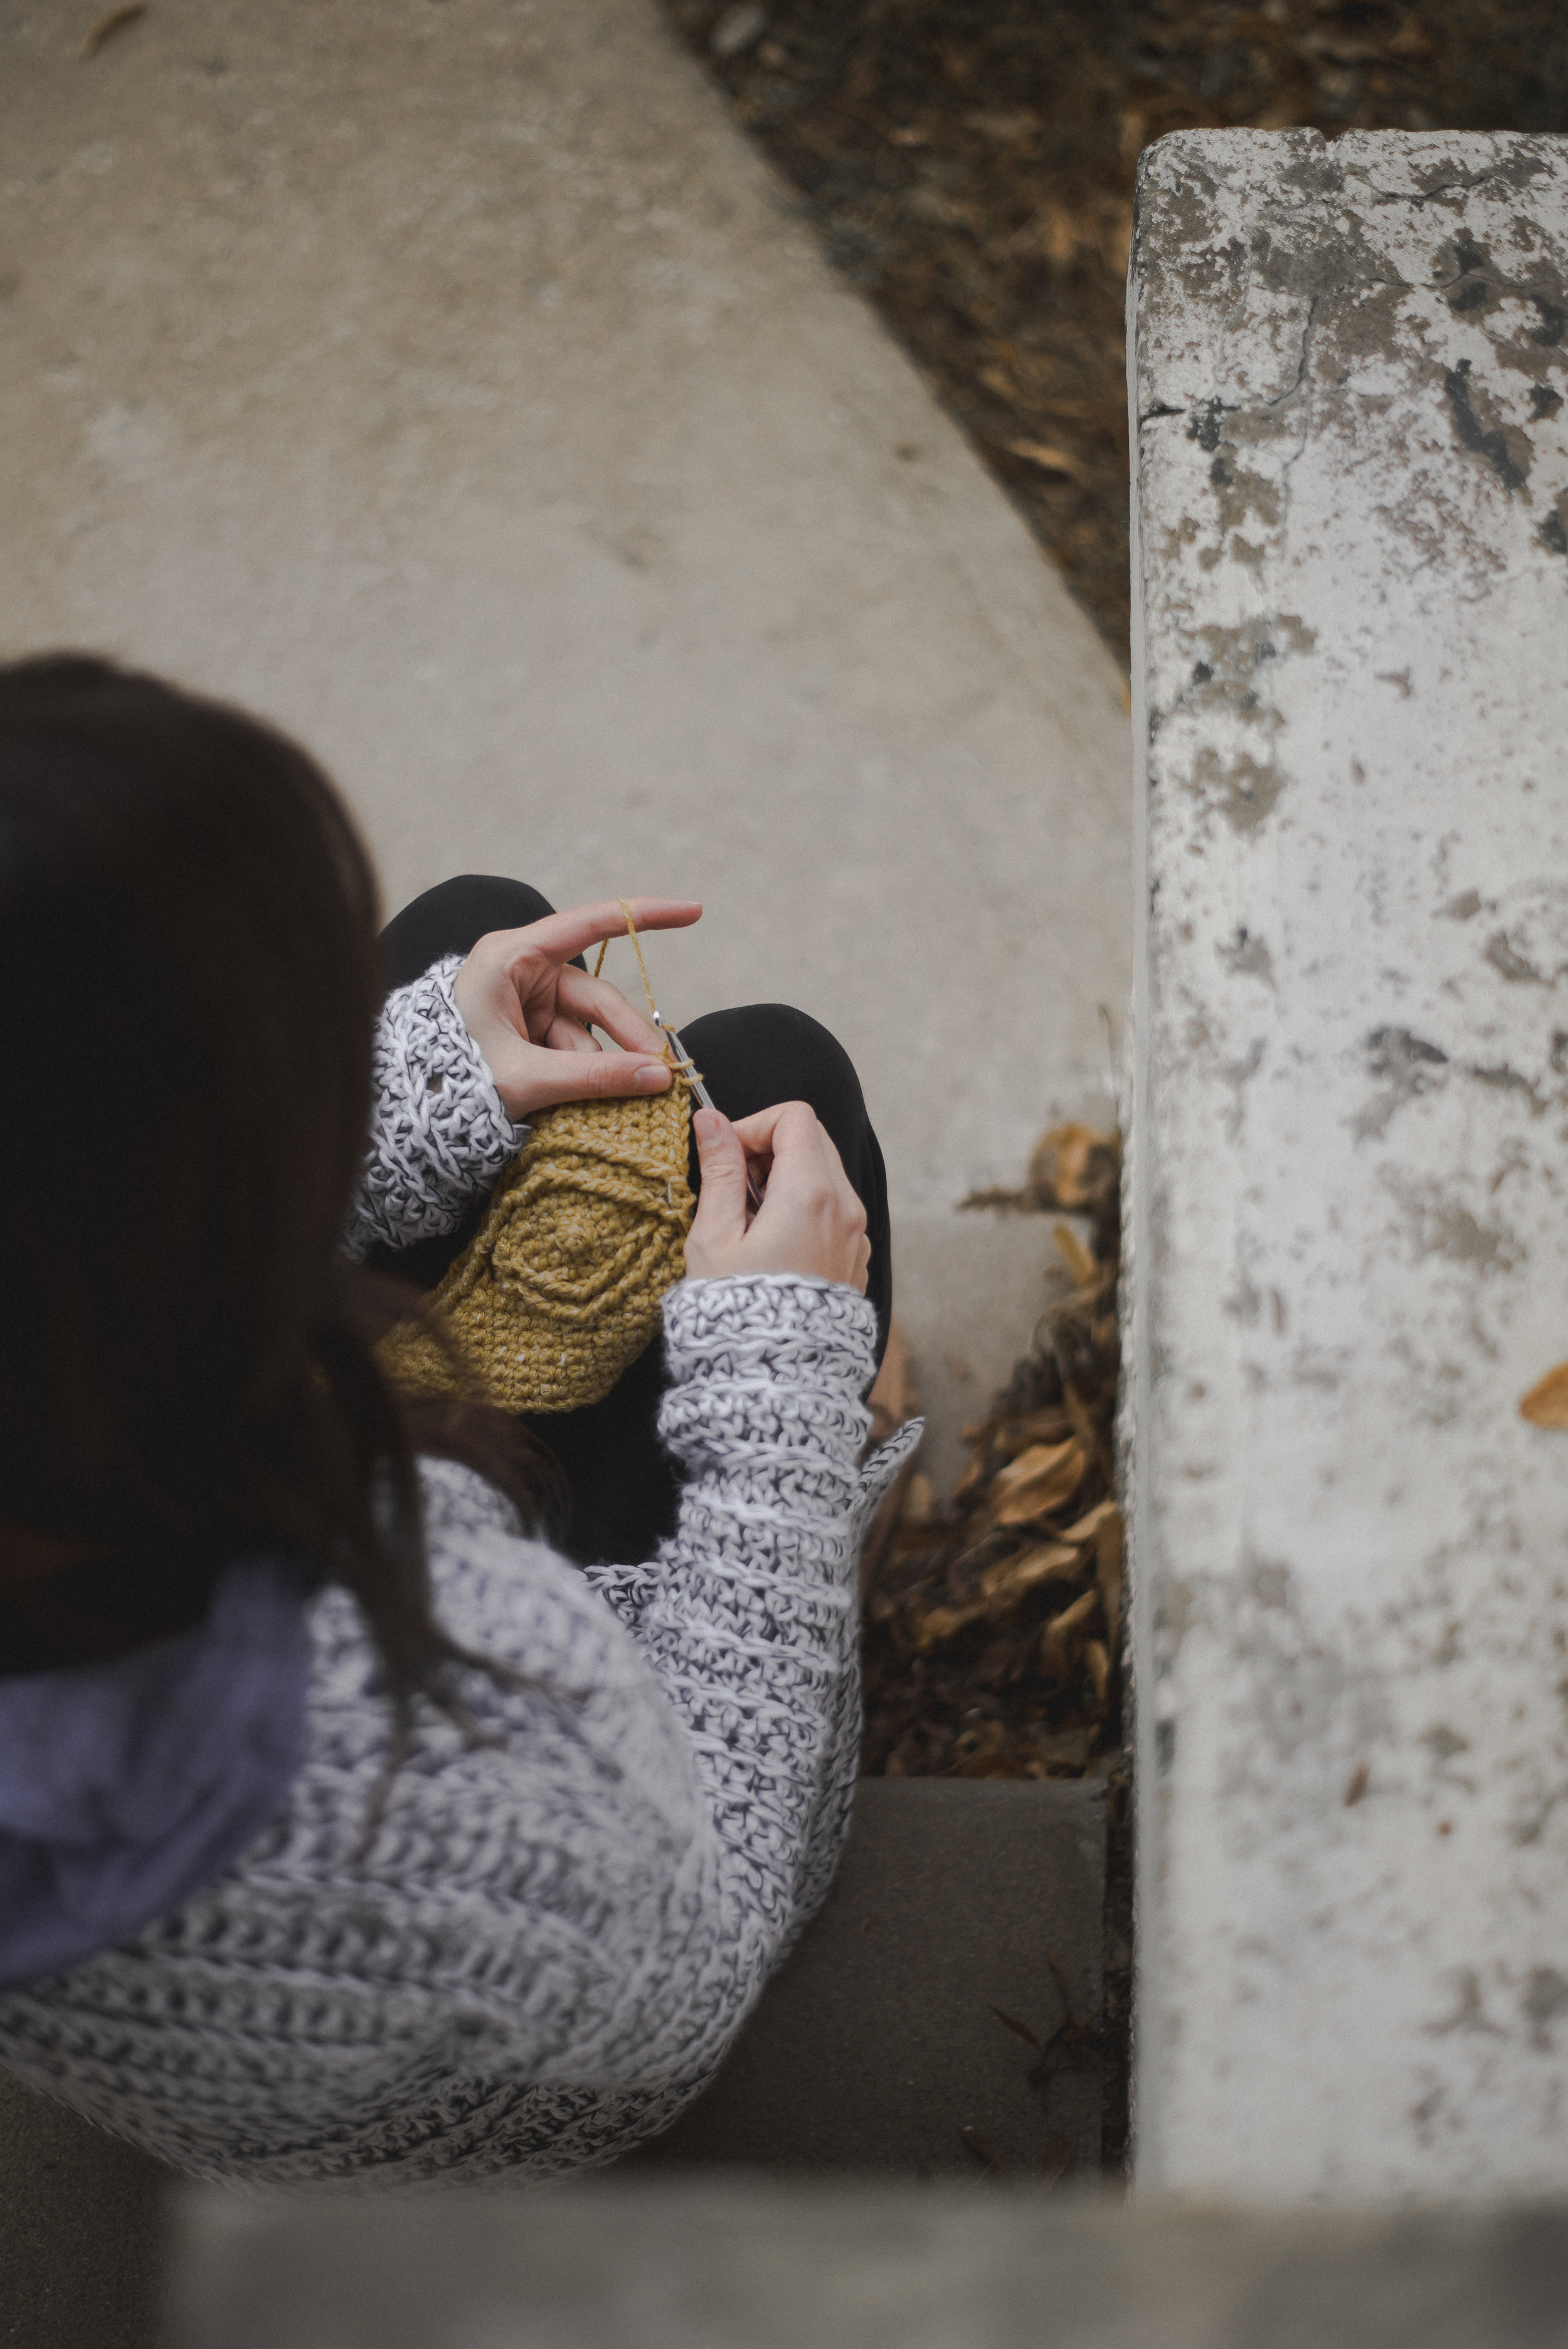
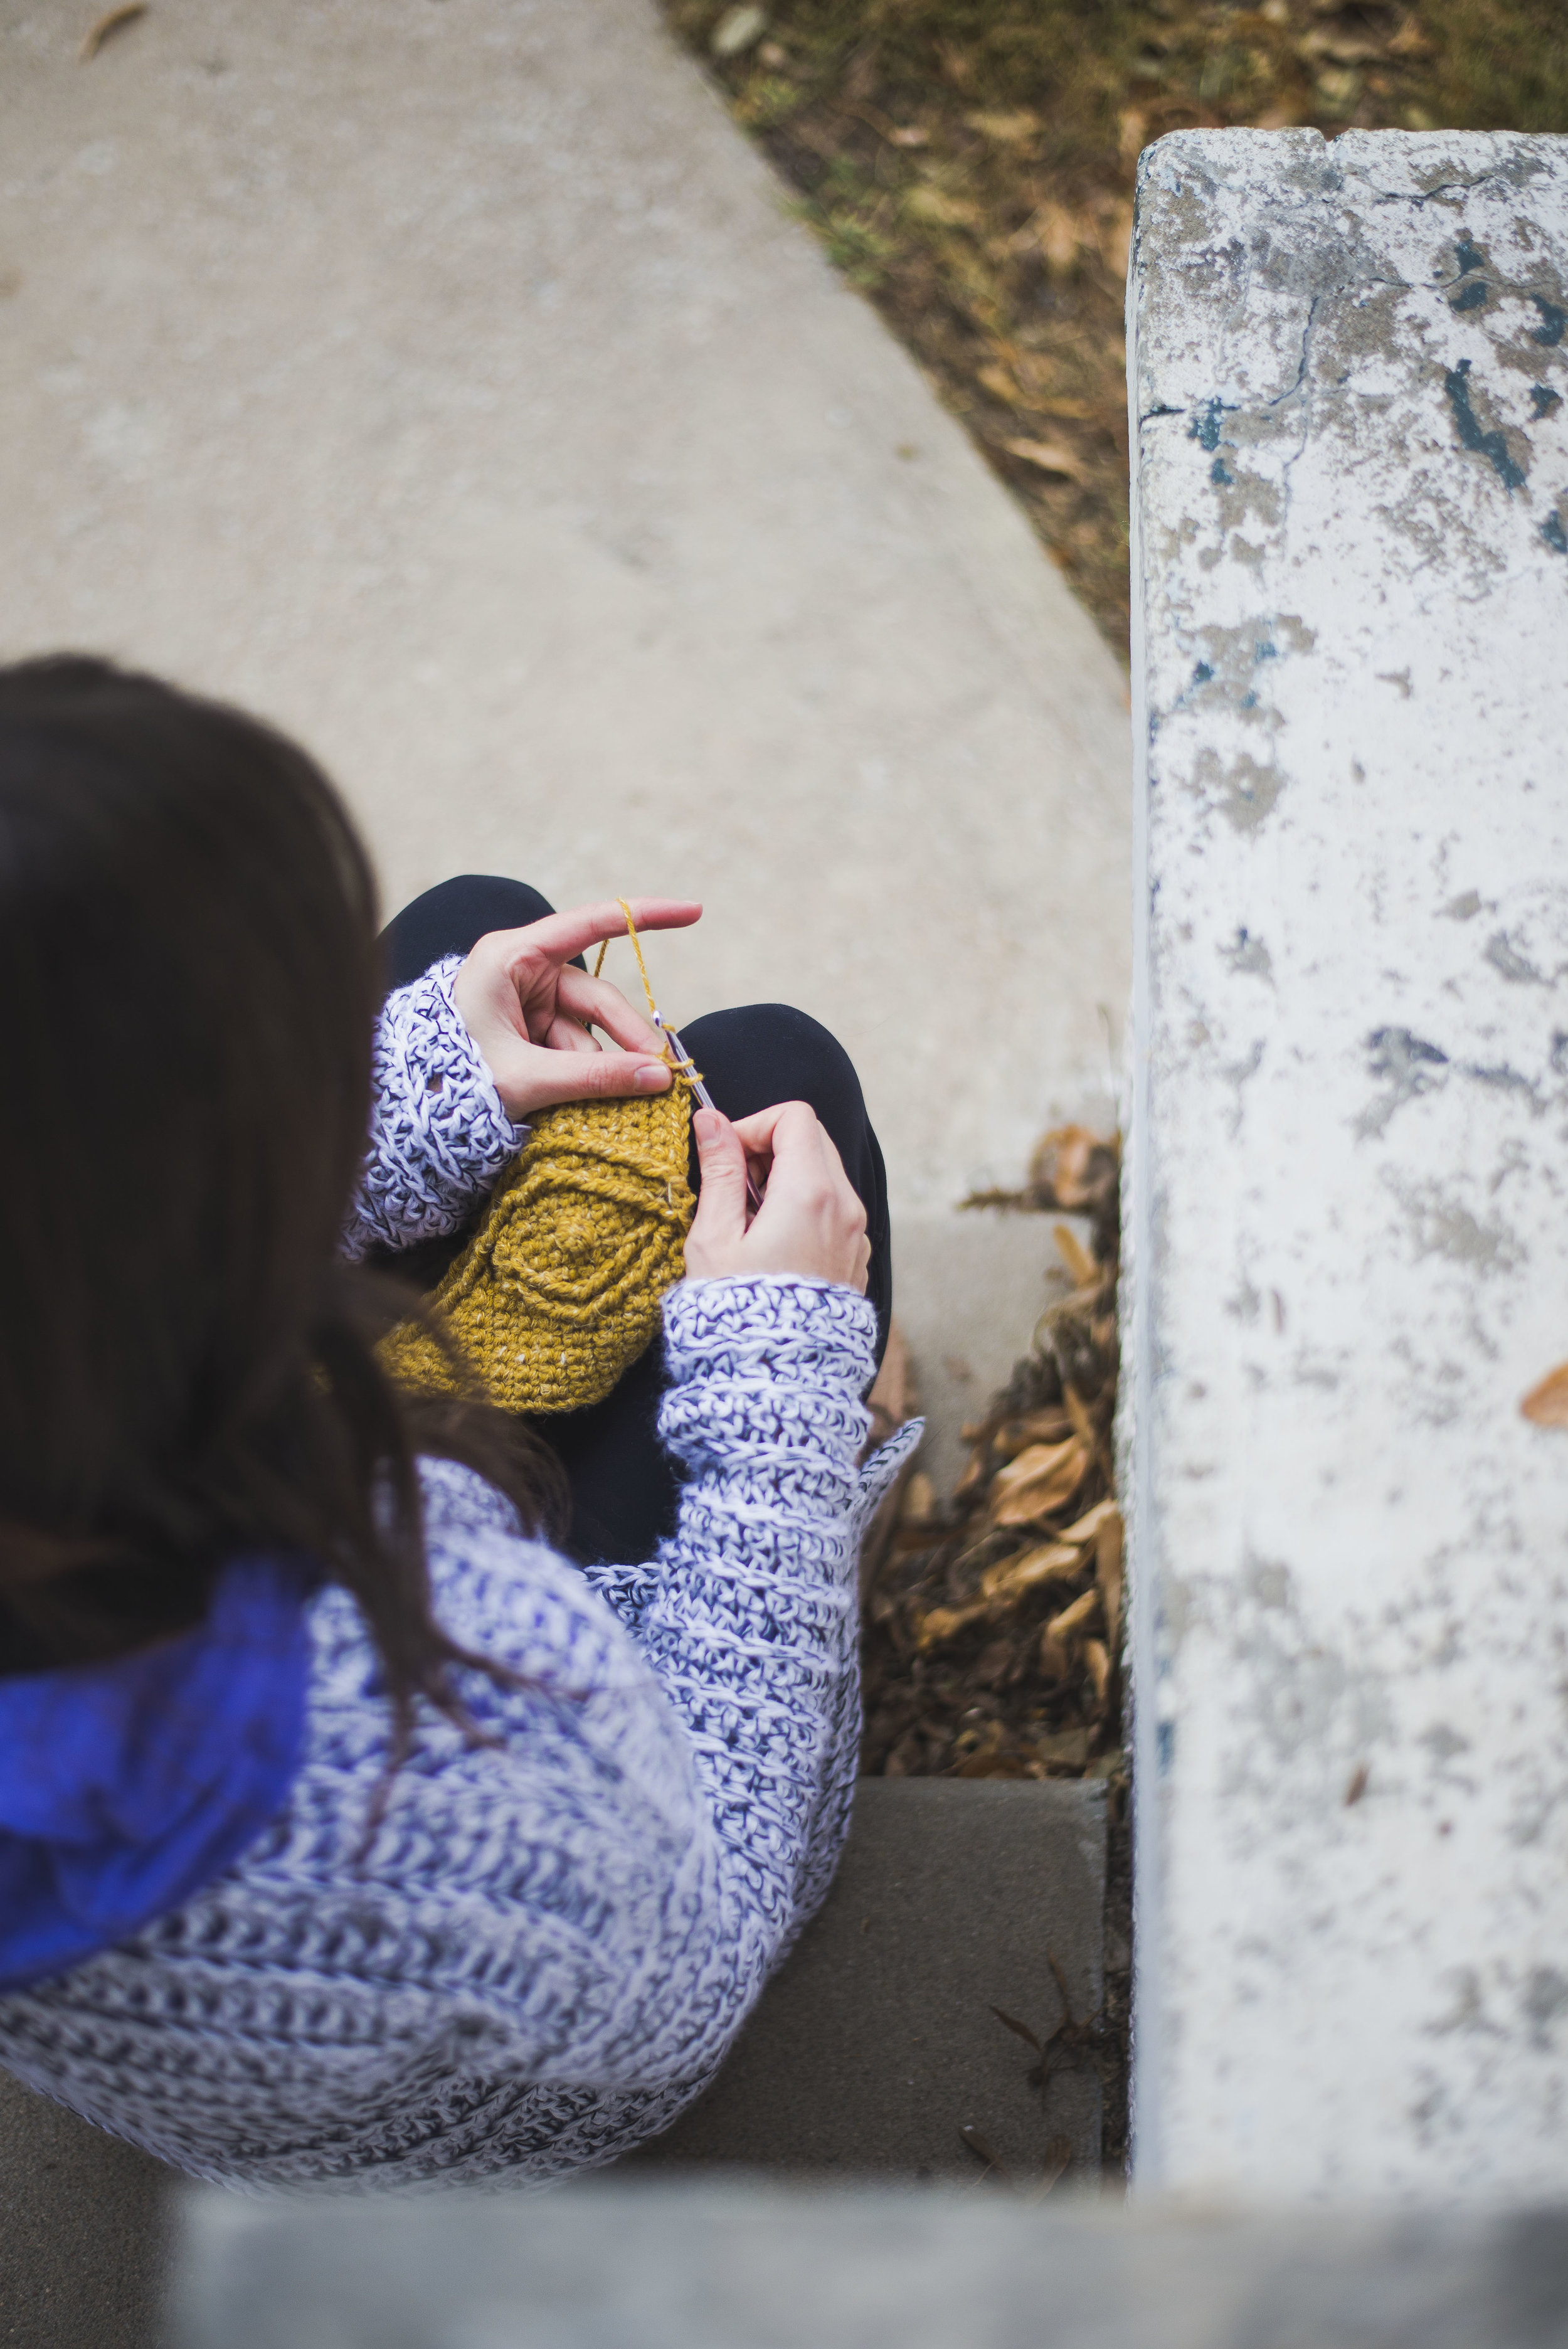
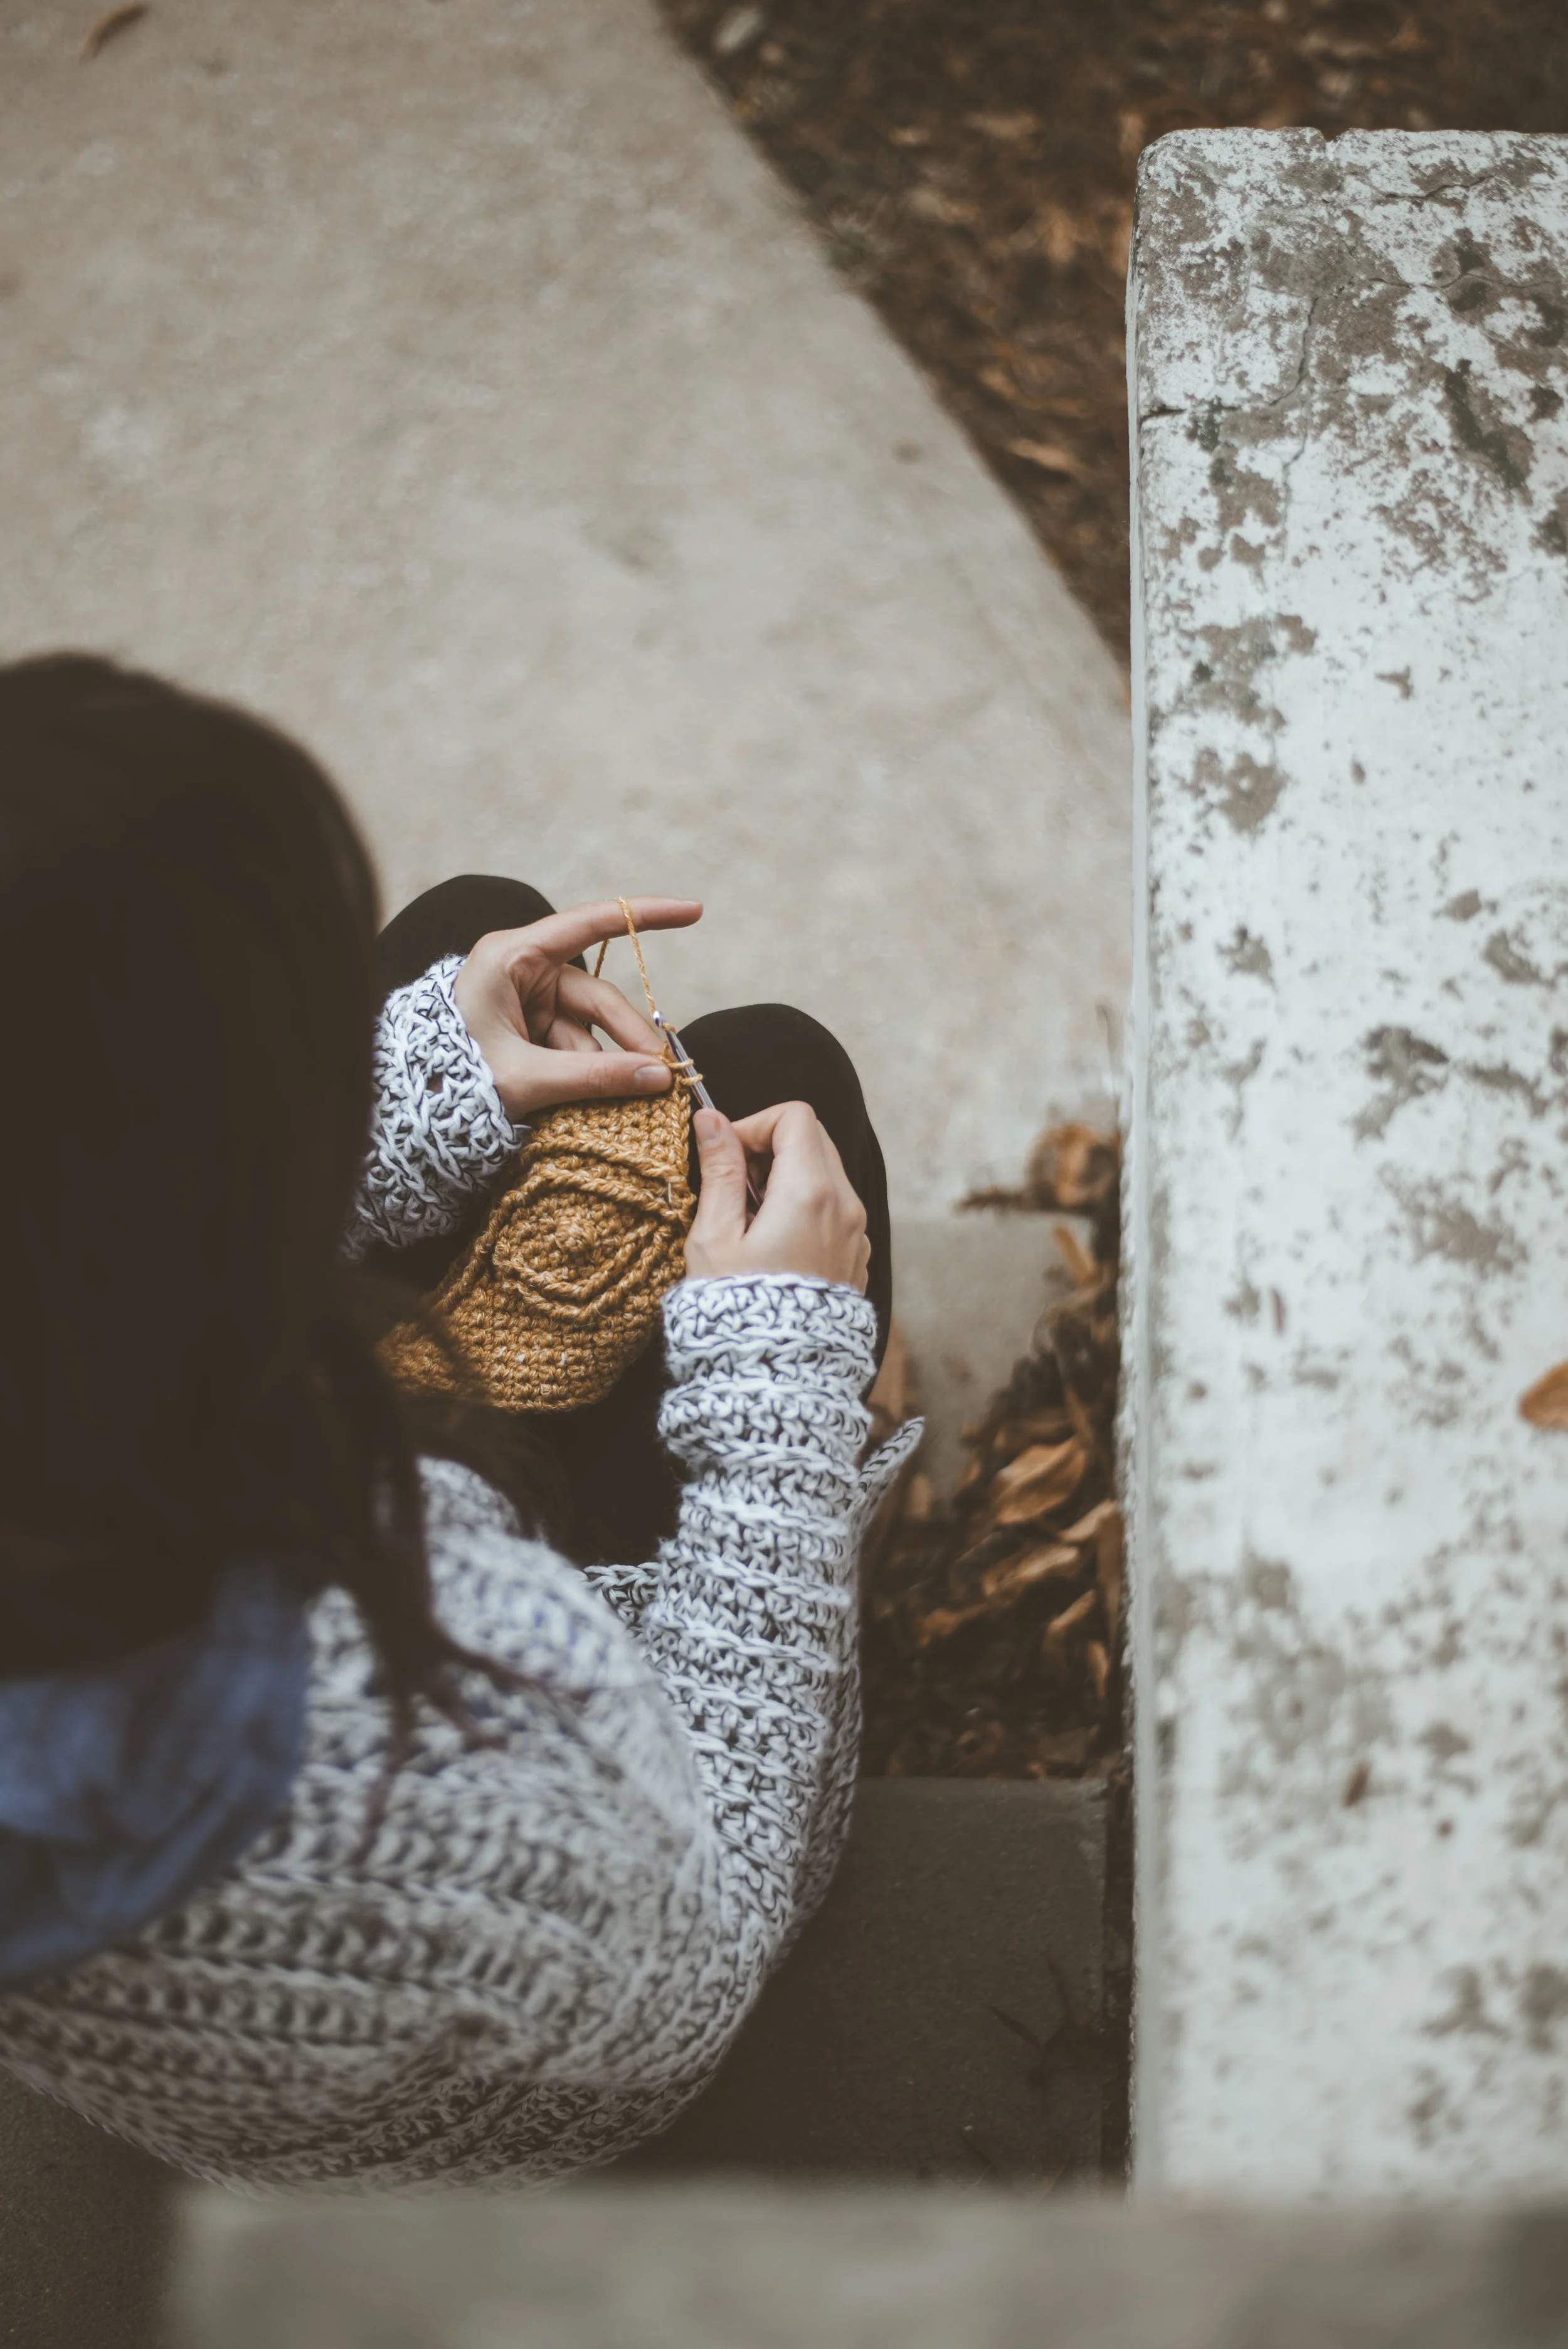
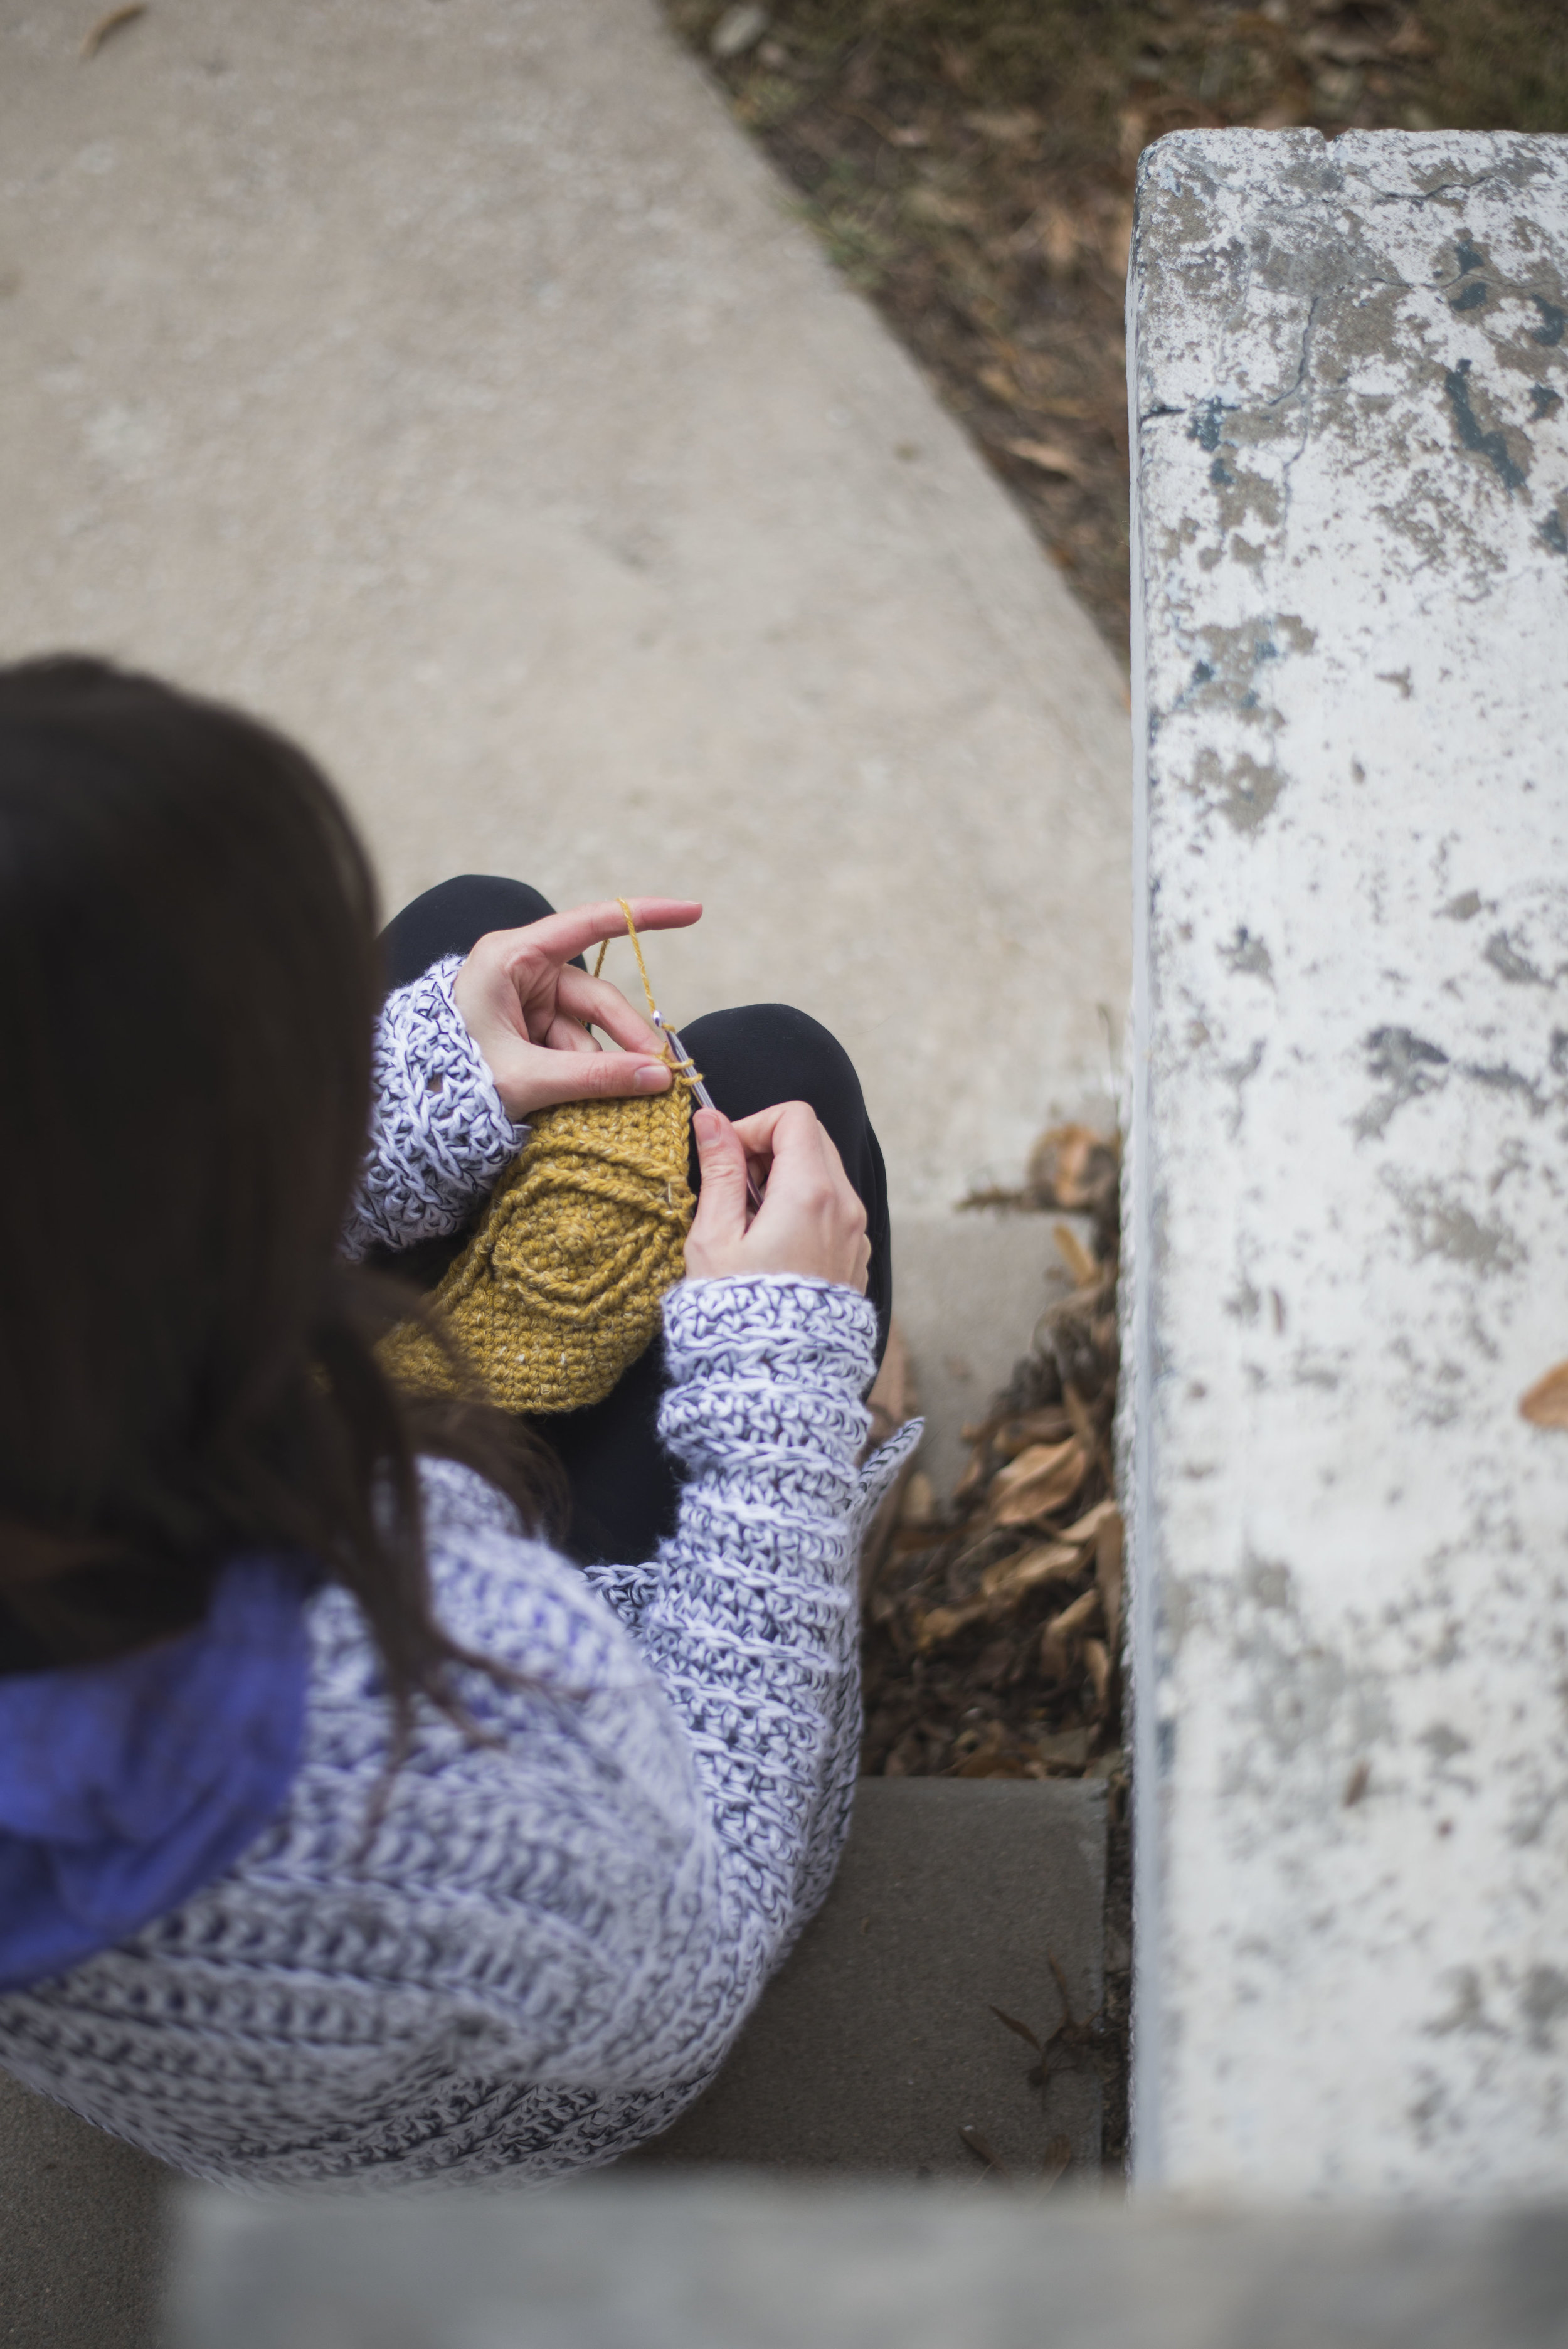
An example of how my editing has changed these past few months. You can see on the left photo in August that my edit is more bright and "true white". And on the right, my edit has more of a "cloudy" feel. The whites are more gray and it almost looks antique-y.
Finding your editing style can be kind of hard to do, and will probably change as you grow as a photographer. I've been dabbling with photography for years, and I still don't 100% stick with one style. I actually recently made kind of a switch in my editing. And I think that's totally okay... I mean, no one says you have to know exactly what you're all about right away. However, I will say that it can be a little confusing to your customers or audience if you're really all over the place with your editing. It can also look a bit unorganized in my opinion. Just something to keep in mind...
So once you've kind of honed-in on your edit-style, then you can try to achieve the look you're going for. **This post isn't going to contain the details on exactly how to edit (because this would be one long post!), but I will provide some links to some good tutorials to help you out.
I think the number one thing I would suggest when it comes to editing is to shoot all your photos in RAW format (that is, if you're shooting with a digital camera). This is a big one. RAW is basically a way your camera saves the image you take. It takes all the information from your shot, and allows you to adjust it on your computer later. This means that if you didn't quite get the lighting or settings just right on your camera when you were shooting you can easily tweak the photo while editing. And it produces such a better-quality image. You need to be utilizing RAW format! Below are some links to some good articles regarding RAW:
10 Reasons Why You Should be Shooting RAW
Here's a basic video showing an edit in RAW in Photoshop:
As to how to make your camera shoot RAW-- each camera is a little different on how to set this up. All you'll have to do is Google "set up RAW format on *your camera model*" It's quite easy!
Then you're going to need a program that will allow you to open those RAW files. In that second article that I linked to above, there is a list of a whole bunch of programs that will allow you to open RAW files. I personally use Adobe Photoshop to do all of my editing. I know Adobe Lightroom is what a lot of people use for their photos, I just learned Photoshop years ago, and don't have the patience to learn how to navigate Lightroom. Lightroom basically allows you to edit in bulk and have more of a Library-type format to your editing. Photoshop is basically a one-photo edit.
I pay for the monthly Adobe Photoshop membership, about 10 bucks a month. You can even try it out for free for a month if it's something you'd like to test out (trial here). There's also plenty of free photo editing programs (although I'm not sure on their ability to edit RAW). Click here to see some of the top free editing programs. Another free program I've used in the past is Pixlr-- it's great because it's online, no downloading required.
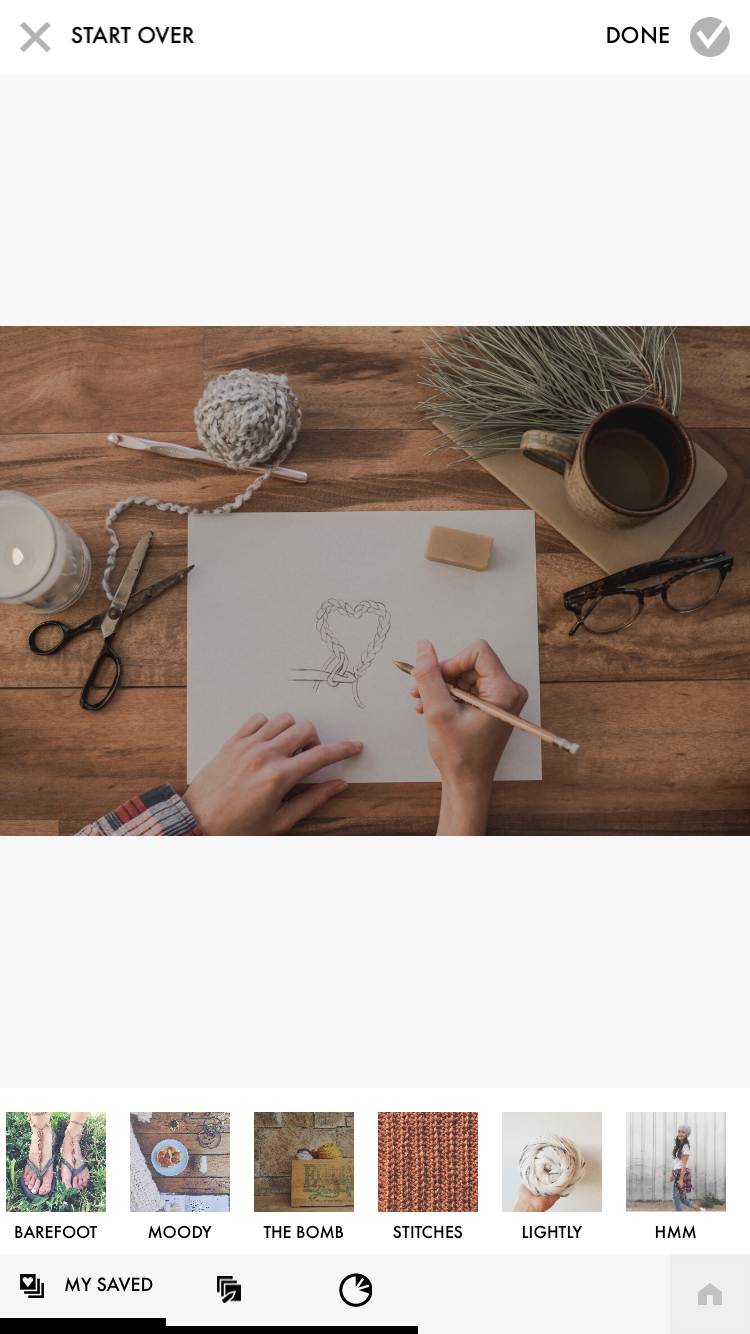
Here's a screenshot of the ColorStory app at work. Below are all the photo presets I've saved--my absolute favorite feature.
When it comes to editing photos taken with your phone, there is no telling the amount of apps that you can edit your photos with. Here is a list of some photo editing apps put together by Forbes. I'm not really savvy with the phone-editing world, honestly. But I will say that I've been using a great app called Color Story, and it's proven to be a great tool for photo pics. You can easily adjust all the important stuff with it's easy-to-use layout. They provide some free presets for you, as well as paid options. And my favorite feature of all is that the app allows you to save YOUR OWN presets, so with the click of a button your photo is edited with the steps you've previously done. Definitely worth trying out. Oh, and did I mention the app is free??

So... back to editing according to your "style". I wanted to share a little trick that helps me achieve a "look" I'm going for... First, I grab an image that is my ideal edit. Probably one from your Pinterest style board, if you made one. I open the image and drag it over to the side of my screen, then open an image of my own that I'd like to edit. I then go to work adjusting all of the little nobs and buttons-- tone curve, exposure, white balance, hue and saturation -- everything (in RAW format), until my image looks like my goal. Once I've reached my desired look, I save all my little tweaks as a preset so I can apply the changes to future photos. This can be done in both Photoshop and Lightroom. Or you could even find some freebie/purchase presets to get the look you're going for if you don't feel quite advanced enough to do that. This is just something I like to do to help me get the a specific look! Plus if you're using a preset, you're getting a consistent result with your edits, which is of course a great thing. Also less work for you!
Here's a few resources that should help with editing:
Beginners Guide: How to Edit Raw Images in Adobe Camera Raw
All You Need to Know to Process a Raw File in Lightroom
EDITING TRAVEL PHOTOS WITH LIGHTROOM: TIPS, TRICKS, & ALTERNATIVE APPS (The title says travel photos, but I found it to have lots of good general information!)
A Color Story: Curves Tutorial
When it comes down to it, you really get to tell a story with your editing. It can really affect the mood and setting of a photo with a slide of a button. I thought it'd be fun to edit a photo I've taken, but with different styles to show how impactful editing style can be! See the edits below.
The image above is the original photo untouched. Some people may like minimal editing, it's nice, simple and clean.
This was the actual photo I ended up saving and using. This edit is pretty moody and contrast-y. I messed with the colors some and made the photo more "warm".
I thought I'd make a vibrant and colorful edit with this photo. You can see the colors really pop. It's also fairly high in contrast, with bright whites and black blacks.
I just started playing around with image and called it a "spunky" edit. This image also looks moody in a way. The whites are more teal and the blacks have got some fade to them. I also changed the colors up some making the yellows more orange. It's a fun edit in my opinion.
This edit I didn't do much to the photo. I messed with the curves a bit and upped the exposure. Pretty simple.
And of course a black and white edit. B&W always adds a bit of drama to it. When doing black and white I always up the contrast big time. I also sharpened the image quite a bit.
Whew! If you made it through this long post-- I commend you. I hope I provided some good info for you. Editing can be tricky, and there is so much to learn. But as always, you won't get anywhere with it unless you jump in and play around with it! I would suggest doing what I did with my one photo above-- take a single photo and try to create different moods. Experiment with examples from your Pinterest photo board. And make some of your own presets so you aren't just going at each new image with different "style".
Hope you enjoyed this fun little series. I enjoyed writing about it! Is there another subject or series you'd like me to cover here on the blog?? I'd be interested to know... comment below if you have some ideas..
Happy editing!
Meg


