


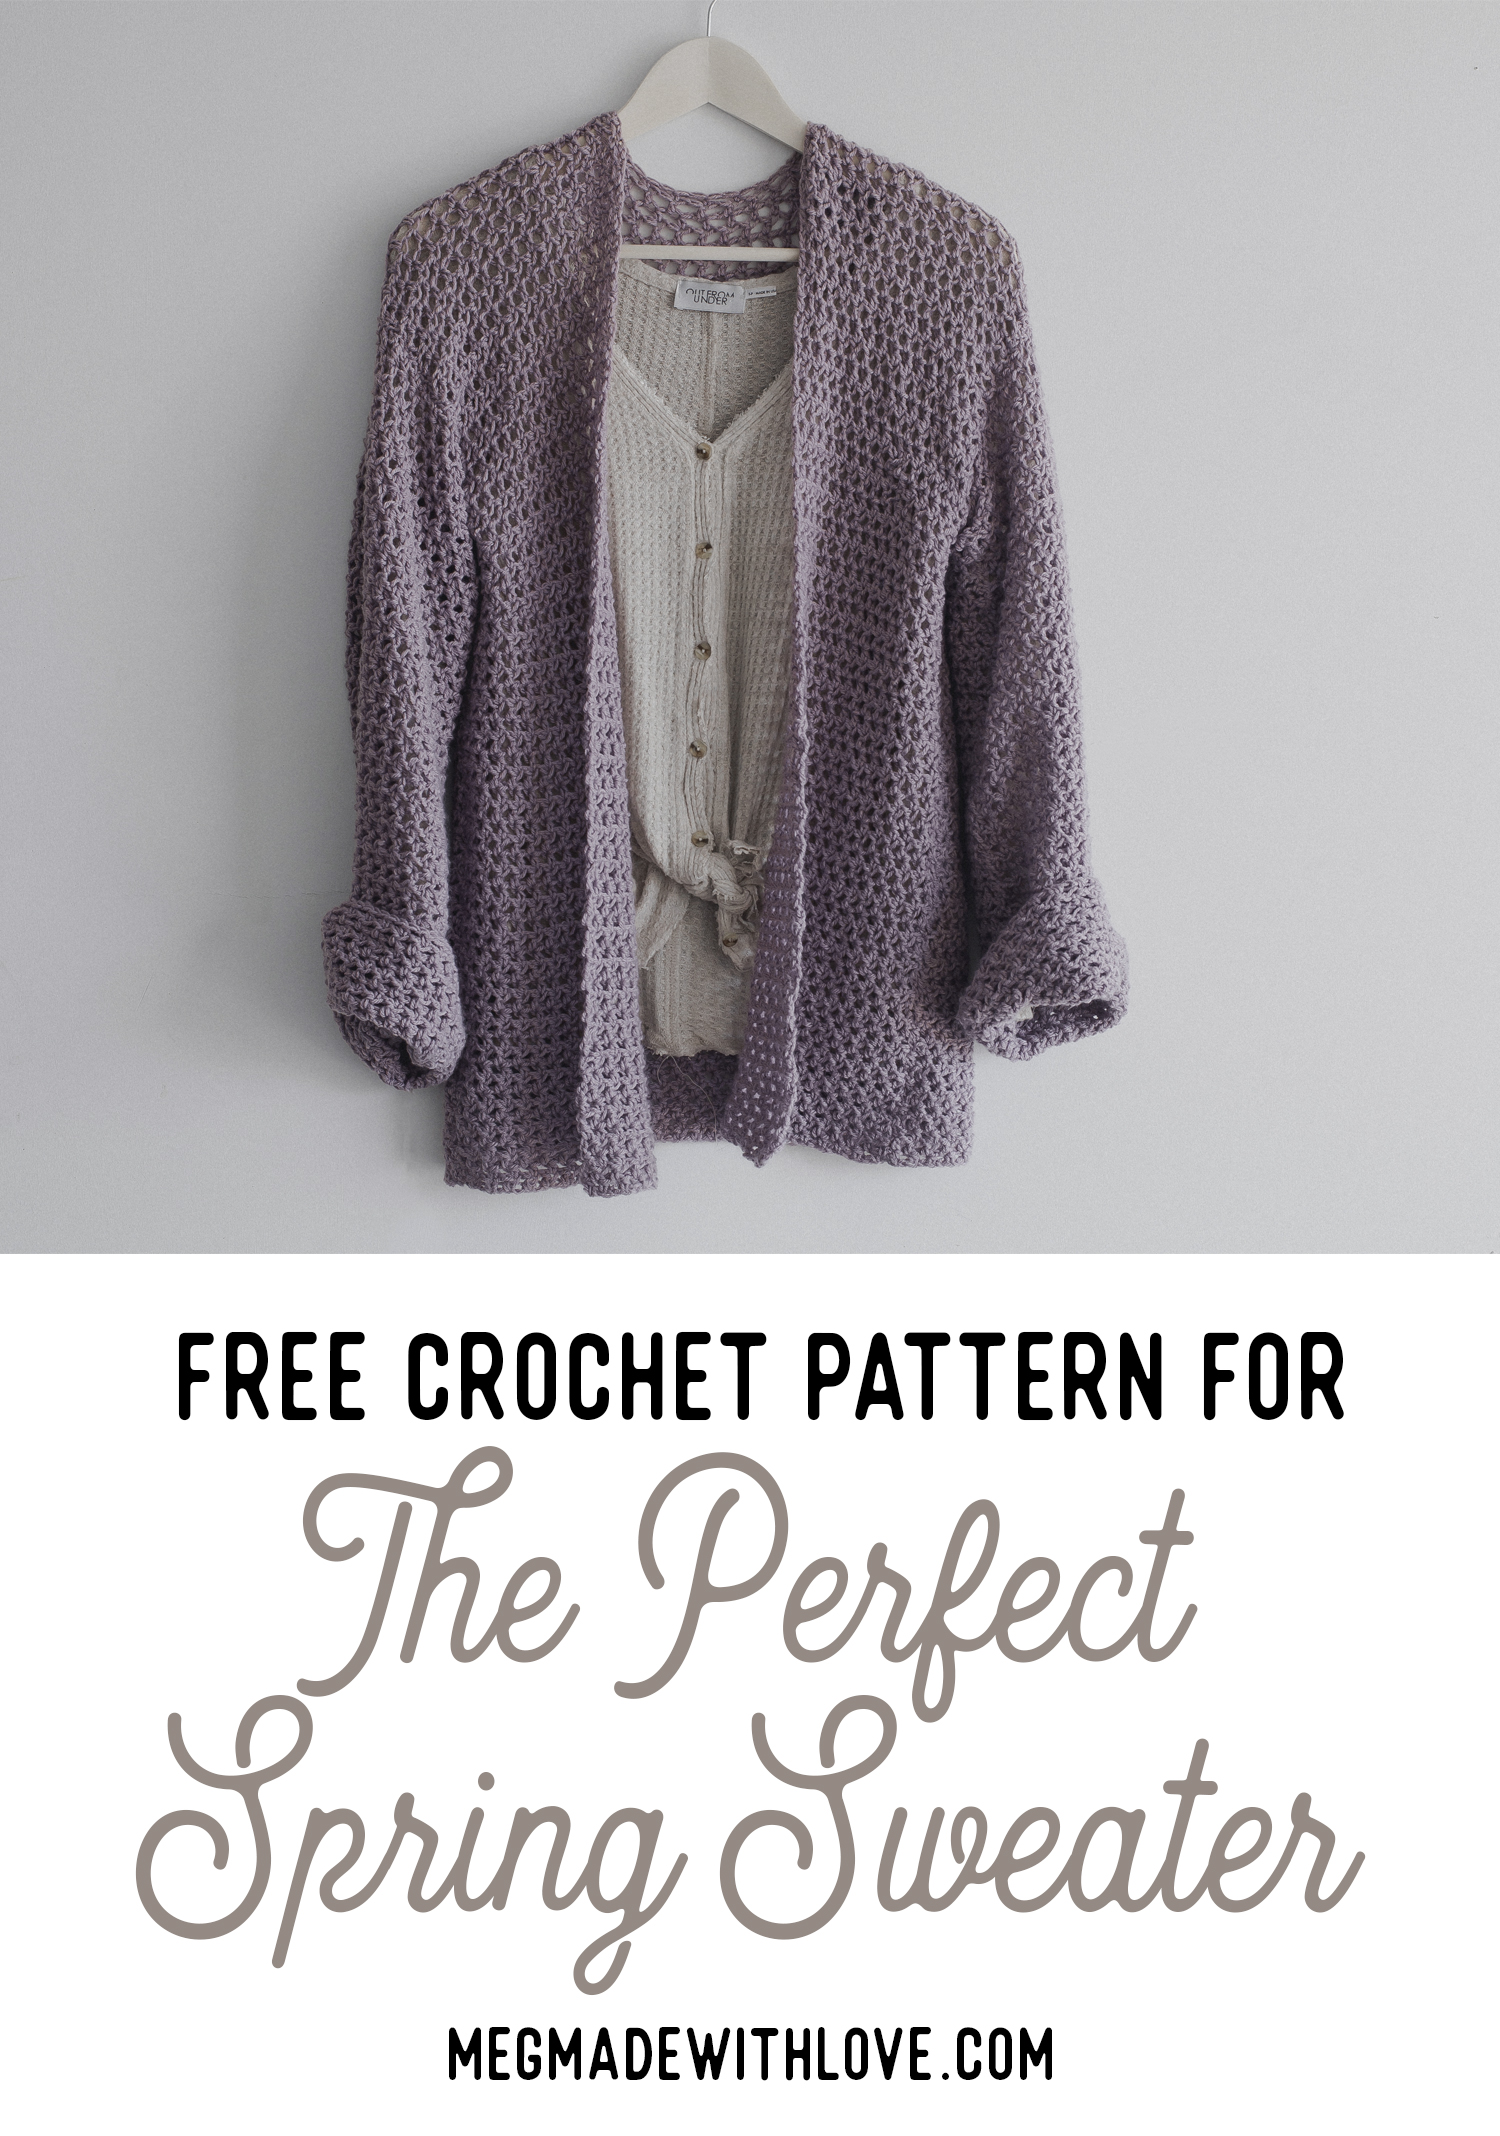
Free Crochet Pattern for The Perfect Spring Sweater
/
***To purchase the PDF version of this pattern you can find it in my shop by clicking here. Great for easy printing!***
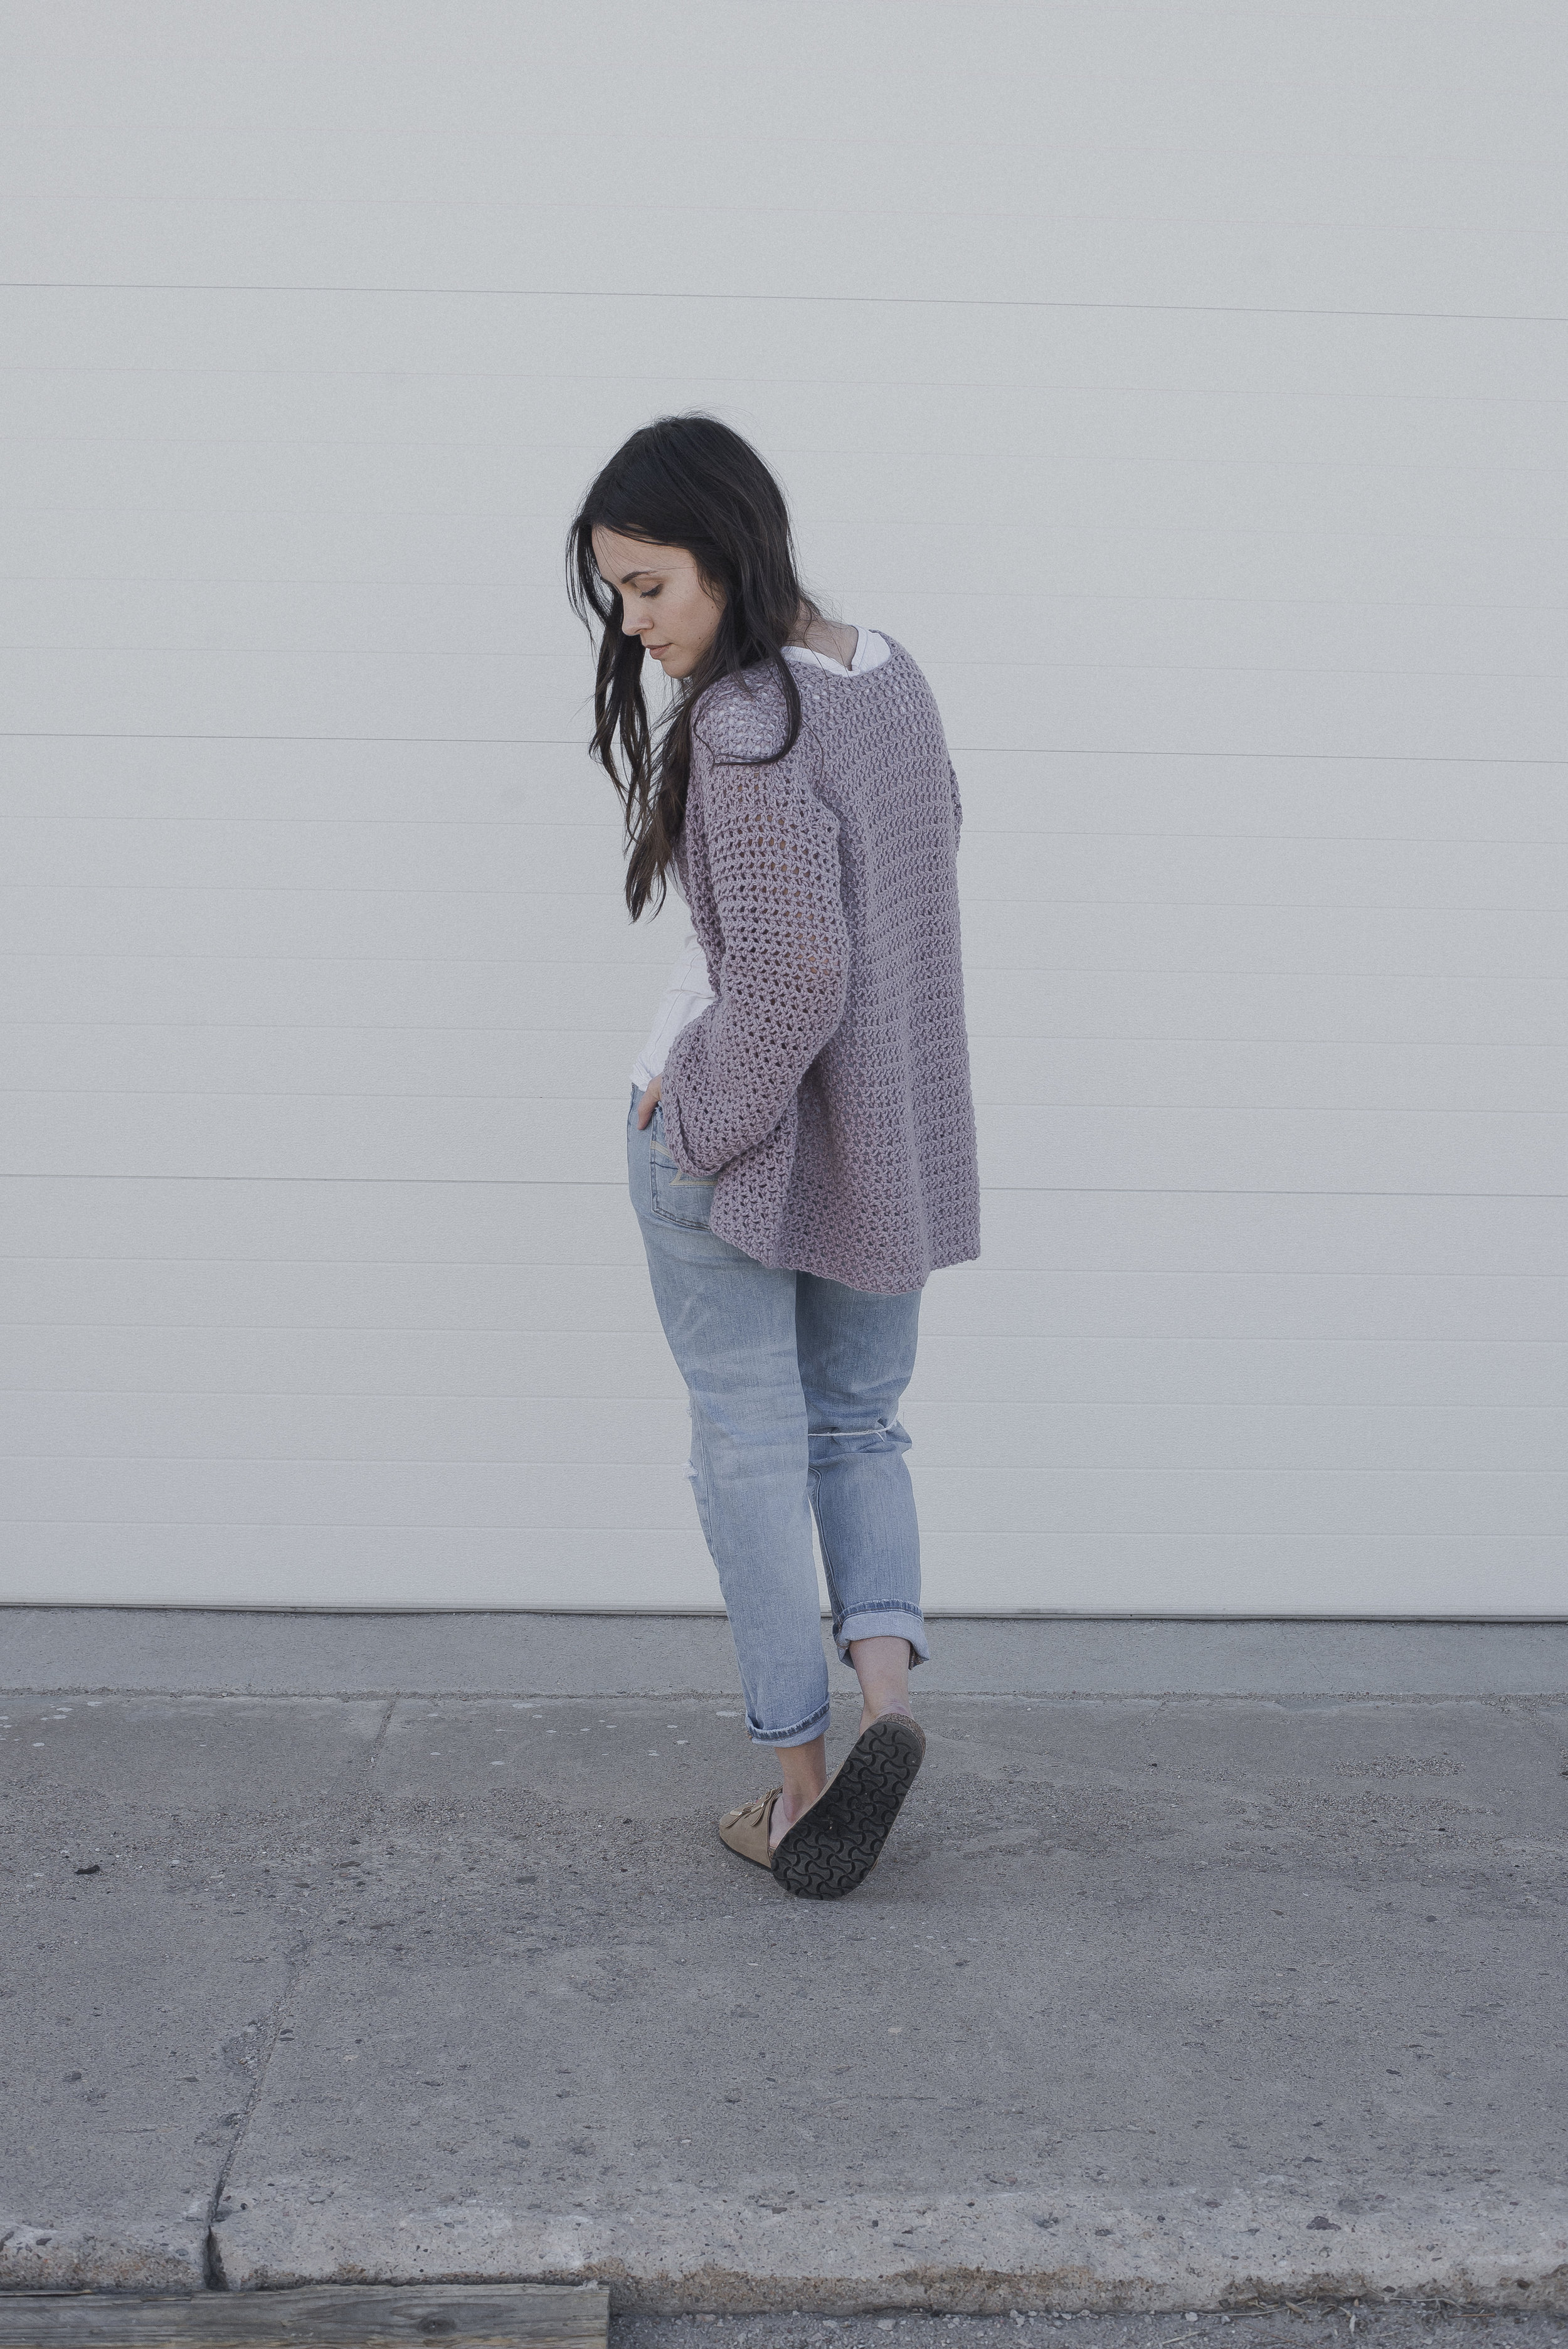
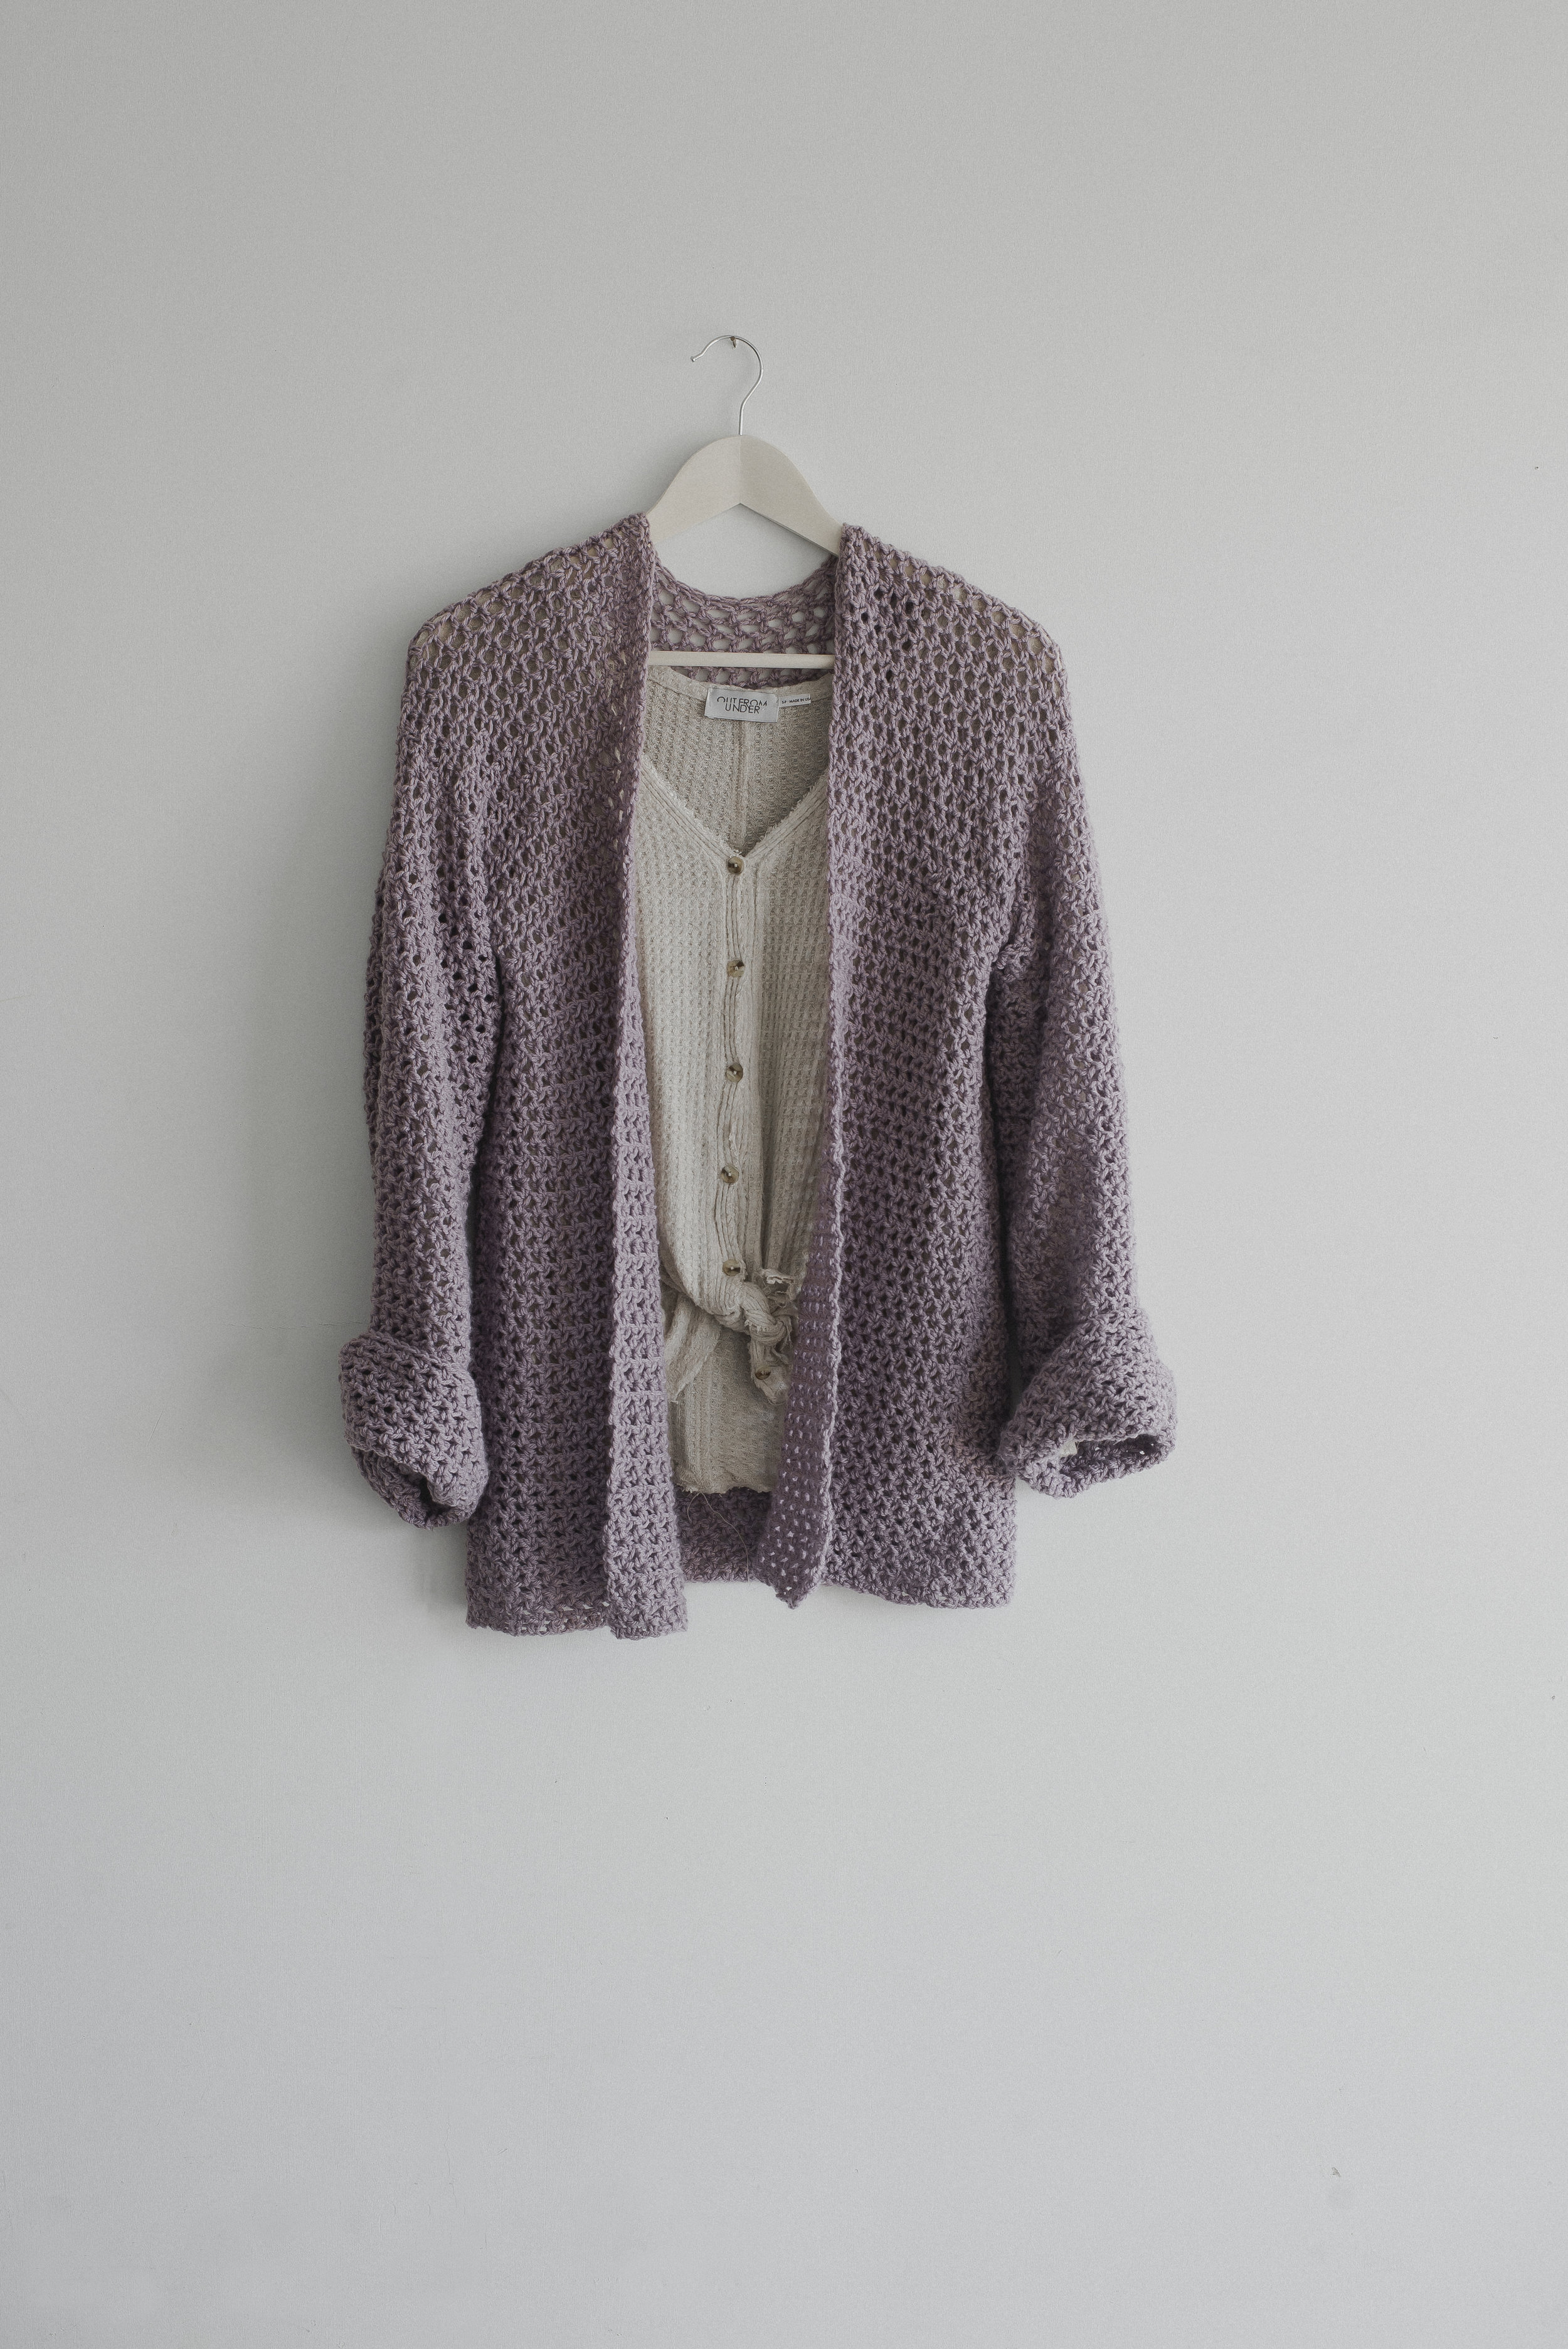
With Spring amongst us officially, I am so jazzed to bring this new simple, Spring-y cardigan to the blog. It's lightweight and airy-- perfect for those chilly Spring mornings..

The sweater offers a laid-back, oversized feel to it that I love. It looks great dressed down or even thrown on over a dress with a belt too! It's made up of a super simple half double crochet mesh (I wrote a tutorial on how to execute this stitch here), and with zero increases or decreases- it truly is a piece of cake to make.
The yarn I used for it was Knit Picks Brava Sport yarn in the color "Seraphim" (see it here) and I'm in l o v e with the color of this yarn-- precisely what I wanted. Another big reason I chose to use it was because I can machine wash and dry it, holla!!! This yarn is a category "2" weight yarn, but truly felt very similar to many "3" weight yarns I've used... I wrote more on this and substituting for this sweater in the notes below.

Since this design is so simple, it's crazy easy to customize to your specific body type. And it's available in sizes XS-3X! You're gonna love this sweater, I promise :)
What you'll need:
-Sport weight yarn (category “2”, I used Knit Picks Brava Sport yarn in color “Seraphim”, see notes for yardage and more information on substituting for this yarn)
-8 mm hook, or hook needed to obtain gauge
-Yarn needle
-Safety or sewing pins
Gauge:
two ways to assess gauge:
- 12 hdc by 9 rows equals a four inch square
- worked up as pattern calls: 16 sts of (hdc, sk st, ch 1) -- so 8 hdc, 8 ch’s by 10 rows equals a four inch square
Abbreviations:
ch(’s)=chain(s), st(s)=stitch(es), hdc=half double crochet, sk=skip
Notes:
Measurements & yarn yardage for the sweater sizes (approximately):
XS: Bust: 34 inches, Length: 24 inches (Approx 1,000 yards)
S: Bust: 36 inches, Length: 24 inches (Approx 1,050 yards)
M: Bust: 38 inches, Length: 25 inches (Approx 1,100 yards)
L: Bust: 40 inches, Length: 25 inches (Approx 1,150 yards)
XL: Bust: 42 inches, Length: 26 inches (Approx 1,200 yards)
2XL: Bust: 46 inches, Length: 26 inches (Approx 1,250 yards)
3XL: Bust: 50 inches, Length: 26 inches (Approx 1,300 yards)
-pattern is formatted for sizing as follows: xs (s, m, l, xl, 2x, 3x)
**regarding the yarn weight: in my opinion the yarn I used felt exactly like the “category 3 light” yarns I’ve used before so I feel you could use a “3” yarn for this sweater, I just highly suggest checking the gauge and adjusting the hook as necessary.
-For a photo tutorial on how to do the stitch performed in this sweater click here.
-this cardigan is VERY simple, with zero increases or decreases. Very much a beginner-friendly sweater.
-yes, the 8 mm hook is larger than suggested for this weight of yarn. The reason for the larger hook is to make a loose and drape-y material. Although, I HIGHLY RECOMMEND that you check your gauge and adjust the hook accordingly for an accurately-sized sweater.
-when working the hdc’s of each row, you are working into the next stitch, not the ch 1 space from the previous row
-the cardigan is designed to be open, meaning it isn’t meant to be closed around the tummy, and just lays freely at the sides. It’s also designed to be a roomy and relaxed fit.
-I designed the sleeves of this sweater to be a bit longer, which is just a preference of mine. And I wanted to have some to fold over. To shorten them up a bit, you can work less rows on the sleeves.
-I used a whip stitch to sew the pieces together- making sure not to sew too tight!
-the length of the cardigan is very easy to customize, just add or take away rows to your preference
Pattern:
Front Panels (make 2):
Row 1) ch 32 (34, 36, 38, 40, 44, 48), hdc in fourth ch from hook (those first three ch’s you skipped will count as a hdc + “ch 1”), [ch 1, sk st, hdc in the next st] repeat [ ] across to end of row (total sts-- xs:16 hdc & 15 ch’s, s: 17 hdc & 16 ch’s, m: 18 hdc & 17 ch’s, l: 19 hdc & 18 ch’s, xl: 20 hdc & 19 ch’s, 2x: 22 hdc & 21 ch’s, 3x: 24 hdc & 23 ch’s)
Row 2) ch 3 (counts as hdc + ch 1), turn, sk first st, hdc in next st (work into the stitch, not the “ch 1” space-- same goes for all hdc’s of this sweater), [ch 1, sk st, hdc in next st] repeat [ ] across (total sts-- xs:16 hdc & 15 ch’s, s: 17 hdc & 16 ch’s, m: 18 hdc & 17 ch’s, l: 19 hdc & 18 ch’s, xl: 20 hdc & 19 ch’s, 2x: 22 hdc & 21 ch’s, 3x: 24 hdc & 23 ch’s)
For sizes xs & s: Rows 3-62 - repeat row 2
For sizes m & l: Rows 3-64 - repeat row 2
For sizes xl, 2x & 3x: Rows 3-66 - repeat row 2
Finish off
Back Panel:
Row 1) ch 72 (76, 80, 84, 88, 96, 104), hdc in fourth ch from hook (those first three ch’s you skipped will count as a hdc + “ch 1”), [ch 1, sk st, hdc in the next st] repeat [ ] across to end of row (total sts-- xs:36 hdc & 35 ch’s, s: 38 hdc & 37 ch’s, m: 40 hdc & 39 ch’s, l: 42 hdc & 41 ch’s, xl: 44 hdc & 43 ch’s, 2x: 48 hdc & 47 ch’s, 3x: 52 hdc & 51 ch’s)
Row 2) ch 3 (counts as hdc + ch 1), turn, sk first st, hdc in next st, [ch 1, sk st, hdc in next st] repeat [ ] across (total sts-- xs: 36 hdc & 35 ch’s, s: 38 hdc & 37 ch’s, m: 40 hdc & 39 ch’s, l: 42 hdc & 41 ch’s, xl: 44 hdc & 43 ch’s, 2x: 48 hdc & 47 ch’s, 3x: 52 hdc & 51 ch’s)
For sizes xs & s: Rows 3-62 - repeat row 2
For sizes m & l: Rows 3-64 - repeat row 2
For sizes xl, 2x & 3x: Rows 3-66 - repeat row 2
Finish off
Sleeves (make 2):
Row 1) ch 52 (56, 60, 64, 64, 72, 72), hdc in fourth ch from hook (those first three ch’s you skipped will count as a hdc + “ch 1”), [ch 1, sk st, hdc in the next st] repeat [ ] across to end of row (total sts-- xs: 26 hdc & 25 ch’s, s: 28 hdc & 27 ch’s, m: 30 hdc & 29 ch’s, l: 32 hdc & 31 ch’s, xl: 32 hdc & 31ch’s, 2x: 36 hdc & 35 ch’s, 3x: 36 hdc & 35 ch’s)
Row 2) ch 3 (counts as hdc + ch 1), turn, sk first st, hdc in next st, [ch 1, sk st, hdc in next st] repeat [ ] across (total sts-- xs: 26 hdc & 25 ch’s, s: 28 hdc & 27 ch’s, m: 30 hdc & 29 ch’s, l: 32 hdc & 31 ch’s, xl: 32 hdc & 31ch’s, 2x: 36 hdc & 35 ch’s, 3x: 36 hdc & 35 ch’s)
For all sizes: Rows 3-52 - repeat row 2
Finish off, leaving an extra long tail to sew the seam of the sleeve
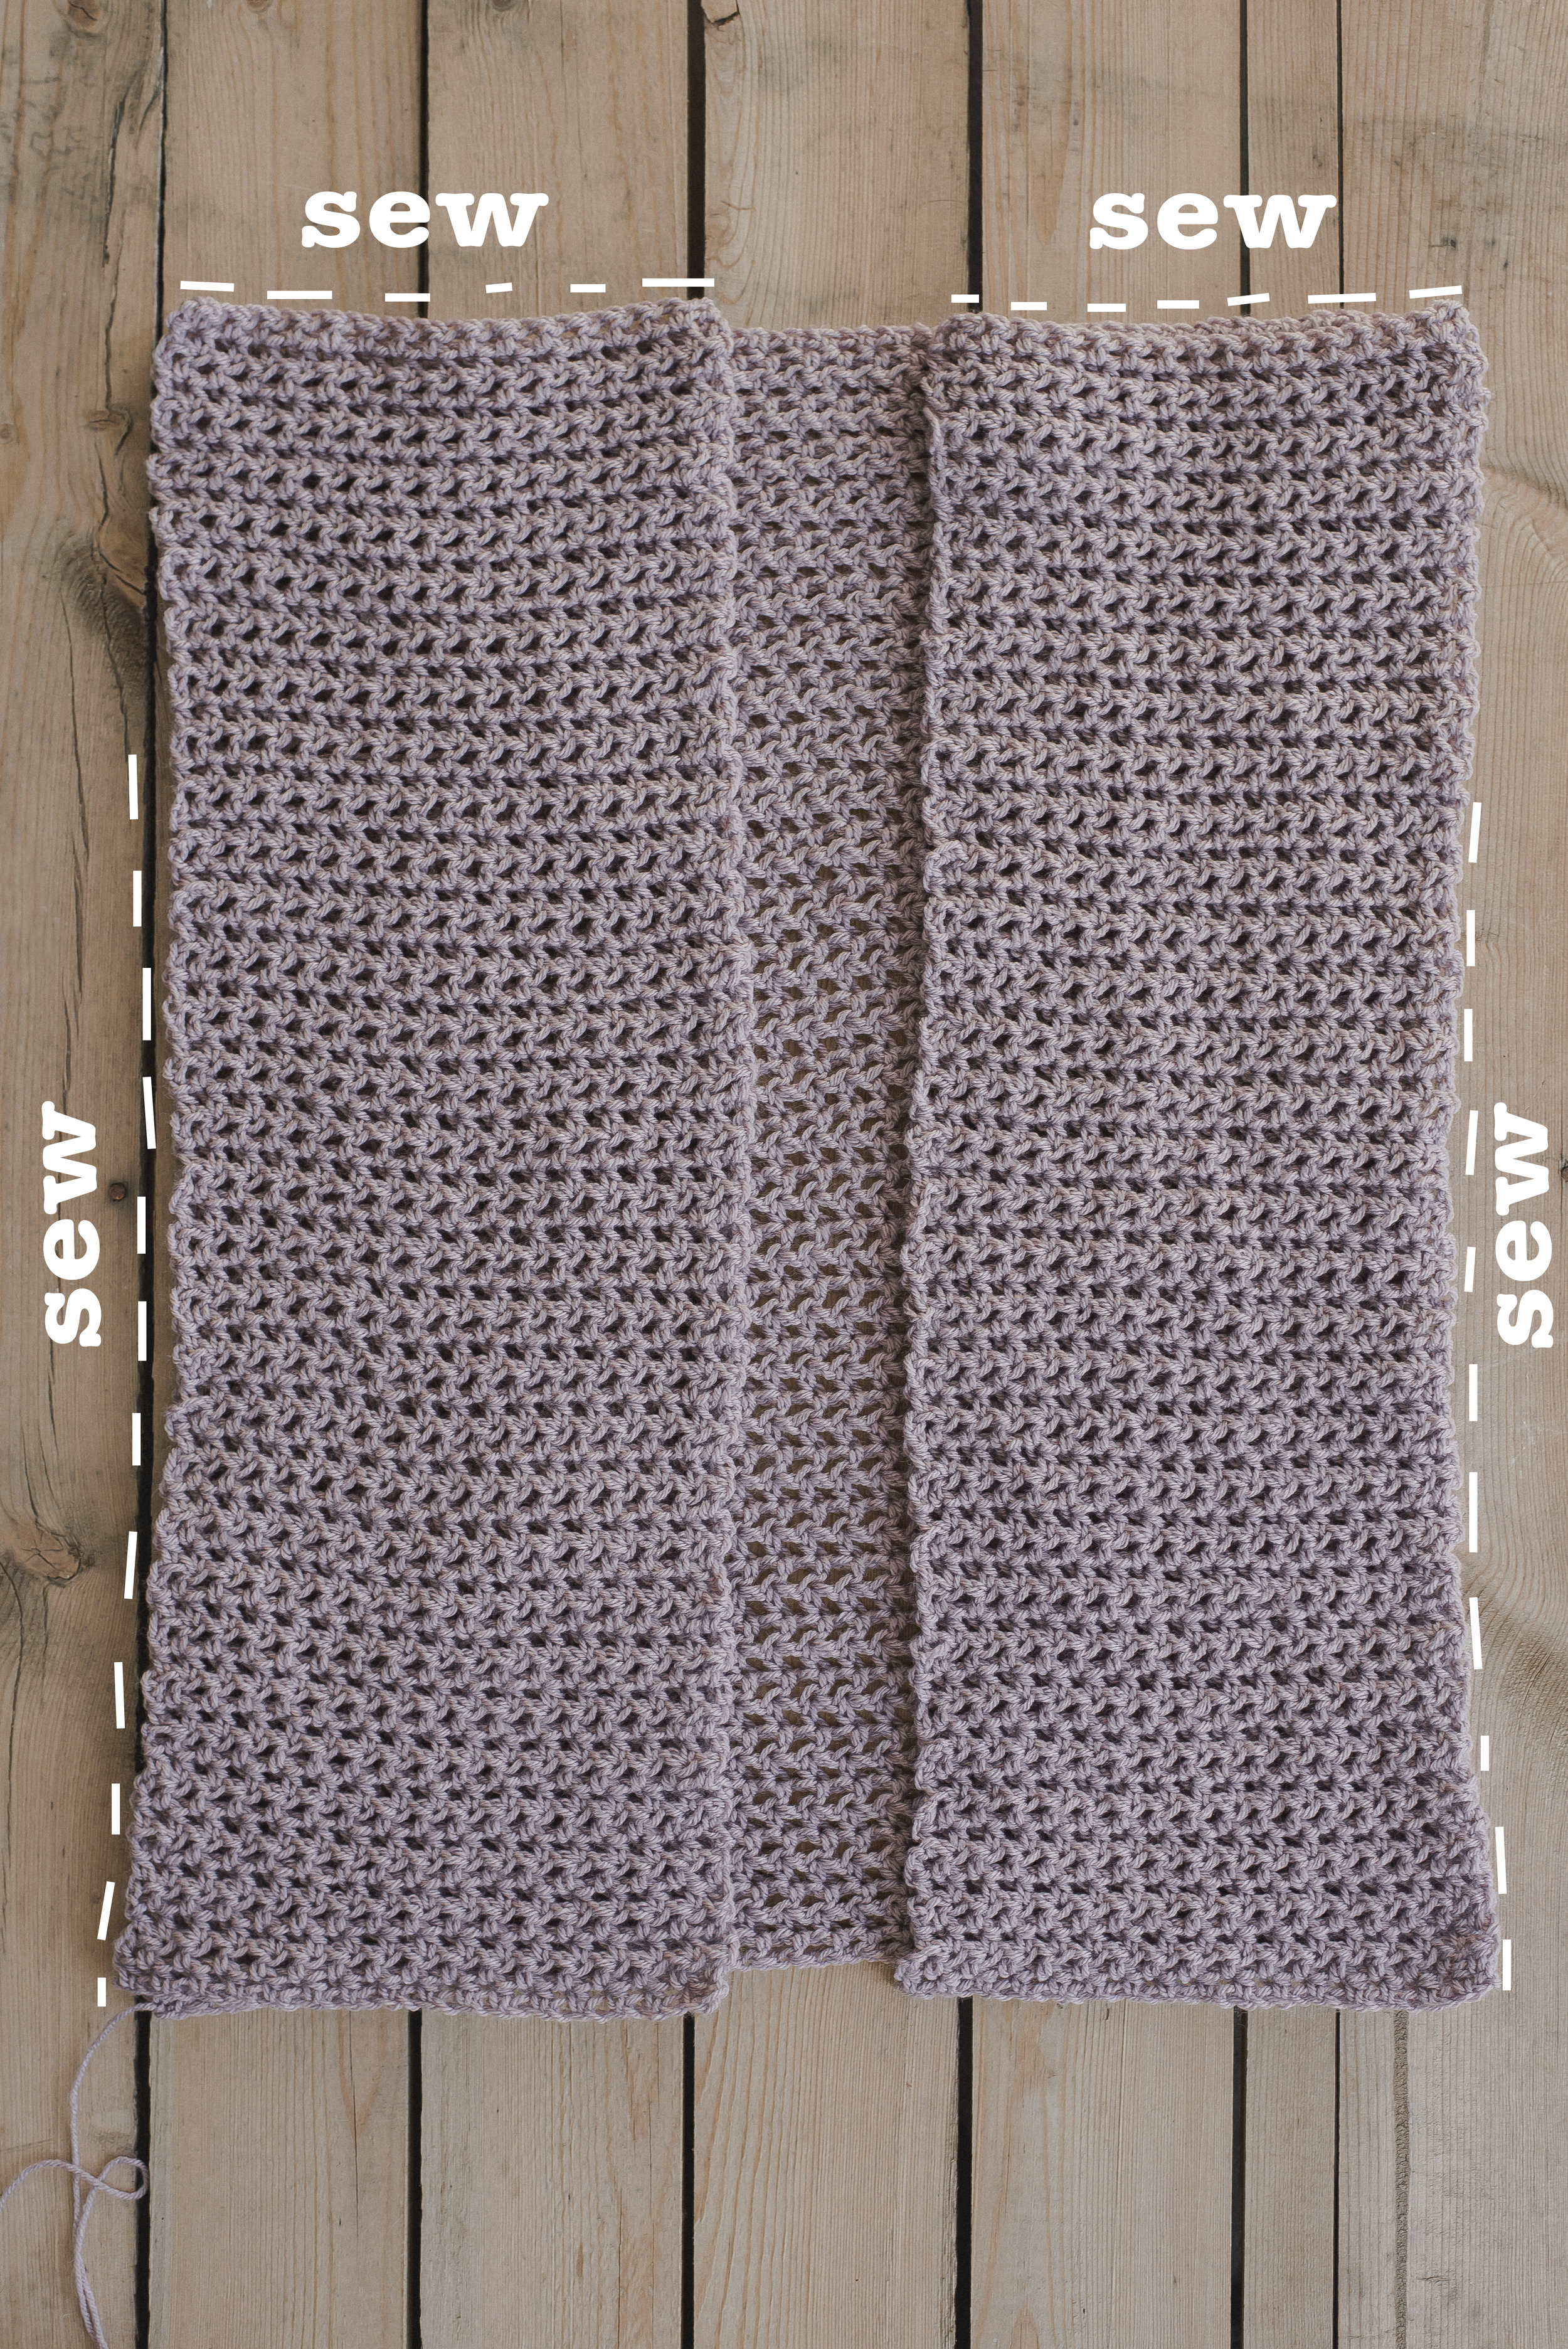
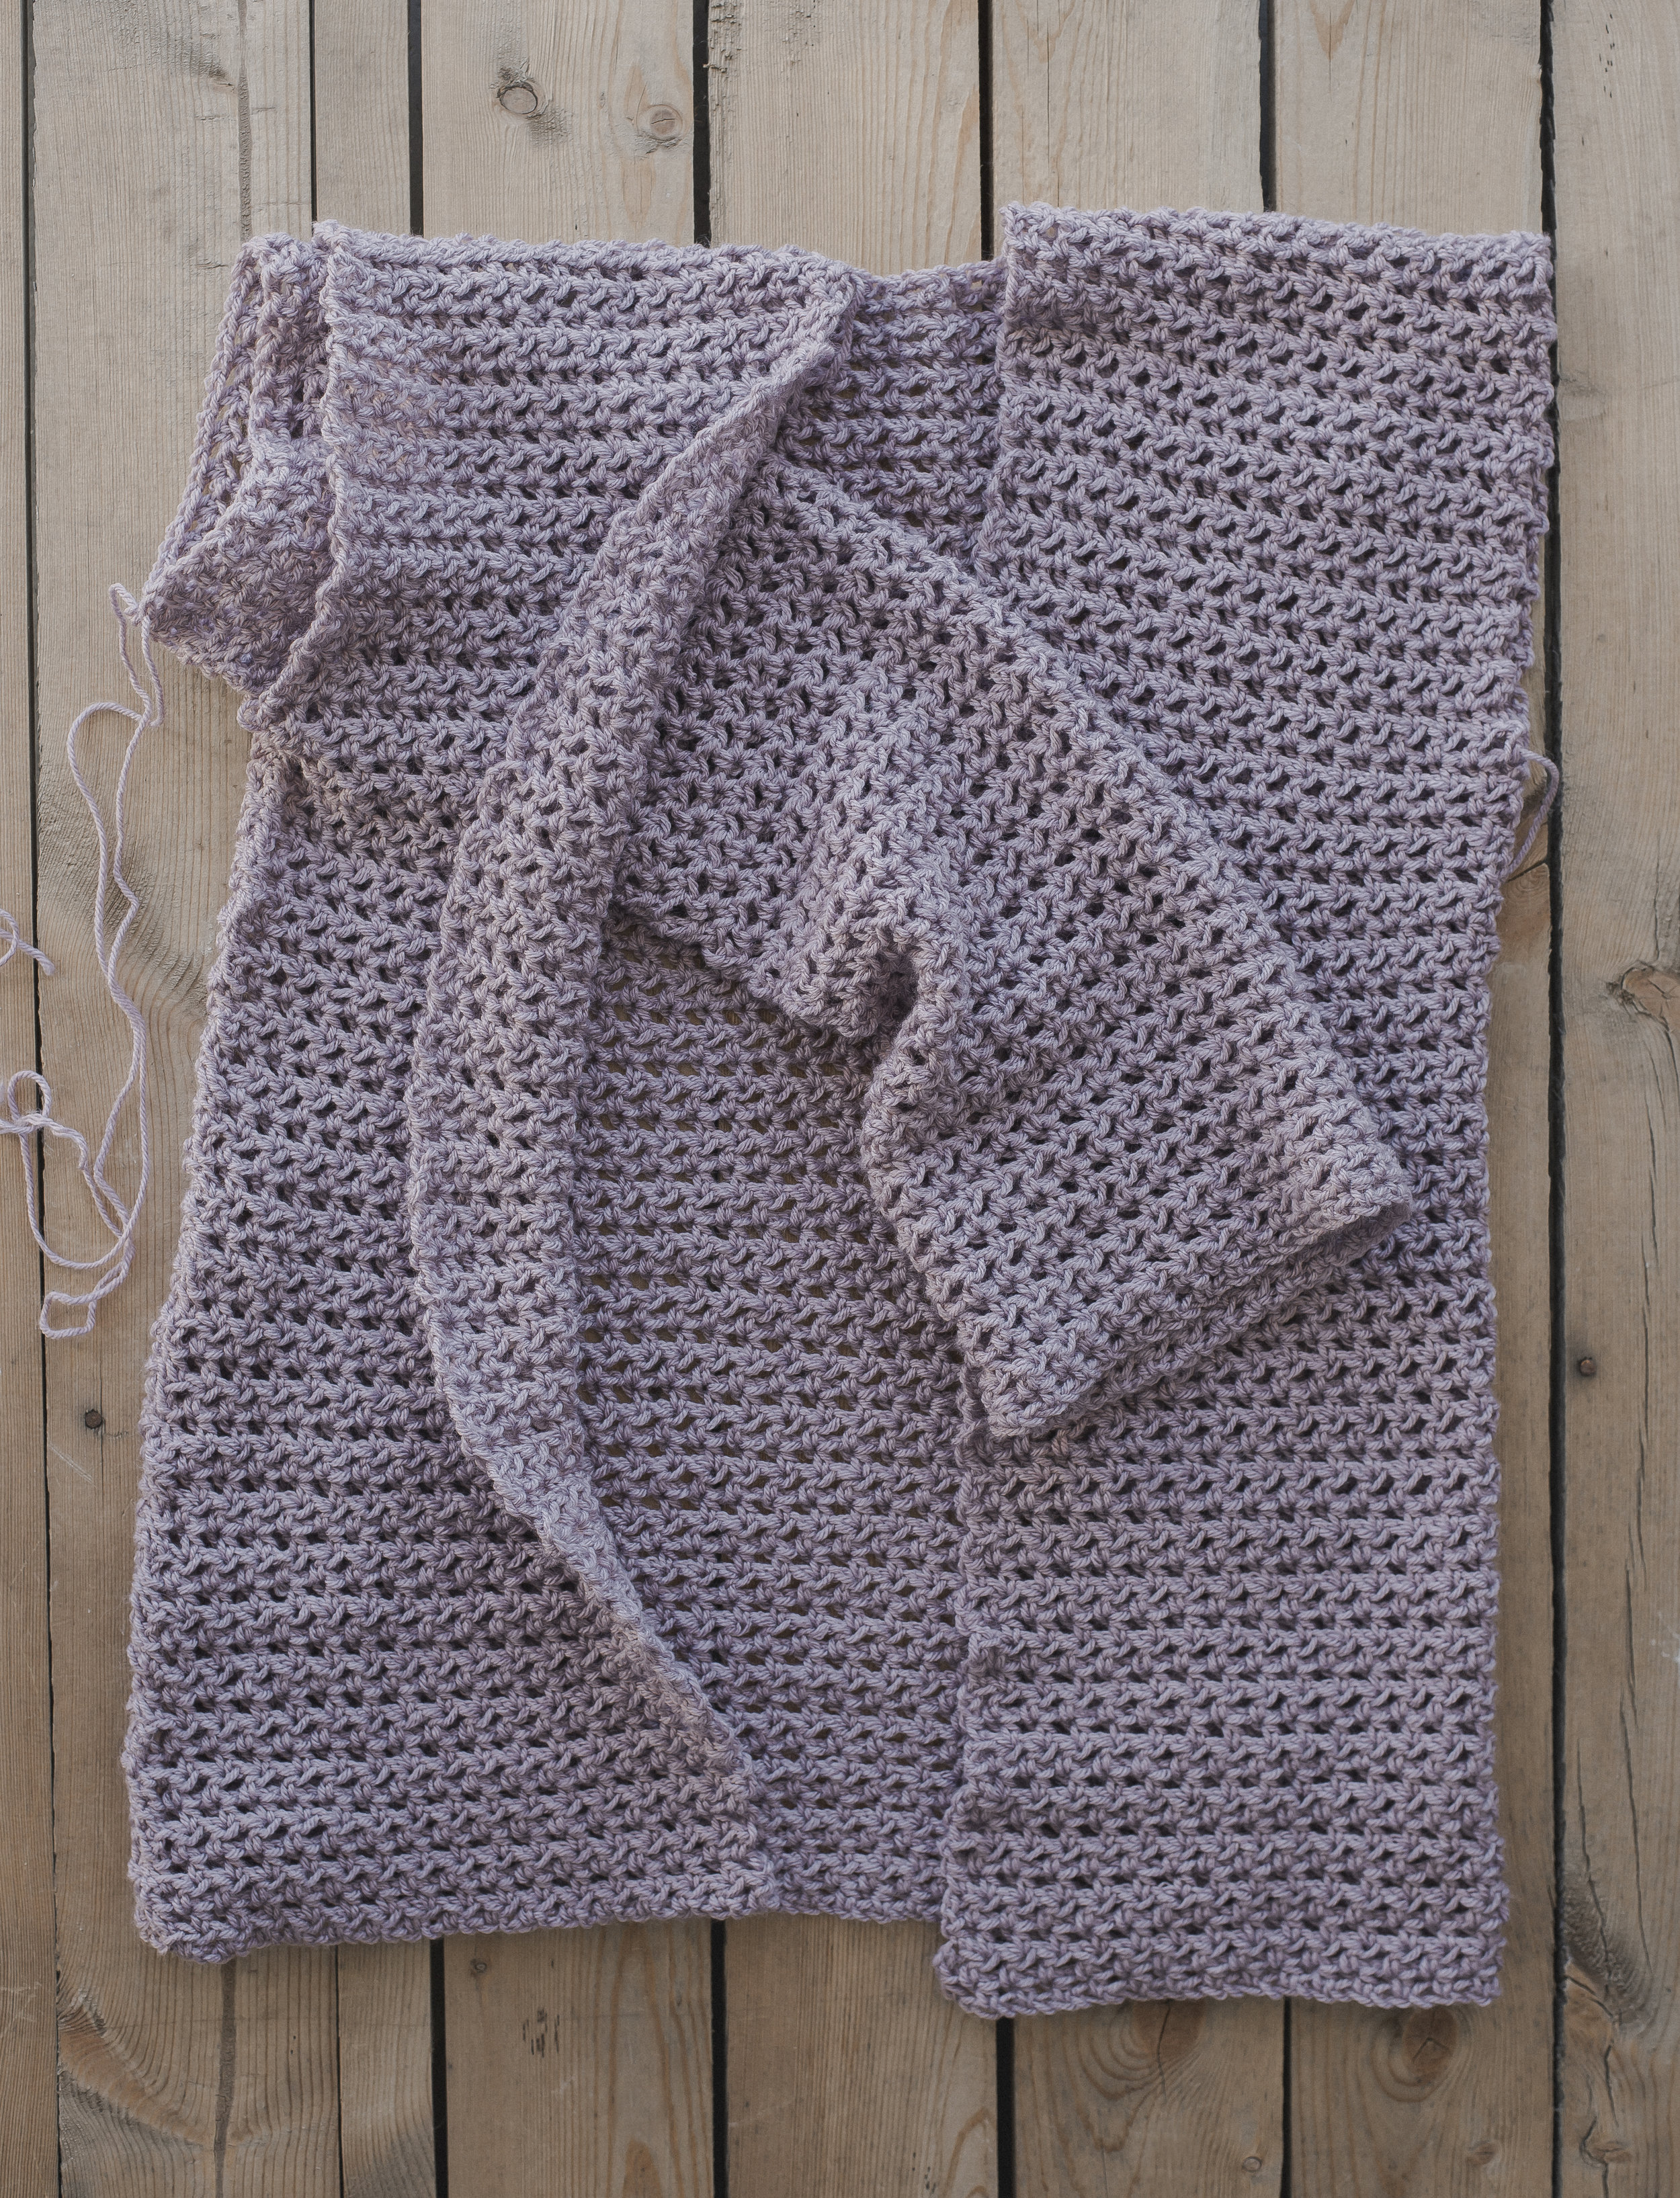
To begin assembling the sweater, gather all the panel pieces-- there will be one back panel and two front panels. Then you will arrange the front panels on top of the back panel as shown in the photo above. You will line up the front panels to the very edges of the back panel. It does not matter which side is facing which at this point because they’re all the same.

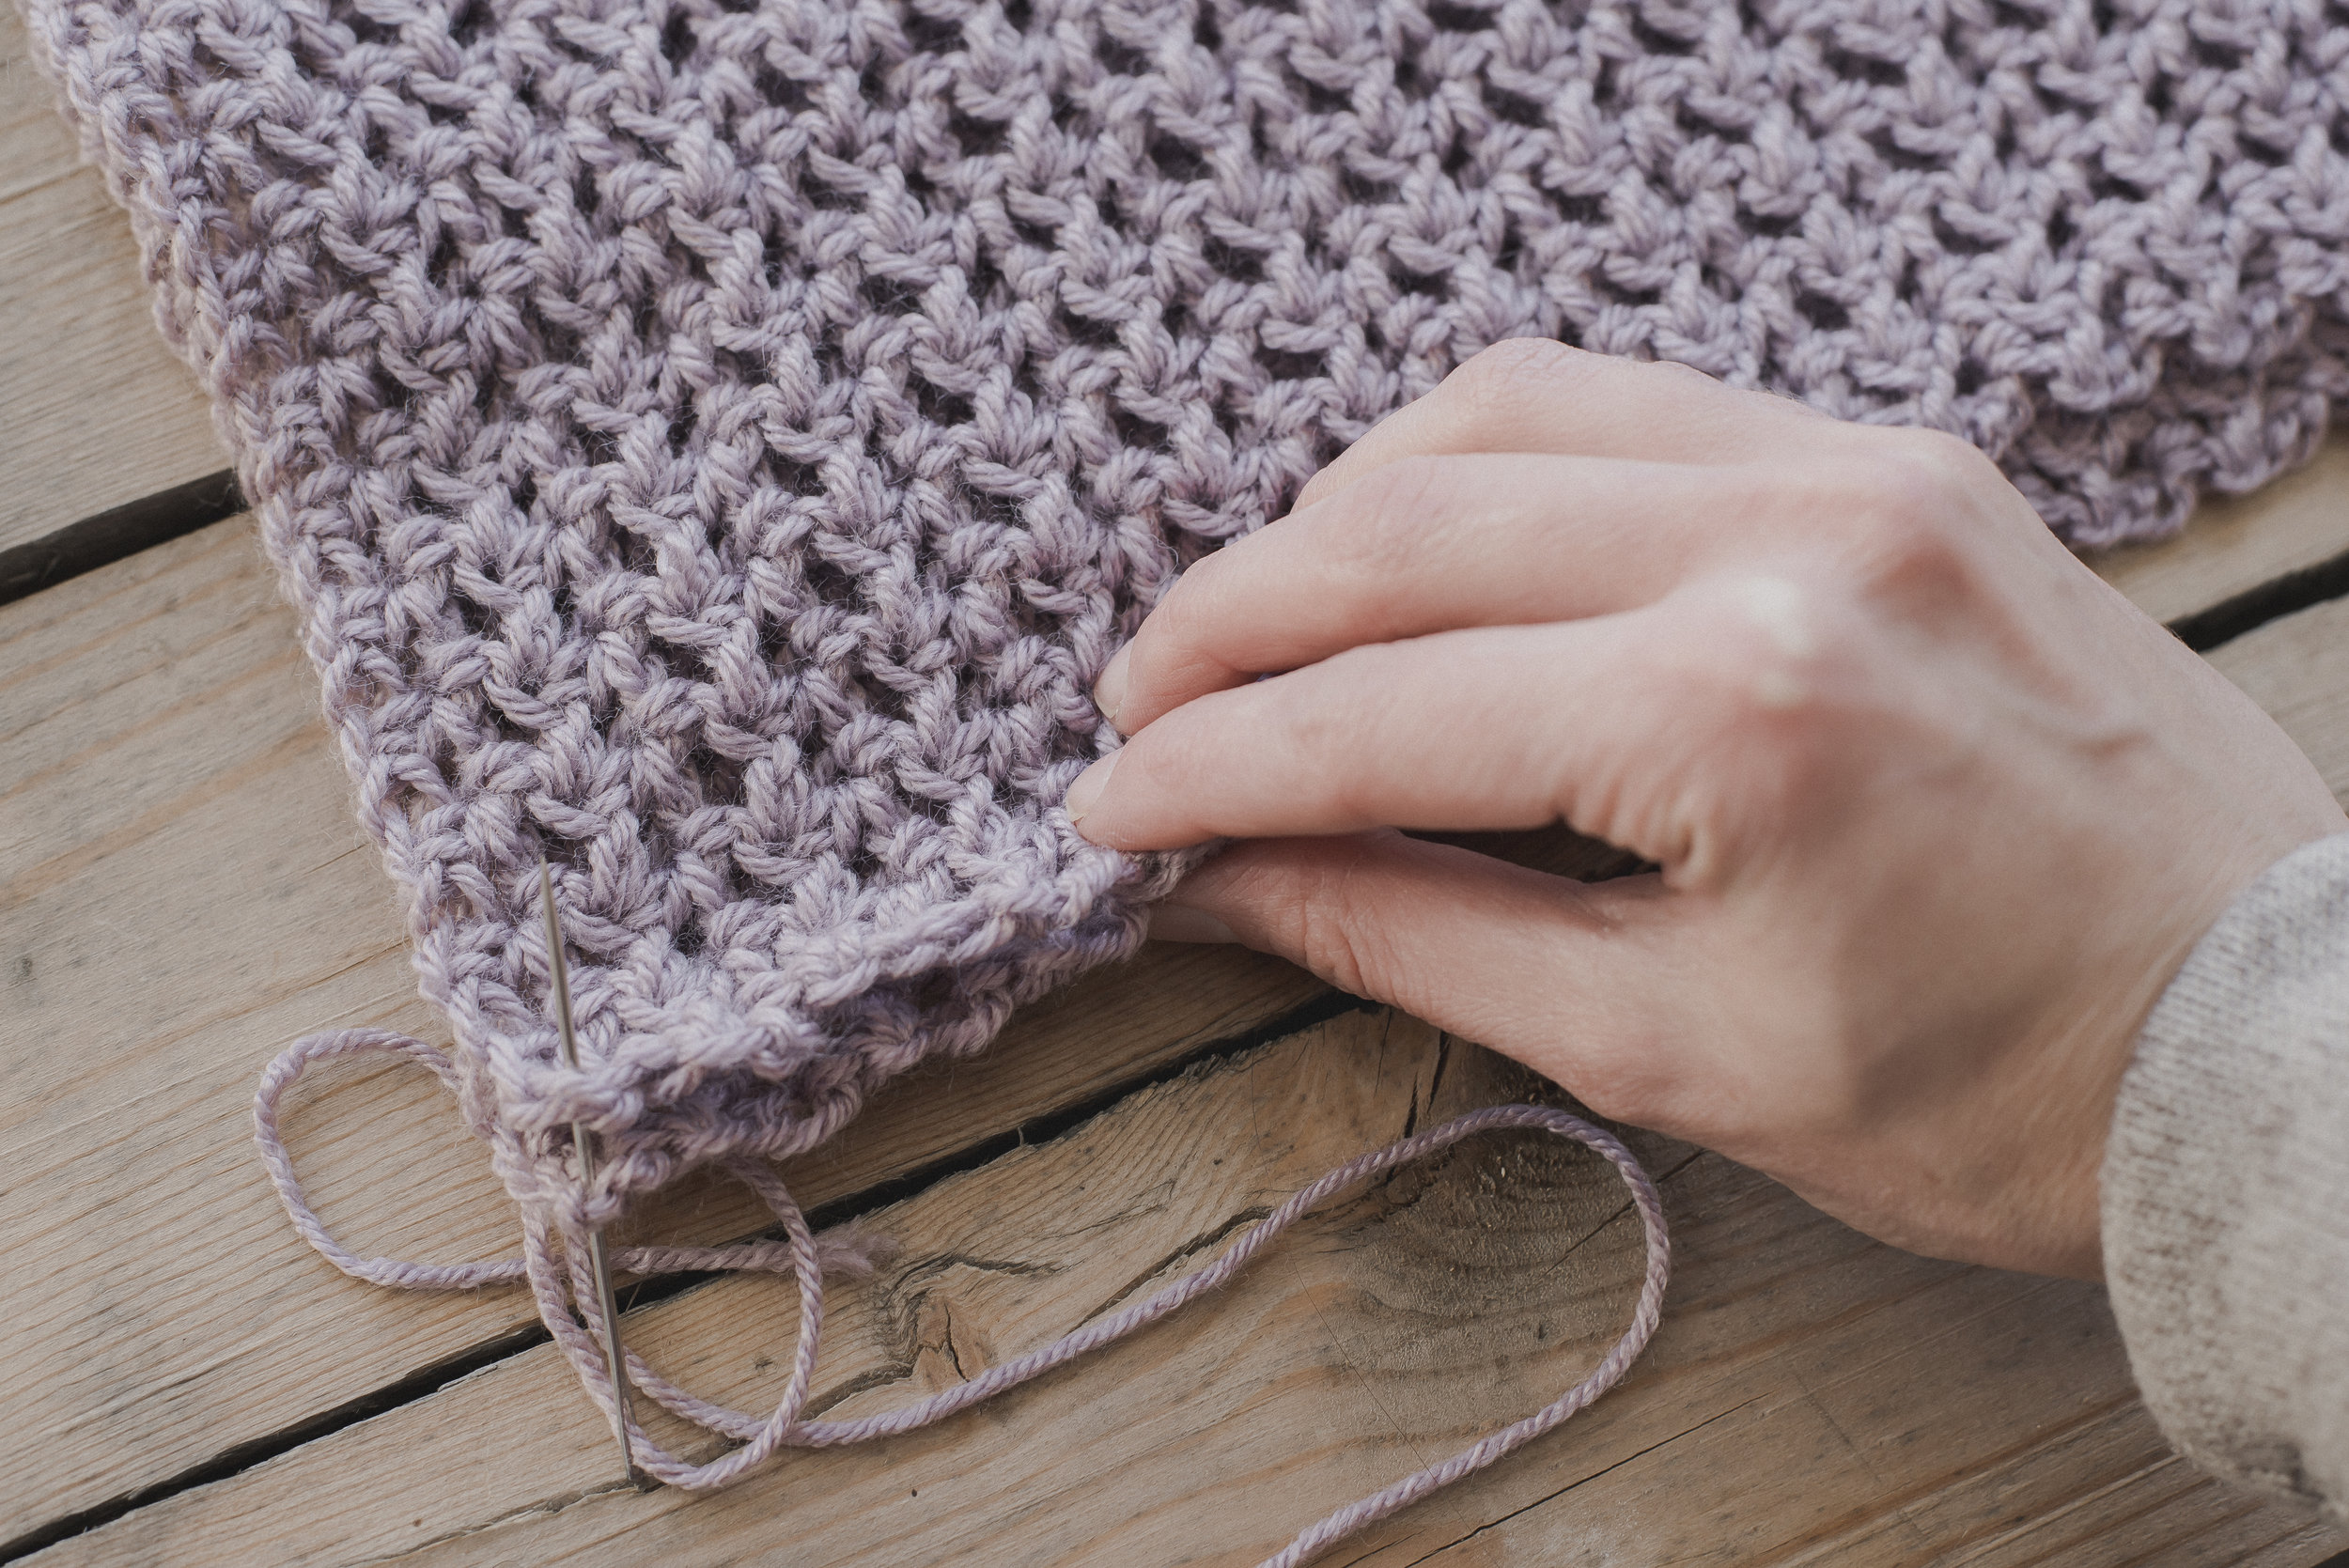
Then you will get your yarn needle and long piece of yarn to sew. Start with the tops of the sweater (you may wish to pin the pieces together so they don’t move around). Using a loose whip stitch over the very edges, sew the tops to connect both the back and front panels. Since each front panel should be lined up on the sides of the back panel, you will begin sewing on the outside, and sew until you reach the other side (middle) of the top of the front panel. Do this on both sides.
After the tops are sewn, you will start on the side seams. You will begin sewing at the bottom of the sweater using the same technique as the tops. For the sides you will want to make EXTRA sure to align the rows of the front and back panels as you go so you will have an accurate amount of rows remaining in the sleeves...
***Instructions for how far to sew up on the side seams for each size (very important!)
xs= up to row 46 (leaving about 6.5 inches for the sleeve on each side)
s= up to row 45(leaving about 7 inches for the sleeve on each side)
m=up to row 44 (leaving about 7.5 inches for the sleeve on each side)
l & xl=up to row 43 (leaving about 8 inches for the sleeve on each side)
2x & 3x = up to row 41 (leaving about 9 inches for the sleeve on each side)

With the body all sewn up, you’re ready to move onto the sleeves. Take your sleeve piece and fold it over matching up the longest sides as shown in the photo above. You can pin along the edge to keep it from shifting around as you sew.

Then you will grab your yarn needle and piece of yarn (or long tail of yarn) and sew along the very edge using a loose whip stitch just like on the body pieces. Sew all the way across, connecting those two long edges to create the sleeve. Do this for both of your sleeves.
** I chose to fold up the sleeves a couple inches on the ends and sew them in a few spots to make the fold stay
Once both sleeves are sewn you are ready to connect them to the body. Keeping your body piece WRONG side out and turning your sleeve RIGHT side out, you will insert the sleeve into the armhole of your sweater like shown in the photo above. It doesn’t matter which end you put at top or bottom, both are the same. You will align the seam of the sleeve to the seam of the side of the body (the armpit). You may wish to pin those together to stabilize.
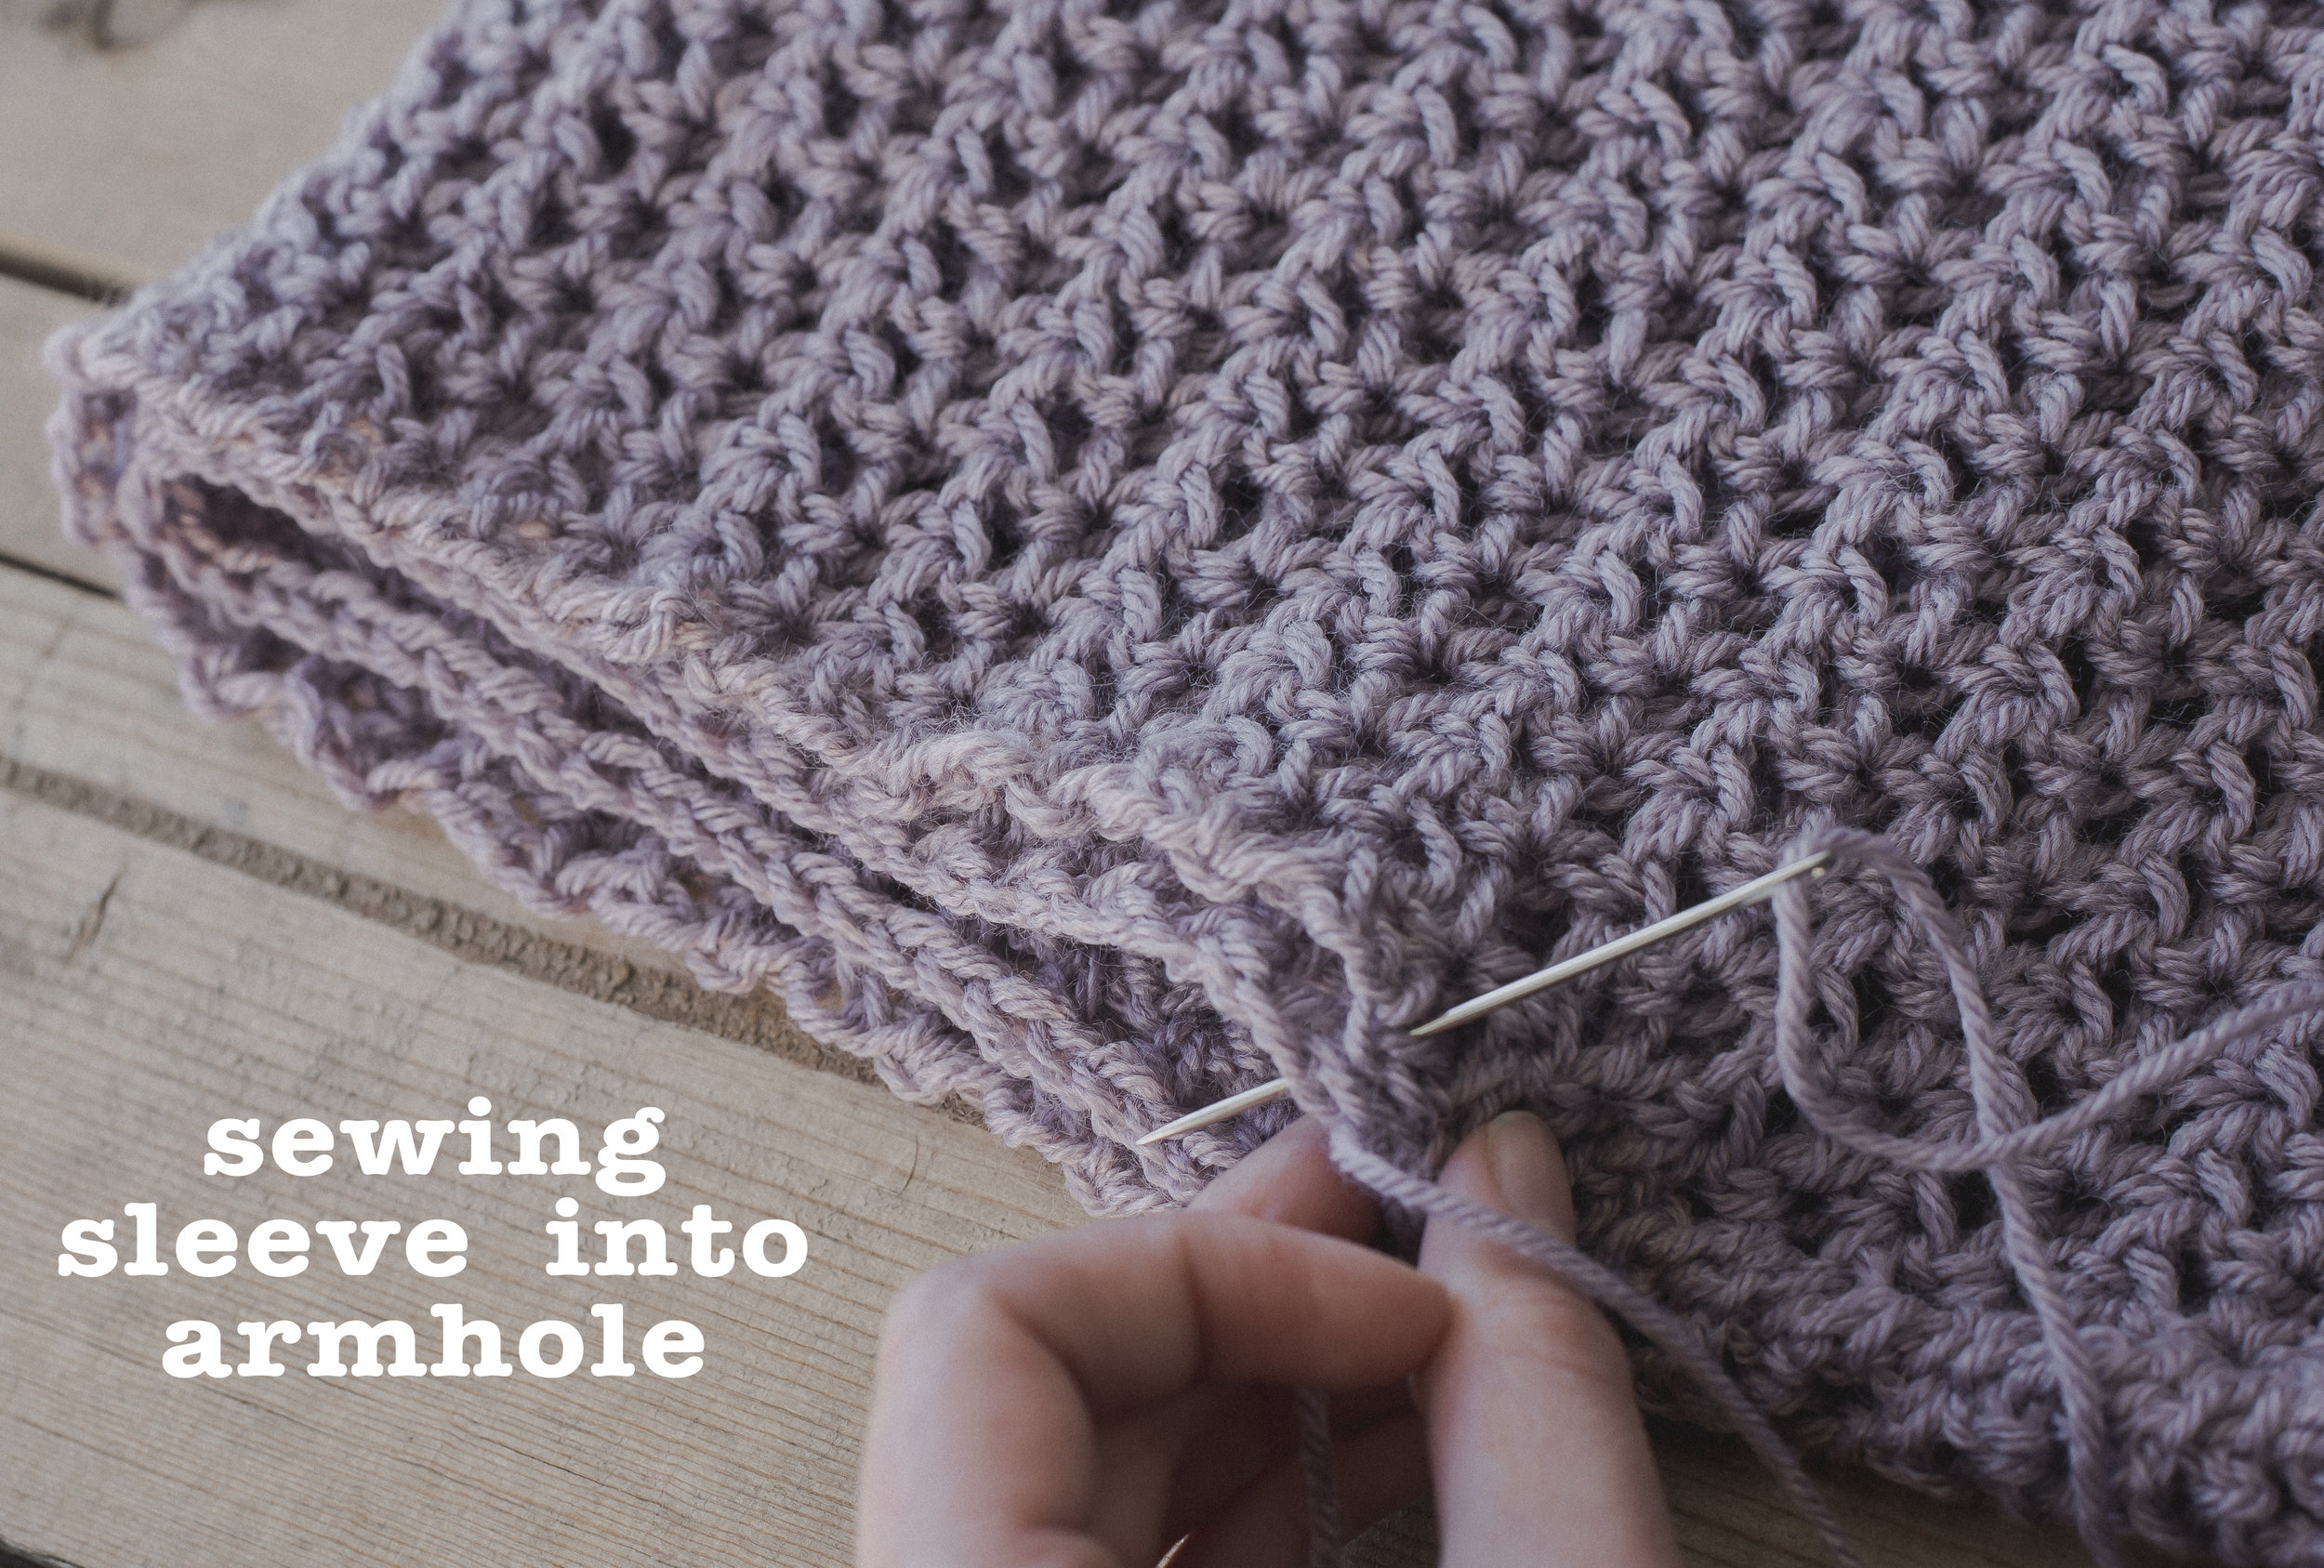
Then you will sew along the very edges of both the sleeve and the body armhole opening with needle and piece of yarn all the way around to connect the sweater. Be sure to sew loosely. Repeat this for both sleeves. After both sleeves are connected, weave in all ends and your Spring sweater is complete!!
Hopefully you love this awesome cardigan as much as I do... It truly lives up to it's name, if you ask me. ;)
If you end up making one of these bad boys, go tag me over on Insta so I can admire it!
Happy making!
Meg


