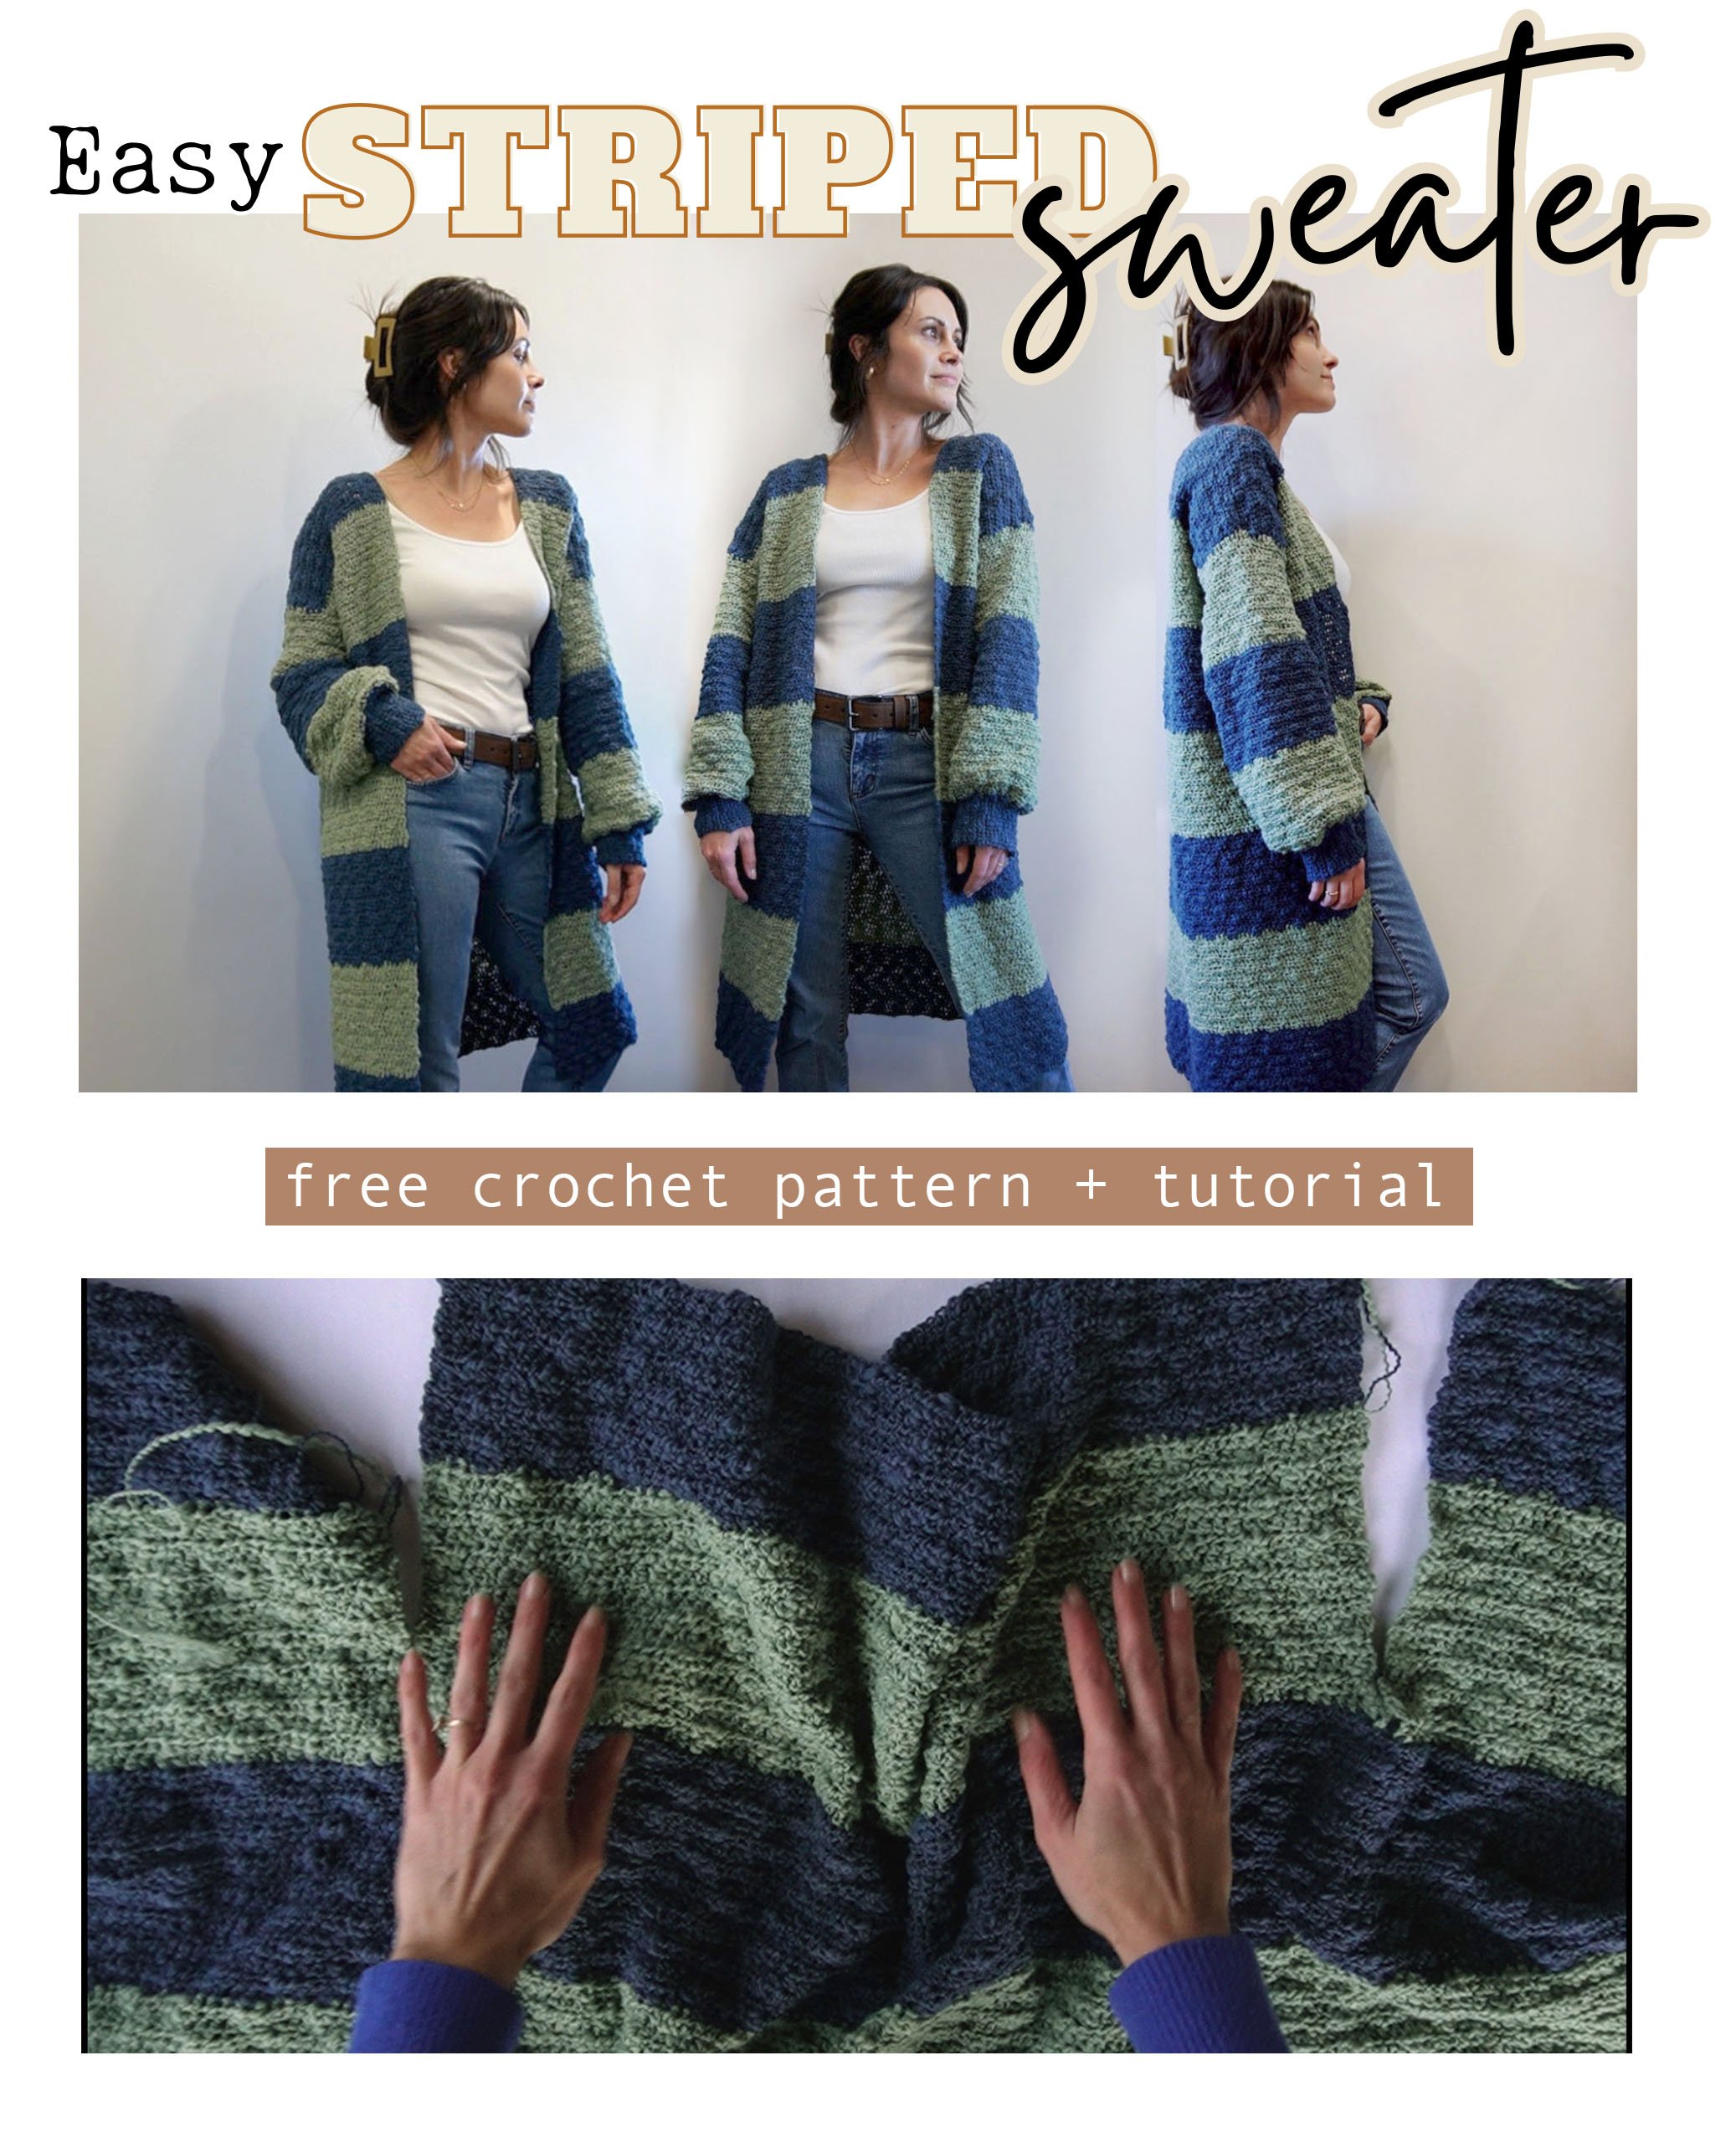
Easy Striped Crochet Sweater - Free Pattern
/
***You can find the PDF version of this pattern by clicking HERE. Ad-free, and printer-friendly! For the free version, scroll down within this post.***
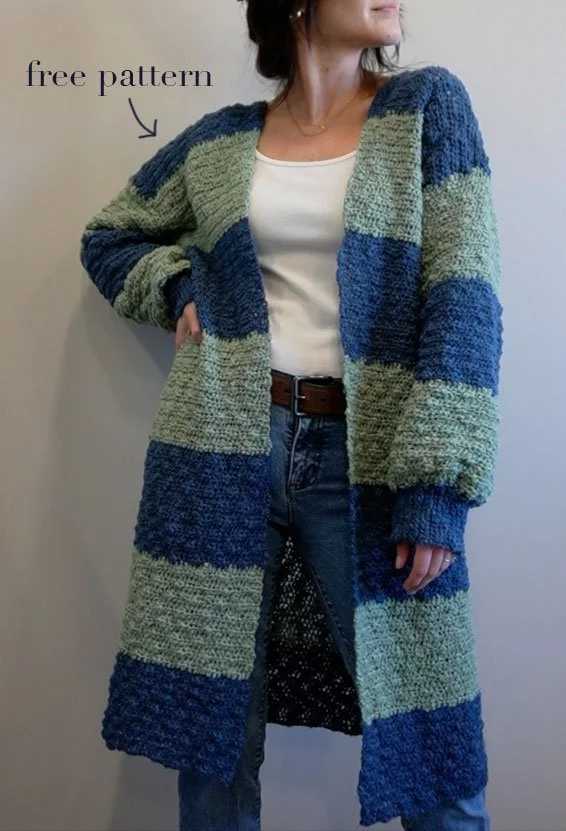
There’s a new sweater here! I’m happy to share this easy striped cardigan, that’s super comfy and laid back—just how I like ‘em. 😊
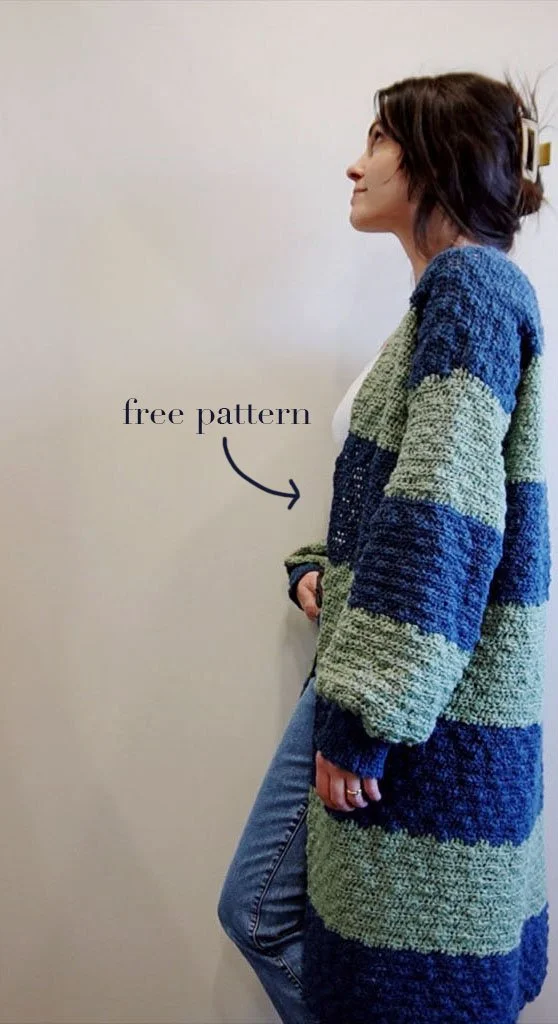
I designed this sweater to be as easy as possible. If you can crochet a box you can crochet this sweater. Yep, no increasing or decreasing. The body has nearly zero seaming to do, just the top shoulders.

It’s worked from the bottom-up, then you add on a couple side panels and one middle back panel. The sleeves are worked in the round, turning after every round.

The pattern is available below, along with a full video tutorial. It’s the perfect beginner sweater... I actually really enjoyed making it because it was one of those mindless projects you could work on while watching a show or video and not have to keep looking back at the pattern, due to the simplicity!

***You can find the PDF version of this pattern by clicking HERE. Ad-free, and printer-friendly! For the free version, scroll down within this post.***
Full Video Tutorial:
Easy Striped Sweater
What you’ll need:
-size 5 mm hook, or size needed to obtain gauge
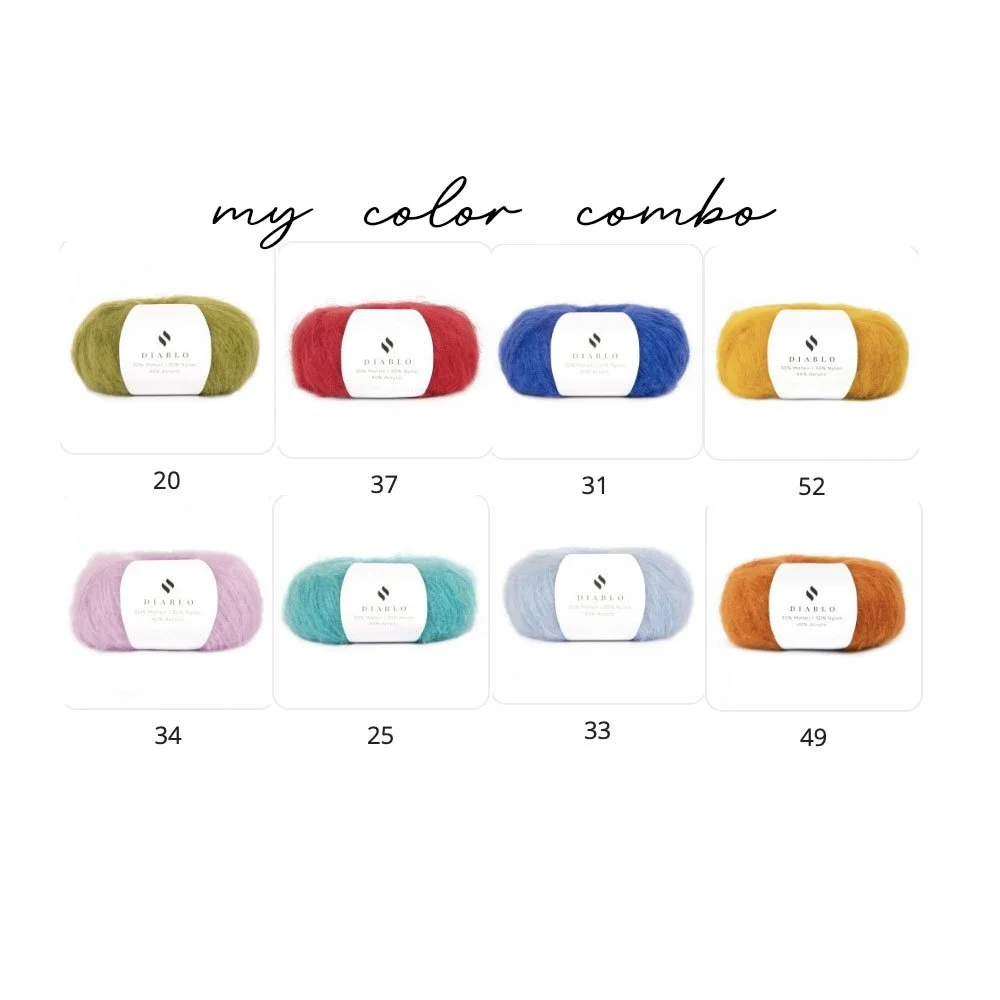
-category 4 worsted weight yarn in two colors. I used Yarn Bee Through Thick and Thin yarn—yardage required is in sizing section. If using a substitute, a yarn with varying thickness like the one I used would be ideal.
-large tapestry needle for weaving in ends
Gauge:
16 hdc by 13 rows equals a 4 inch square
Sizing and Yardage:
please note that the sweater is designed a bit oversized and can stretch with wear
***Size XSmall***
Bust = 43” Length = 32”
Approximately 1,720 yards of yarn
***Small/Medium***
Bust = 45” Length = 33”
Approximately 1,864 yards of yarn
***Large/XLarge***
Bust = 47” Length = 34”
Approximately 2,010 yards of yarn
***Plus***
Bust = 49” Length = 35”
Approximately 2,160 yards of yarn
Notes:
-chains at beginning of rows do not count as stitches
-you can customize the length by adding or taking away rows before you begin working on the top panels
-it may be helpful to use stitch markers when working the top panels, to make it easier for you to distinguish where each panel goes, just count off each of the panel’s st count on row 80, then place markers
-when working the sleeves and sleeve ribbing be sure to keep an eye on stitch count, as it is easy to drop or add stitches
-below is a rough sketch of how the sweater is worked up. You will start at the bottom and work up, then begin working on top of the bottom portion in 3 sections—called the top side panels and top middle panel.

Once top panels are done, you will fold the sides over and sew the tops together shown below. This will make arm holes for the sleeves. Then the sleeves will be worked in the round, turning after every round.

-here's how the the sizing will be formatted for the pattern when instructions for the different sizes are grouped together: XS, S/M, L/XL, PLUS
-the top panel rows will be formatted: 1st top side panel= “a”, top middle panel = “b”, 2nd top side panel = “c”
Abbreviations:
sl=slip, ch(‘s)=chain(s), st(s)=stitch(es), hdc=half double crochet, sc=single crochet, prev=previous
Pattern:
/// Bottom Portion of the Sweater Body ///
Row 1) * using first color * ch [153 162, 171, 180], hdc in 3rd ch from hook and across (151, 160, 169, 178 total sts)
Rows 2-80) ch 2, turn, hdc across row (151, 160, 169, 178 total sts) * after 16 rows, change to next color *
///1st Top Side Panel (a)///
***Size XSmall***
Row 81a) ch 2, turn, hdc 32 (32 total sts)
Rows 82a-106a) ch 2, turn, hdc across (32 total sts) * after 16 rows, change to next color… last stripe will only have 10 rows *
finish off
***Size Small/Medium***
Row 81a) ch 2, turn, hdc 35 (32 total sts)
Rows 82a-108a) ch 2, turn, hdc across (35 total sts) * after 16 rows, change to next color… last stripe will only have 12 rows
finish off
***Size Large/XLarge***
Row 81a) ch 2, turn, hdc 38 (38 total sts)
Rows 82a-110a) ch 2, turn, hdc across (38 total sts) * after 16 rows, change to next color… last stripe will only have 14 rows
finish off
***Size Plus***
Row 81a) ch 2, turn, hdc 41 (41 total sts)
Rows 82a-112a) ch 2, turn, hdc across (41 total sts) * after 16 rows, change to next color
finish off
///Top Middle Panel (b)///

***Size XSmall***
Row 81b) draw up yarn in st NEXT to the bottom of the first top side panel (in photo above) ch 3, tug on yarn end to secure, hdc in same st that you drew up yarn, then 86 more hdc (87 total sts)
Rows 82b-106a) ch 2, turn, hdc across (87 total sts) * after 16 rows, change to next color… last stripe will only have 10 rows *
finish off
***Size Small/Medium***
Row 81b) draw up yarn in st NEXT to the bottom of the first top side panel (in photo above) ch 3, tug on yarn end to secure, hdc in same st that you drew up yarn, then 89 more hdc (90 total sts)
Rows 82b-108b) ch 2, turn, hdc across (90 total sts) * after 16 rows, change to next color… last stripe will only have 12 rows
finish off
***Size Large/XLarge***
Row 81b) draw up yarn in st NEXT to the bottom of the first top side panel (in photo above) ch 3, tug on yarn end to secure, hdc in same st that you drew up yarn, then 92 more hdc (93 total sts)
Rows 82b-110b) ch 2, turn, hdc across (93 total sts) * after 16 rows, change to next color… last stripe will only have 14 rows
finish off
***Size Plus***
Row 81b) draw up yarn in st NEXT to the bottom of the first top side panel (in photo above) ch 3, tug on yarn end to secure, hdc in same st that you drew up yarn, then 95 more hdc (96 total sts)
Rows 82b-112b) ch 2, turn, hdc across (96 total sts) * after 16 rows, change to next color
finish off
///2nd Top Side Panel (c)///

***Size XSmall***
Row 81c) draw up yarn in st NEXT to the bottom of the top middle panel (in photo above) ch 3, tug on yarn end to secure, hdc in same st that you drew up yarn, and across to the end of row (32 total sts)
Rows 82c-106c) ch 2, turn, hdc across (32 total sts) * after 16 rows, change to next color… last stripe will only have 10 rows *
finish off
***Size Small/Medium***
Row 81c) draw up yarn in st NEXT to the bottom of the first top side panel (in photo above) ch 3, tug on yarn end to secure, hdc in same st that you drew up yarn, and across to the end of row (35 total sts)
Rows 82c-108c) ch 2, turn, hdc across (35 total sts) * after 16 rows, change to next color… last stripe will only have 12 rows
finish off
***Size Large/XLarge***
Row 81c) draw up yarn in st NEXT to the bottom of the first top side panel (in photo above) ch 3, tug on yarn end to secure, hdc in same st that you drew up yarn, and across to the end of row (38 total sts)
Rows 82c-110c) ch 2, turn, hdc across (38 total sts) * after 16 rows, change to next color… last stripe will only have 14 rows
finish off
***Size Plus***
Row 81c) draw up yarn in st NEXT to the bottom of the first top side panel (in photo above) ch 3, tug on yarn end to secure, hdc in same st that you drew up yarn, and across to the end of row (41 total sts)
Rows 82c-112c) ch 2, turn, hdc across (41 total sts) * after 16 rows, change to next color
finish off
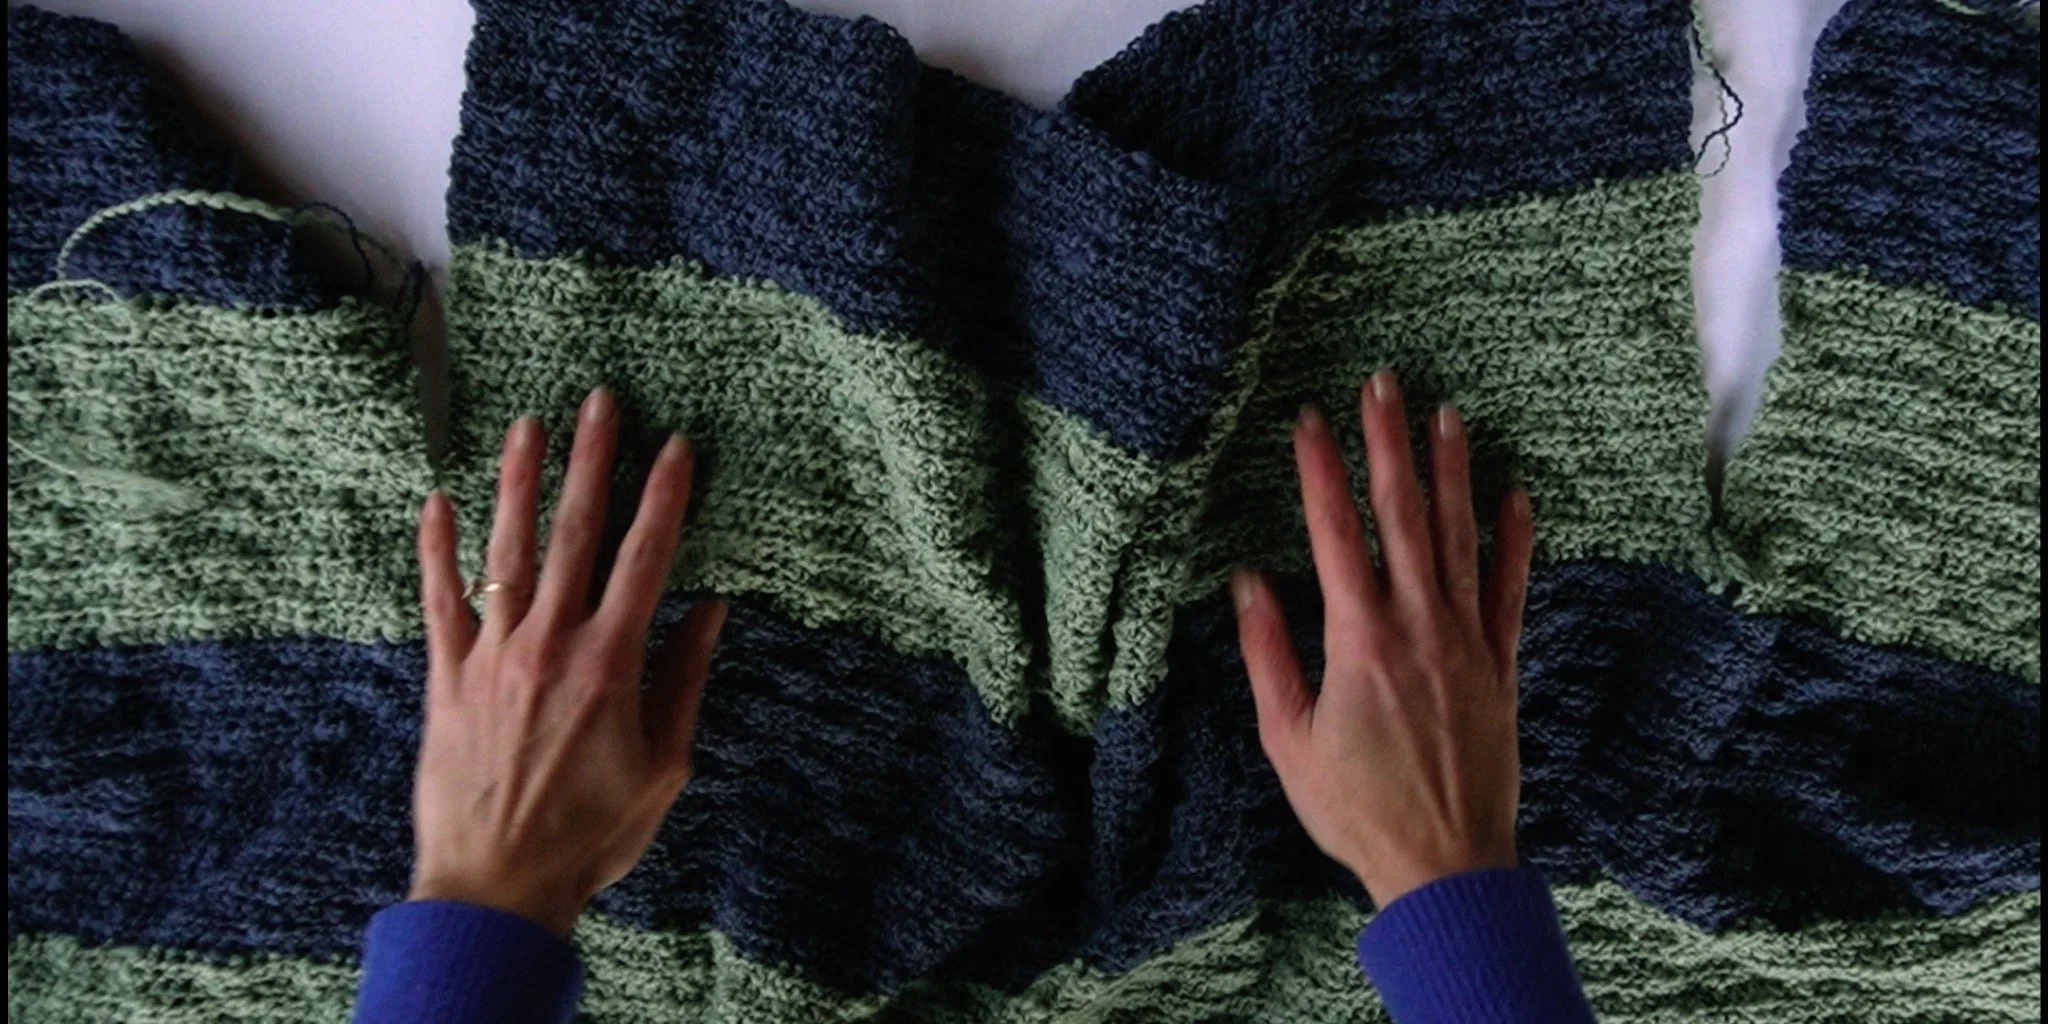
photo shows all 3 top panels completed
/// Seaming the Top Shoulders ///

To seam the tops of the sweater you will fold over both top side panels onto the top middle panel, lining up the top and outside edges.

Then you will sew along the very tops of both sides, creating the shoulder seams. You can see in the photo above I showed where to sew where the dotted lines are. You can pin the panels together to keep them from shifting.

I sewed along the very top edge of the panels with yarn and large needle inserting my needle from the back, pulling through yarn and inserting needle again through the back side, which made the seam go over the top of the edges. Make sure not to pull too tightly on the yarn so the project doesn’t bunch. Repeat for both sides.
///Sleeves///

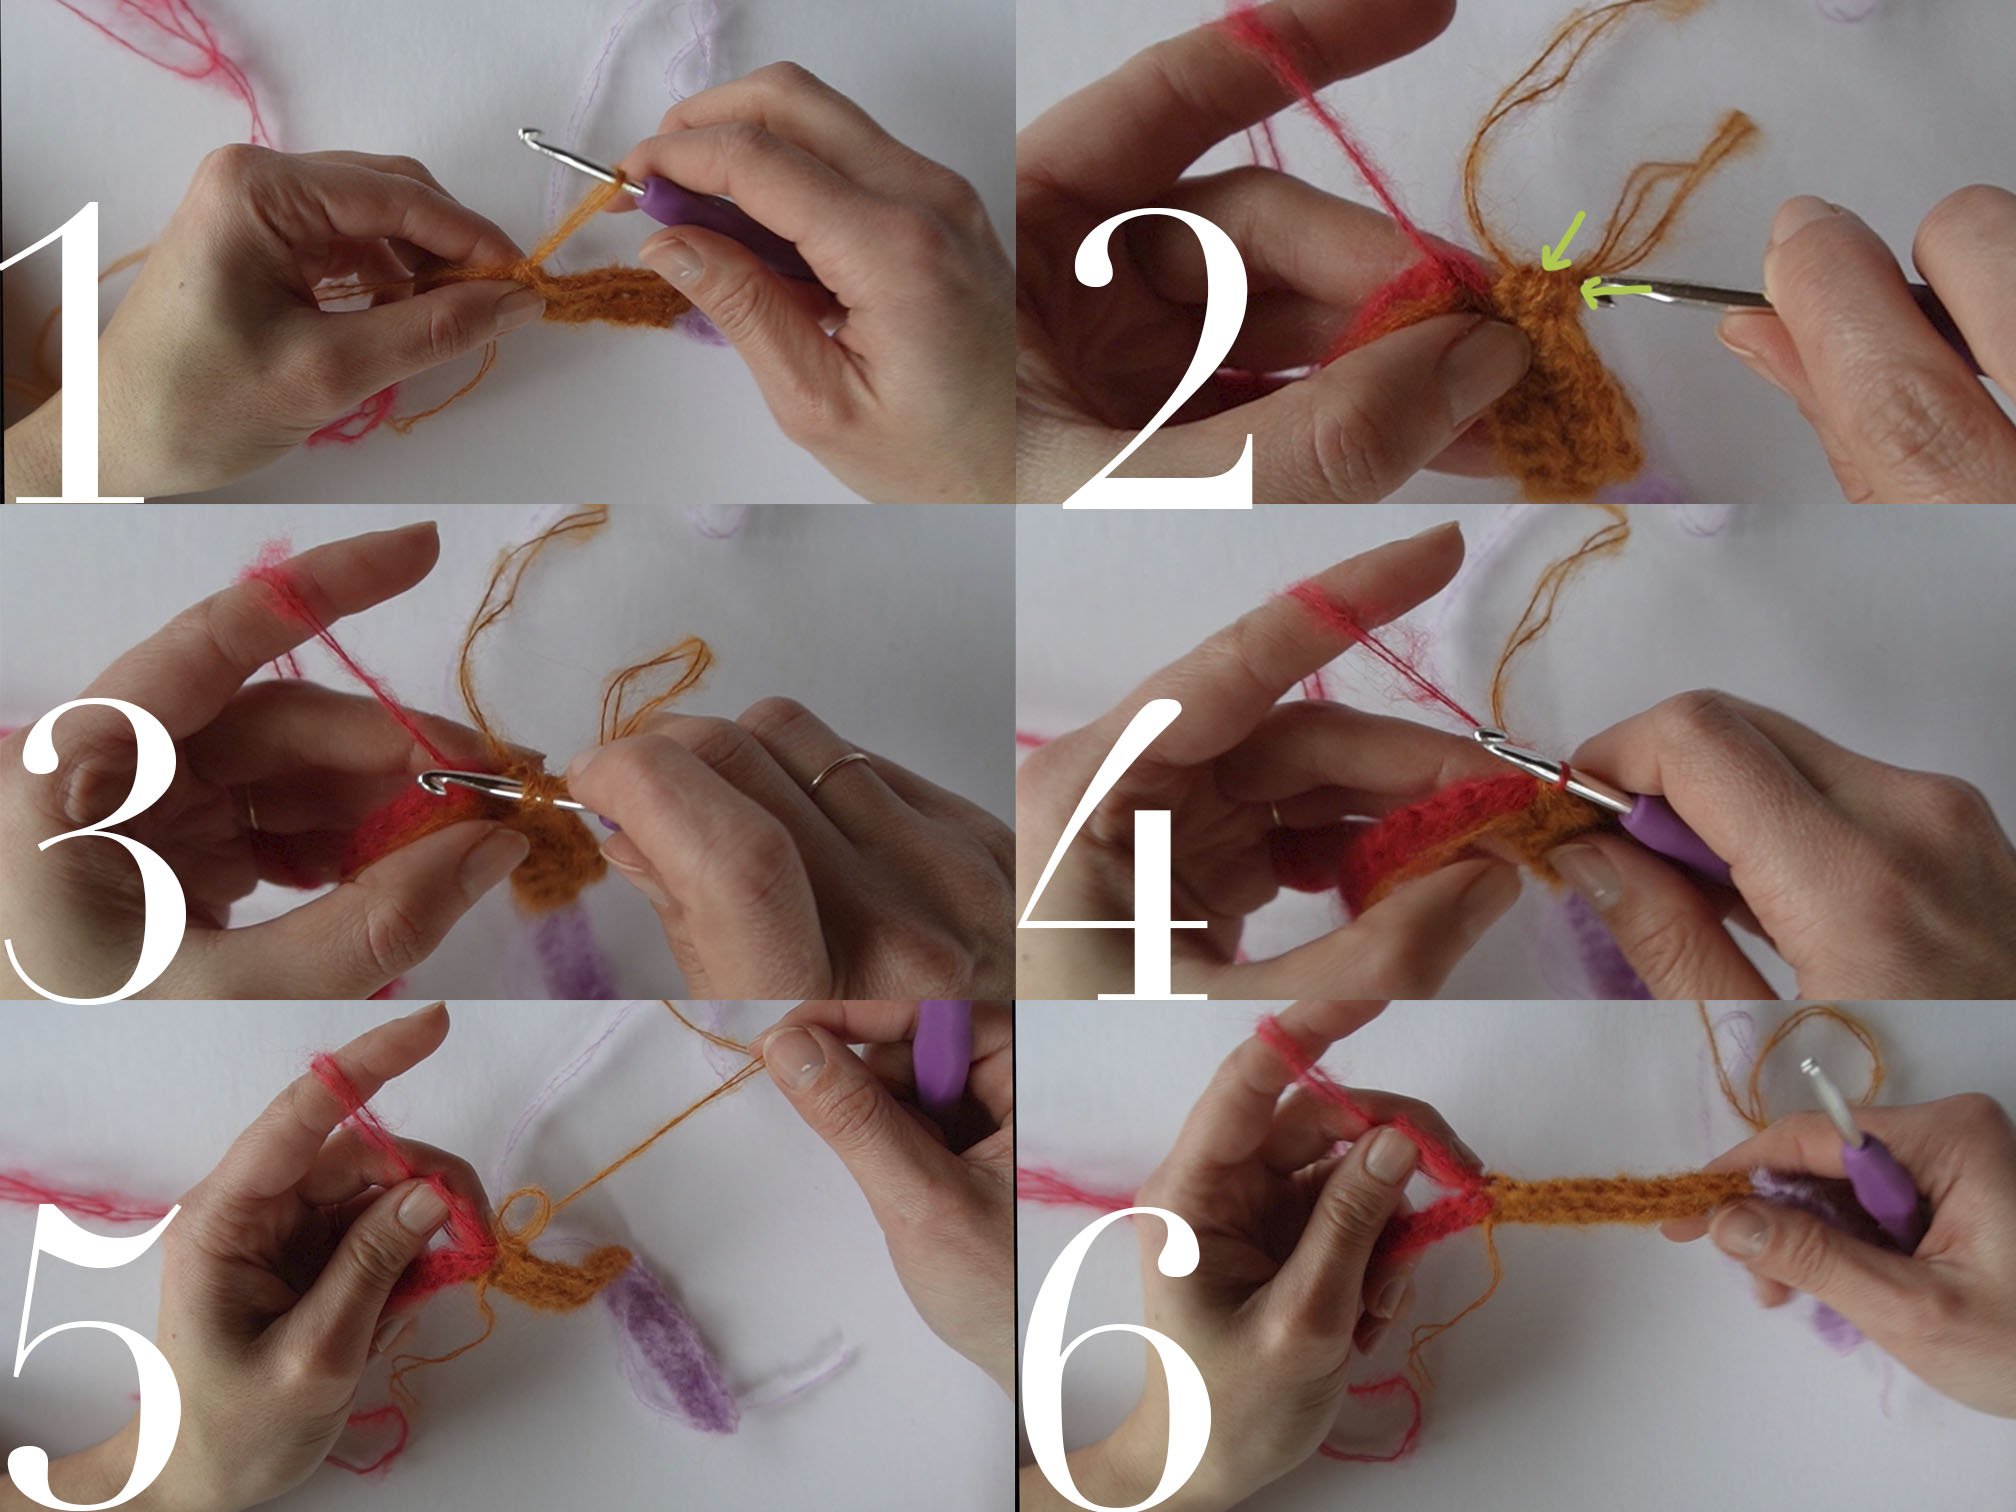
Round 1) draw up yarn in armpit of sleeve hole, the little gap in between the front and back top panels (shown in photo above), ch 3, and tug on yarn tail to secure (continued below)

work one hdc into the edge of every row from the top panels (in photo above, arrows show where you will work each hdc for the sleeve onto the very edge of each row of the top panels) all the way around your sleeve hole (52, 56, 60, 64 total sts)
Rounds 2-48) ch 2, flip work (you will now be working the round the opposite way), hdc around (52, 56, 60, 64 total sts) * after 16 rows, change to next color
///Sleeve Ribbing///
Step 1) for ribbing switch to next color, ch 13, work sc in 2nd ch from hook, and across remaining chains (12 total sts)

Step 2) next, you will sl st into next 3 sts of the sleeve end (this connects ribbing to sleeve), shown in photo above.

Step 3) ch 1, turn, for first st of next row of ribbing you will insert hook into 2nd sl st from hook AND the 1st sc (shown in photo above) and work a sc, then work sc into remaining sts (12 total sts)
Step 4) ch 1, turn, sc across row (12 total sts) then sl st into the next 3 sts of the sleeve end

Repeat steps 3-4 around the sleeve end, until you get to the last rows, sl st into remaining sts of sleeve, ch 1, turn, sc across row ch 1, turn, and pinch two ends of sleeve ribbing together (shown in photo above) and slip stitch the ends together inserting hook into both edges. Finish off after ribbing is closed up.

Weave in ends, and you’re done with a super cute striped sweater!