


New Free Crochet Pattern for an Easy Towel Topper
/
Hi you!
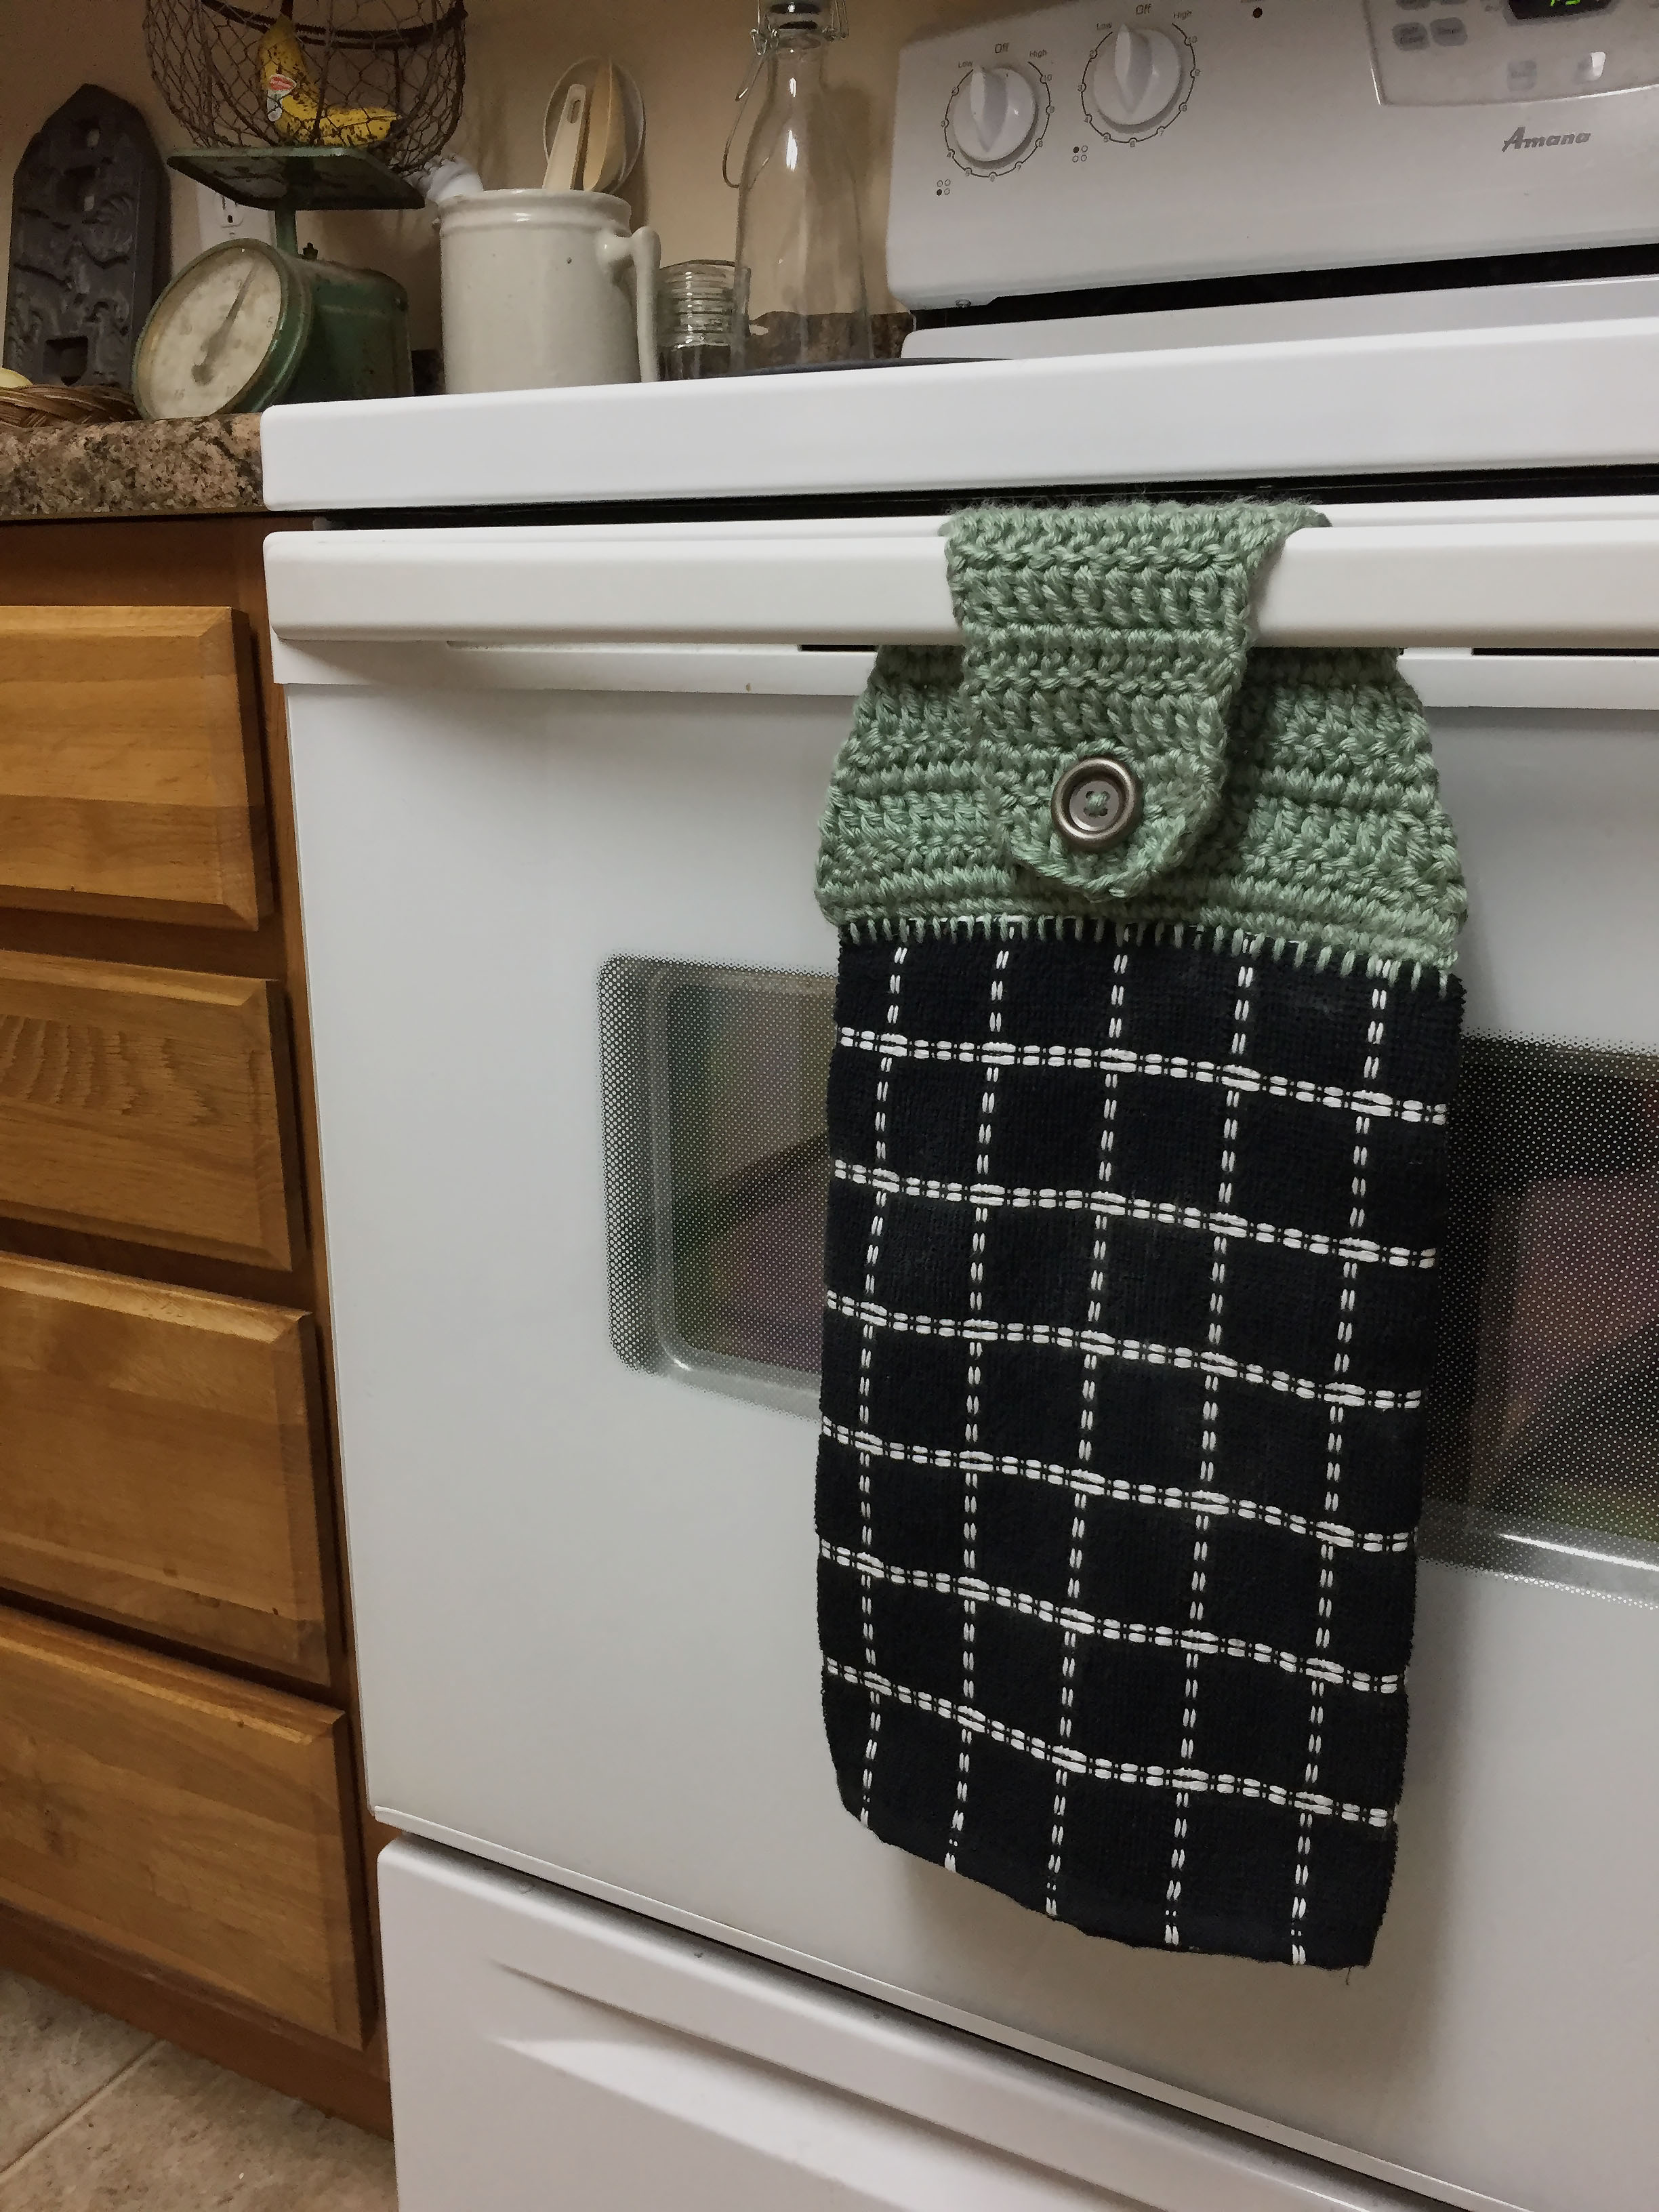
I've got a quick and fun little free pattern for you today. It's for a crochet towel topper-- a cool little addition to a kitchen towel that allows you to hang it oh-so-conveniently from your oven or cabinets. And if you're like me, and have a one-year-boy, it's the only way a towel will stay on your oven. ha!

These things would make awesome and easy Christmas gifts, which is really why I'm posting this. Because I'm wanting to gift some of these! They'd go great with some homemade cookies, and topped with one of the free printable tags available here on the blog.. :) My favorite part about these, is that they are so quick to whip up. They're also a unique gift that doesn't have to break the bank. Win-win!
I wanted to make my design super simple-- I simply folded the towel and sewed a blanket stitch along the top then crocheted into the spaces. And I used two strands of worsted weight yarn to make it more sturdy and dense.

What you'll need:
-a 15" by 25" kitchen towel, I found mine at Dollar General for a couple of bucks
-yarn needle
-worsted weight yarn (medium, 4), I used Caron Simply Soft in Woodland Heather
- i hook (5.5 mm)
- 1 - 1 1/8 inch button
-sewing pins
-iron (optional)
-measuring tape
Prepping the towel:
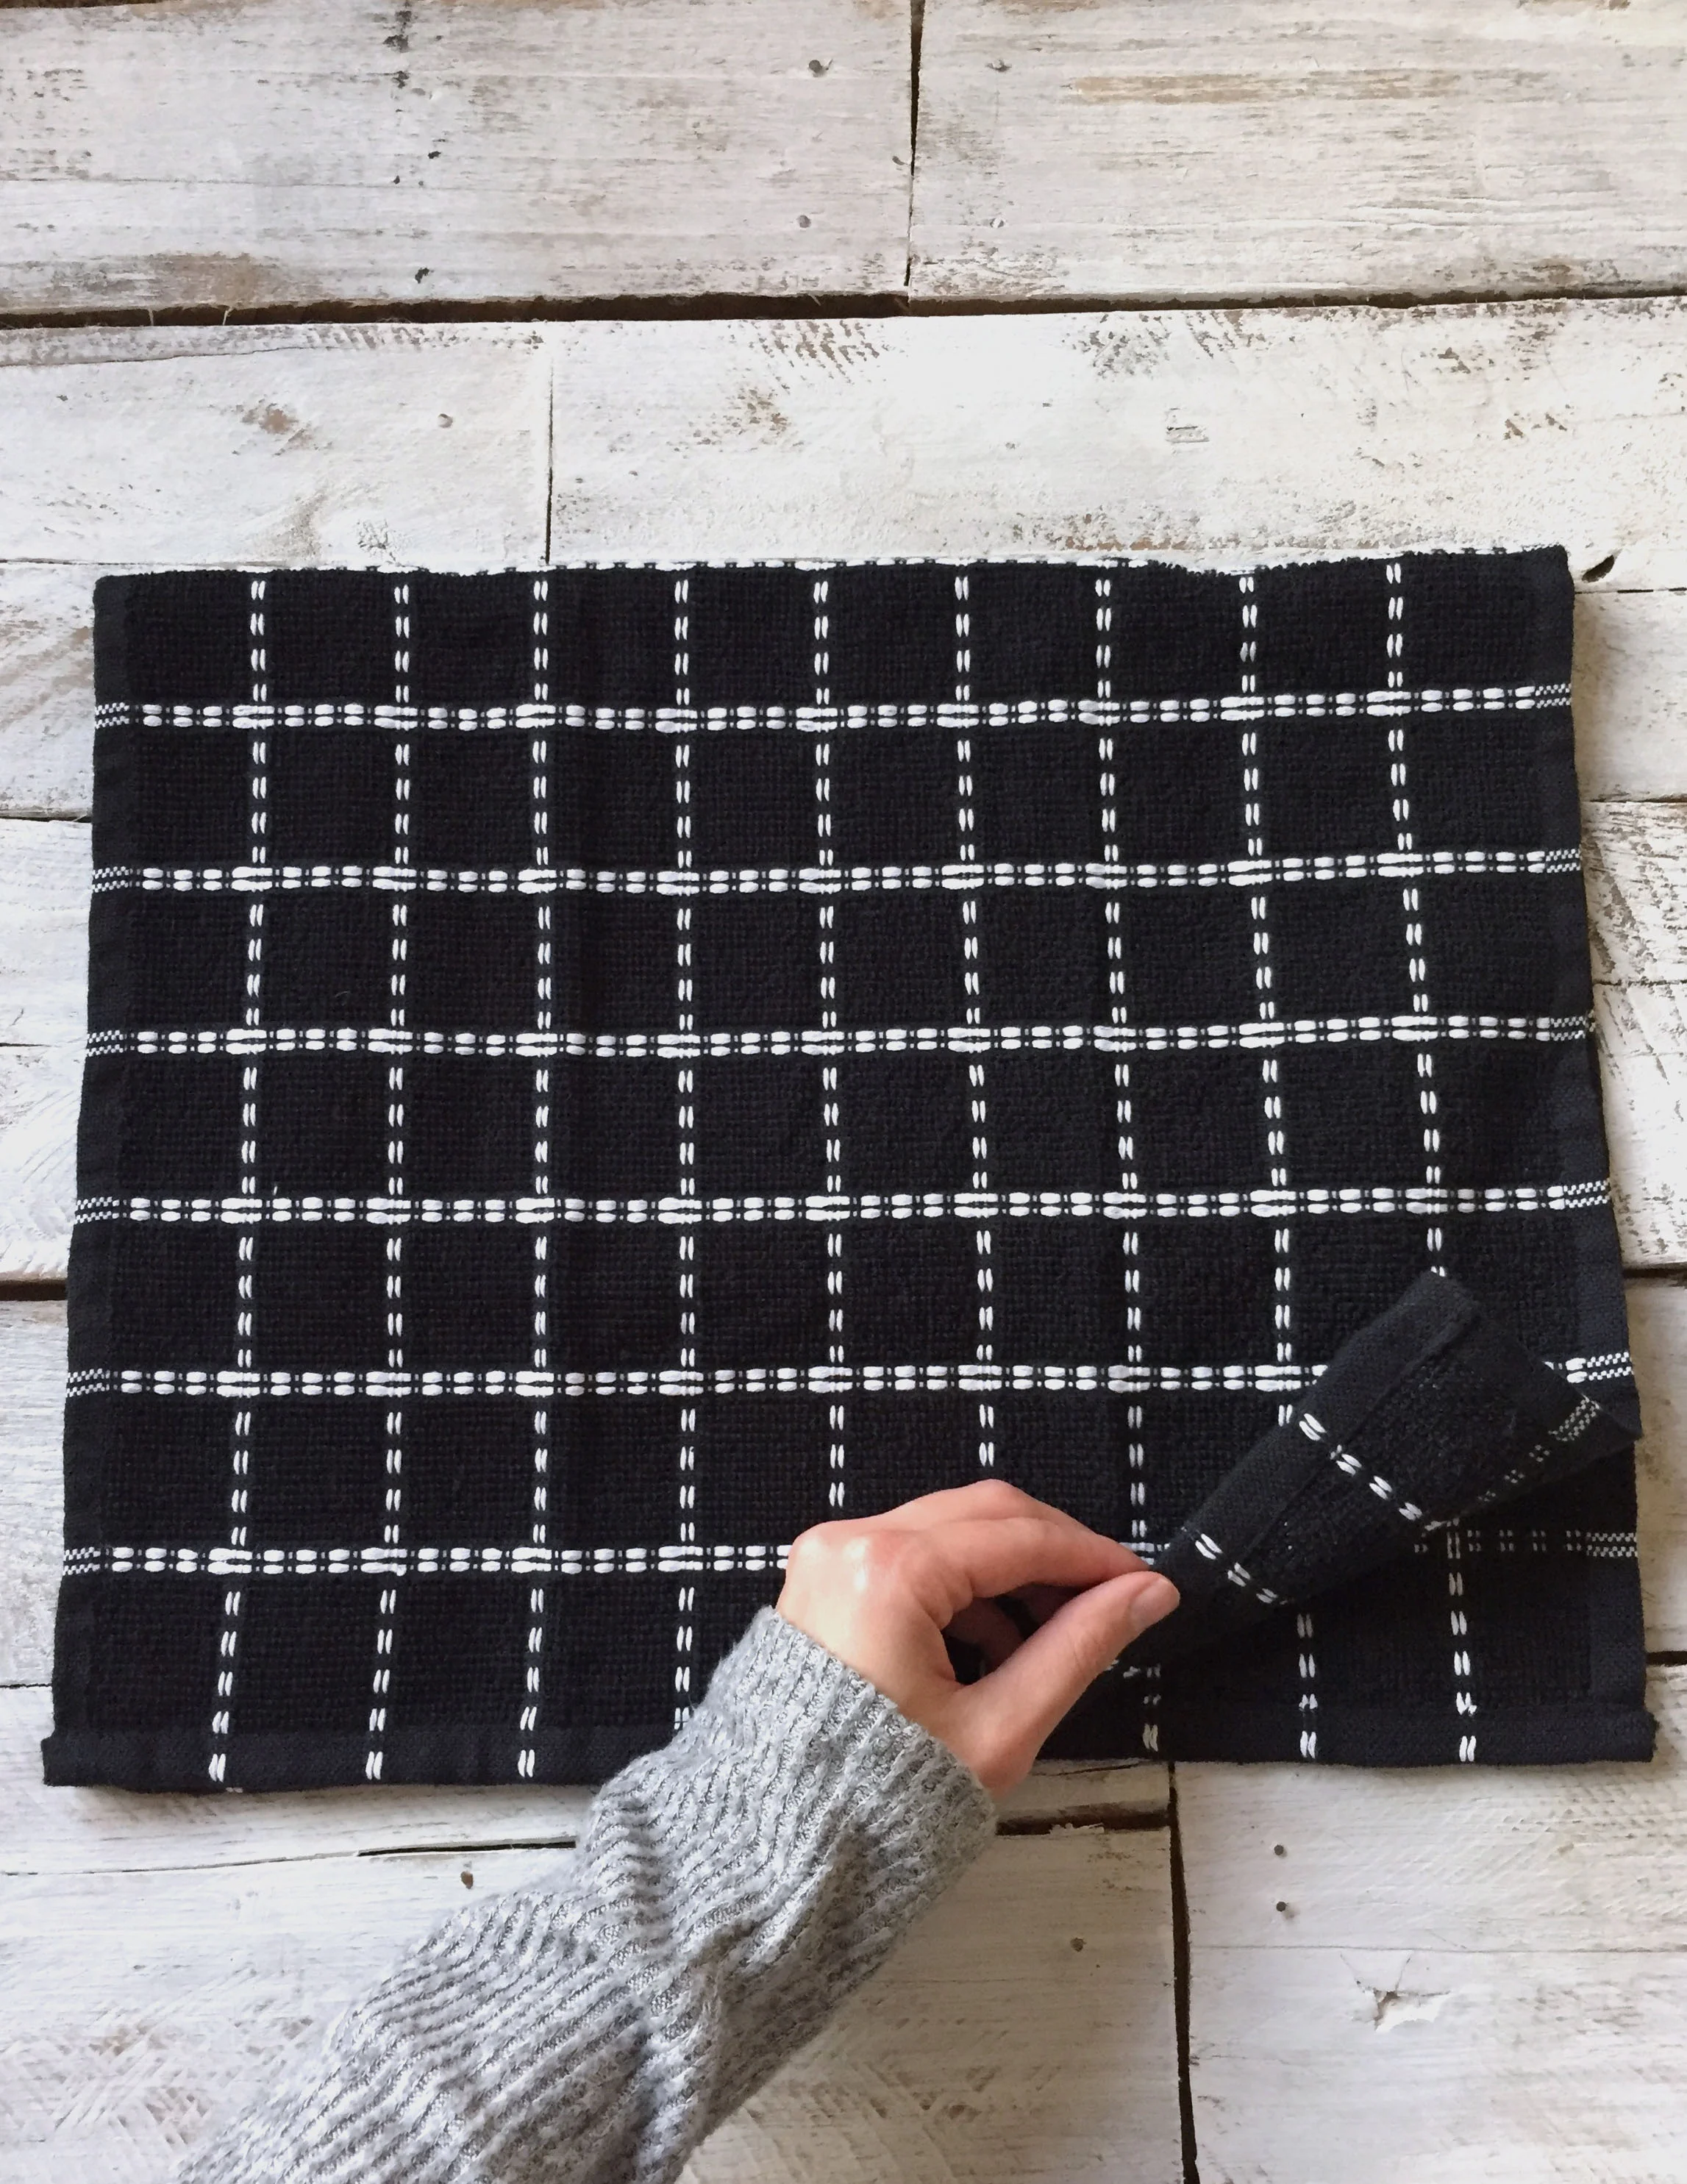
First, you'll take your towel and fold it crosswise, or joining and aligning the two short ends like in the photo above. You could wash your towel before starting. I was kind of a rebel and didn't because I was too impatient. teehee.
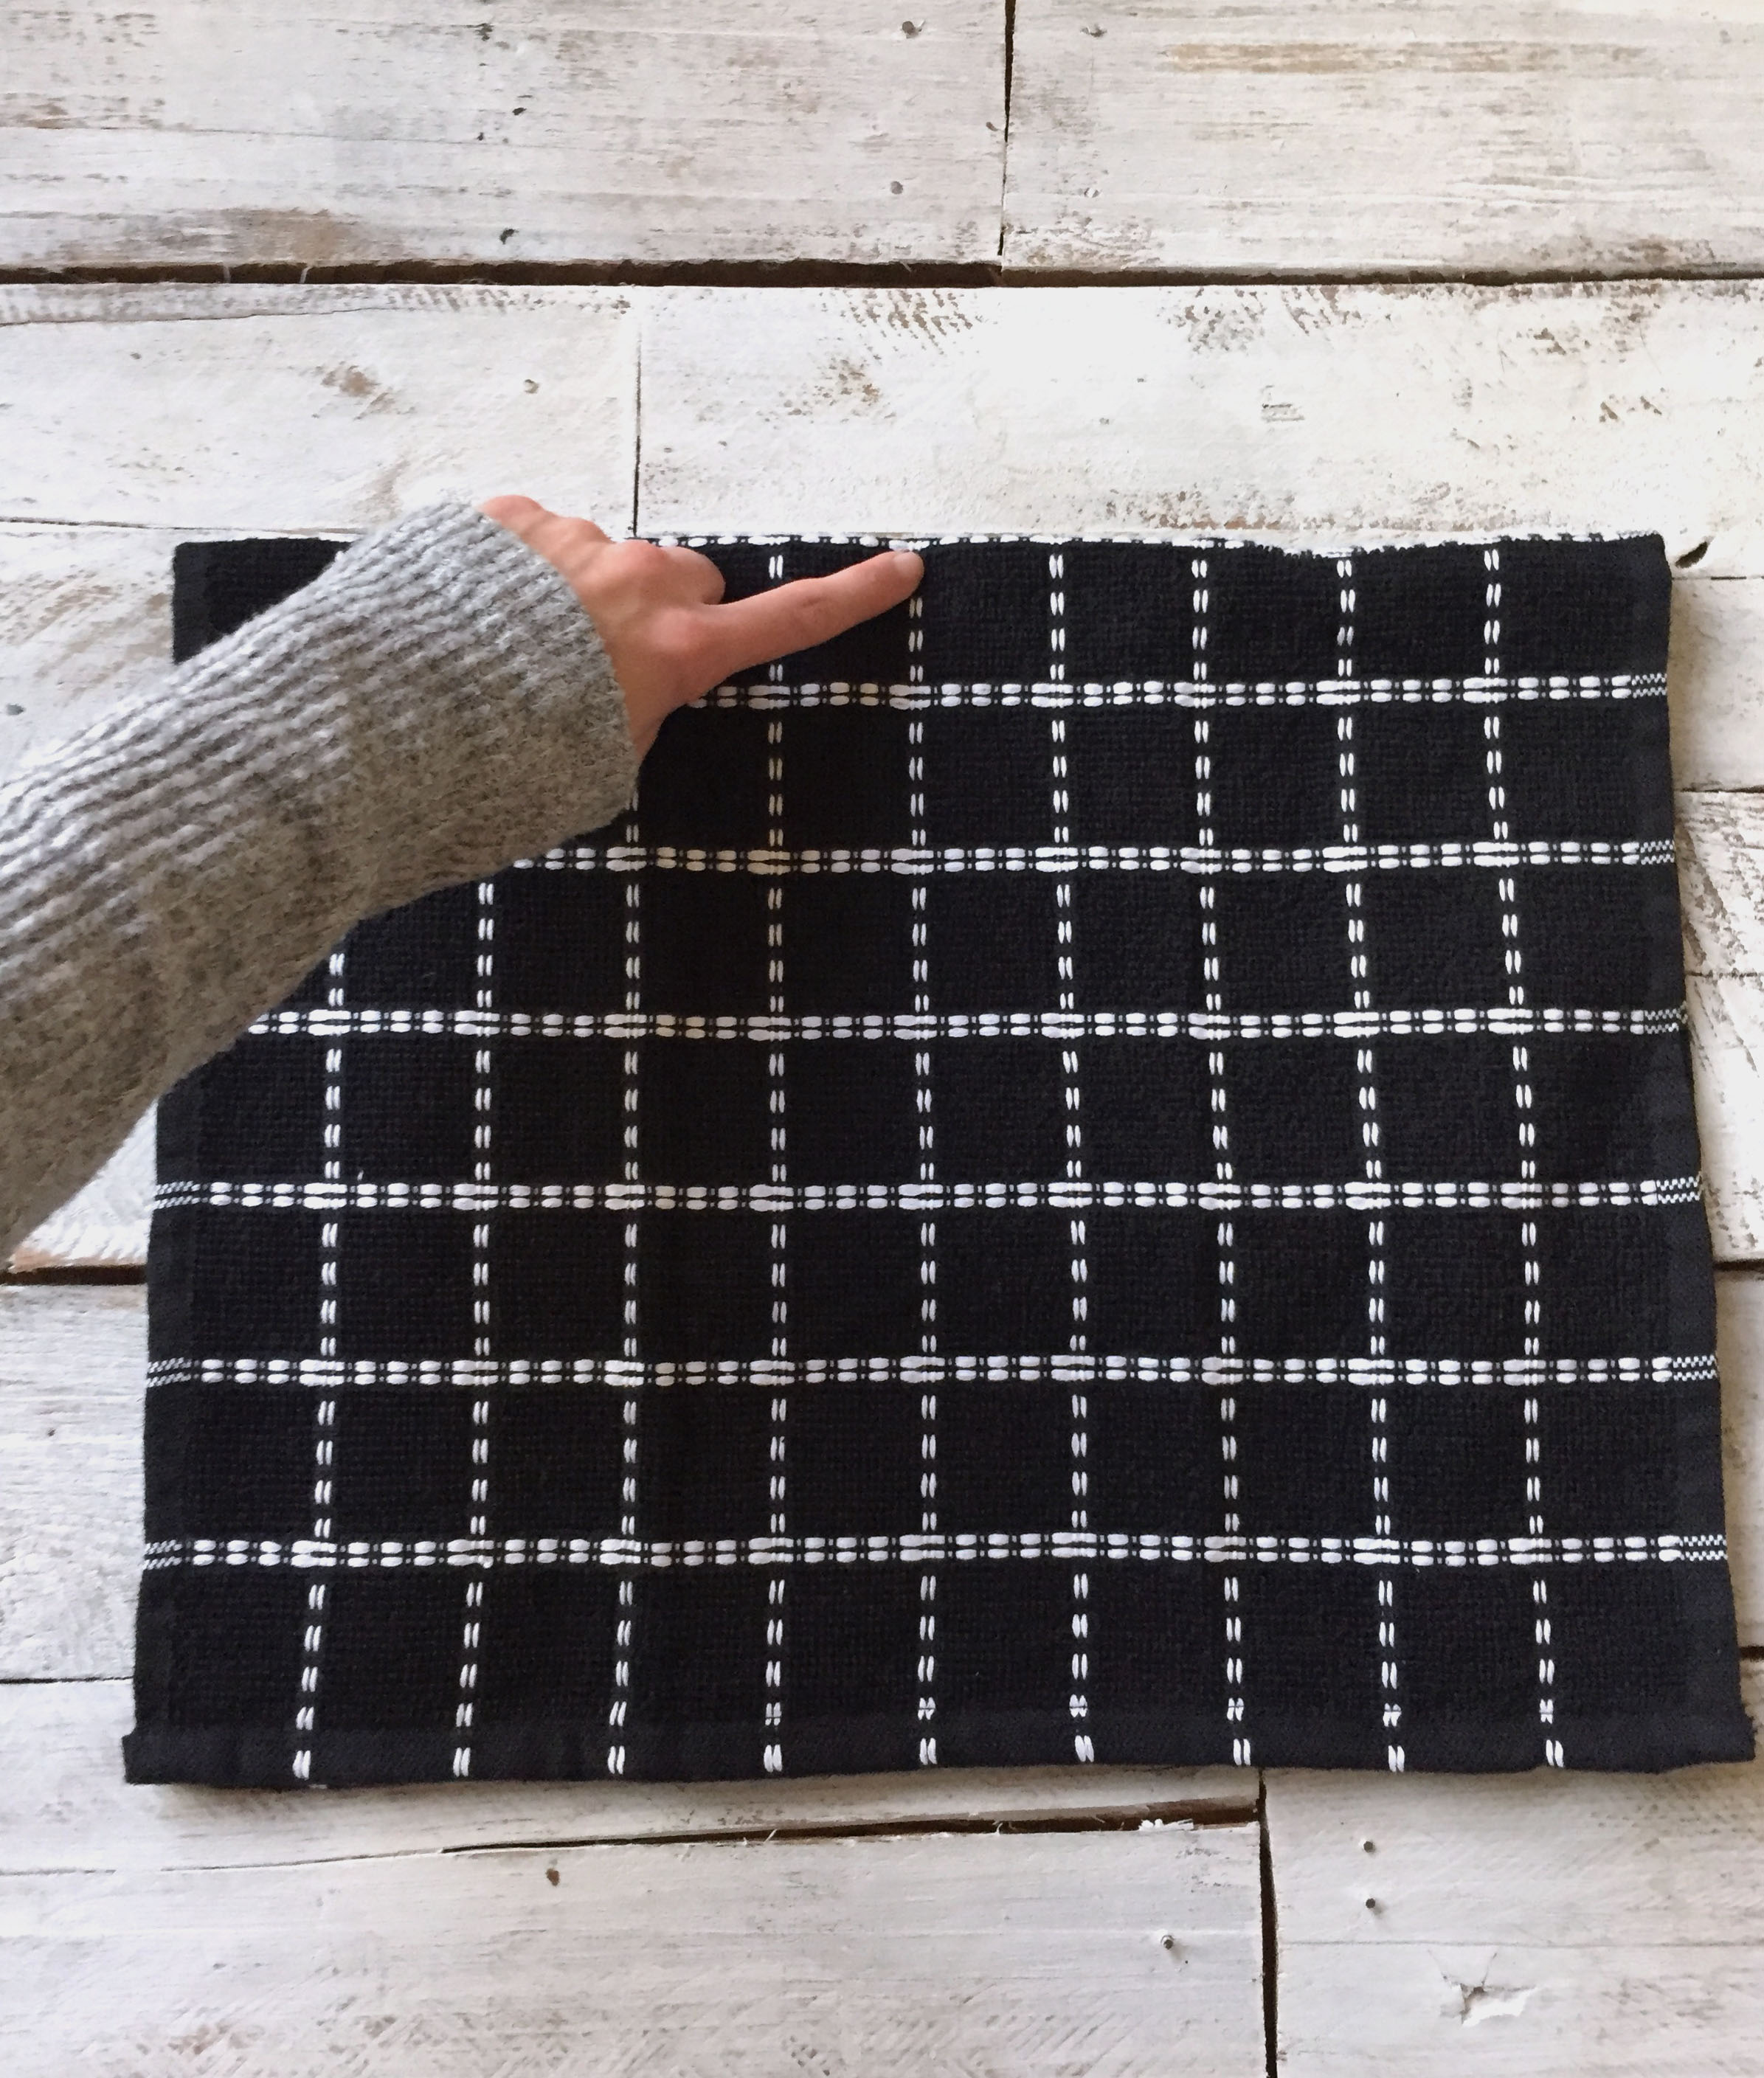
Then you'll need to find the center point, like to what I'm pointing to above. You can find the center by measuring your towel and dividing by 2. If you use a 15" wide towel, the center will be at 7.5 inches. You can mark this spot with a pin if you'd like.

Then you will fold in both of the sides to your center point, making sure they align all the way down. After you do this, it may be helpful for you to iron the folds on the top of the towel, to have a crisp fold. This will also help when you sew. Then you will pin these folds down with a couple of sewing pins. **You will be sewing through all the folds on the very top**

Before you begin sewing, something that helps out a ton with spacing is drawing little ticks on the side of your thumb 1/4 inch apart with a pen. Using this as a guide ensures that your stitches will be nice and even.

Then take your yarn needle and a long strand of your yarn, and prepare to sew along the top of your towel. Tie a knot at the end, to act as a stopper when you pull your yarn through. You will work your blanket stitch from the front of your towel, or the side that doesn't show the folds.

To begin sewing the blanket stitch, you will insert your needle from the center of your folds.You will insert the needle about 1/4 inch down from the top on the very edge, and through the front. Then you will pull your yarn through. Your knot you made will be on the inside of your fold.

Then you will go back over the top, inserting your needle from the back and into the same space you first inserted your needle. Don't pull all the way through yet.

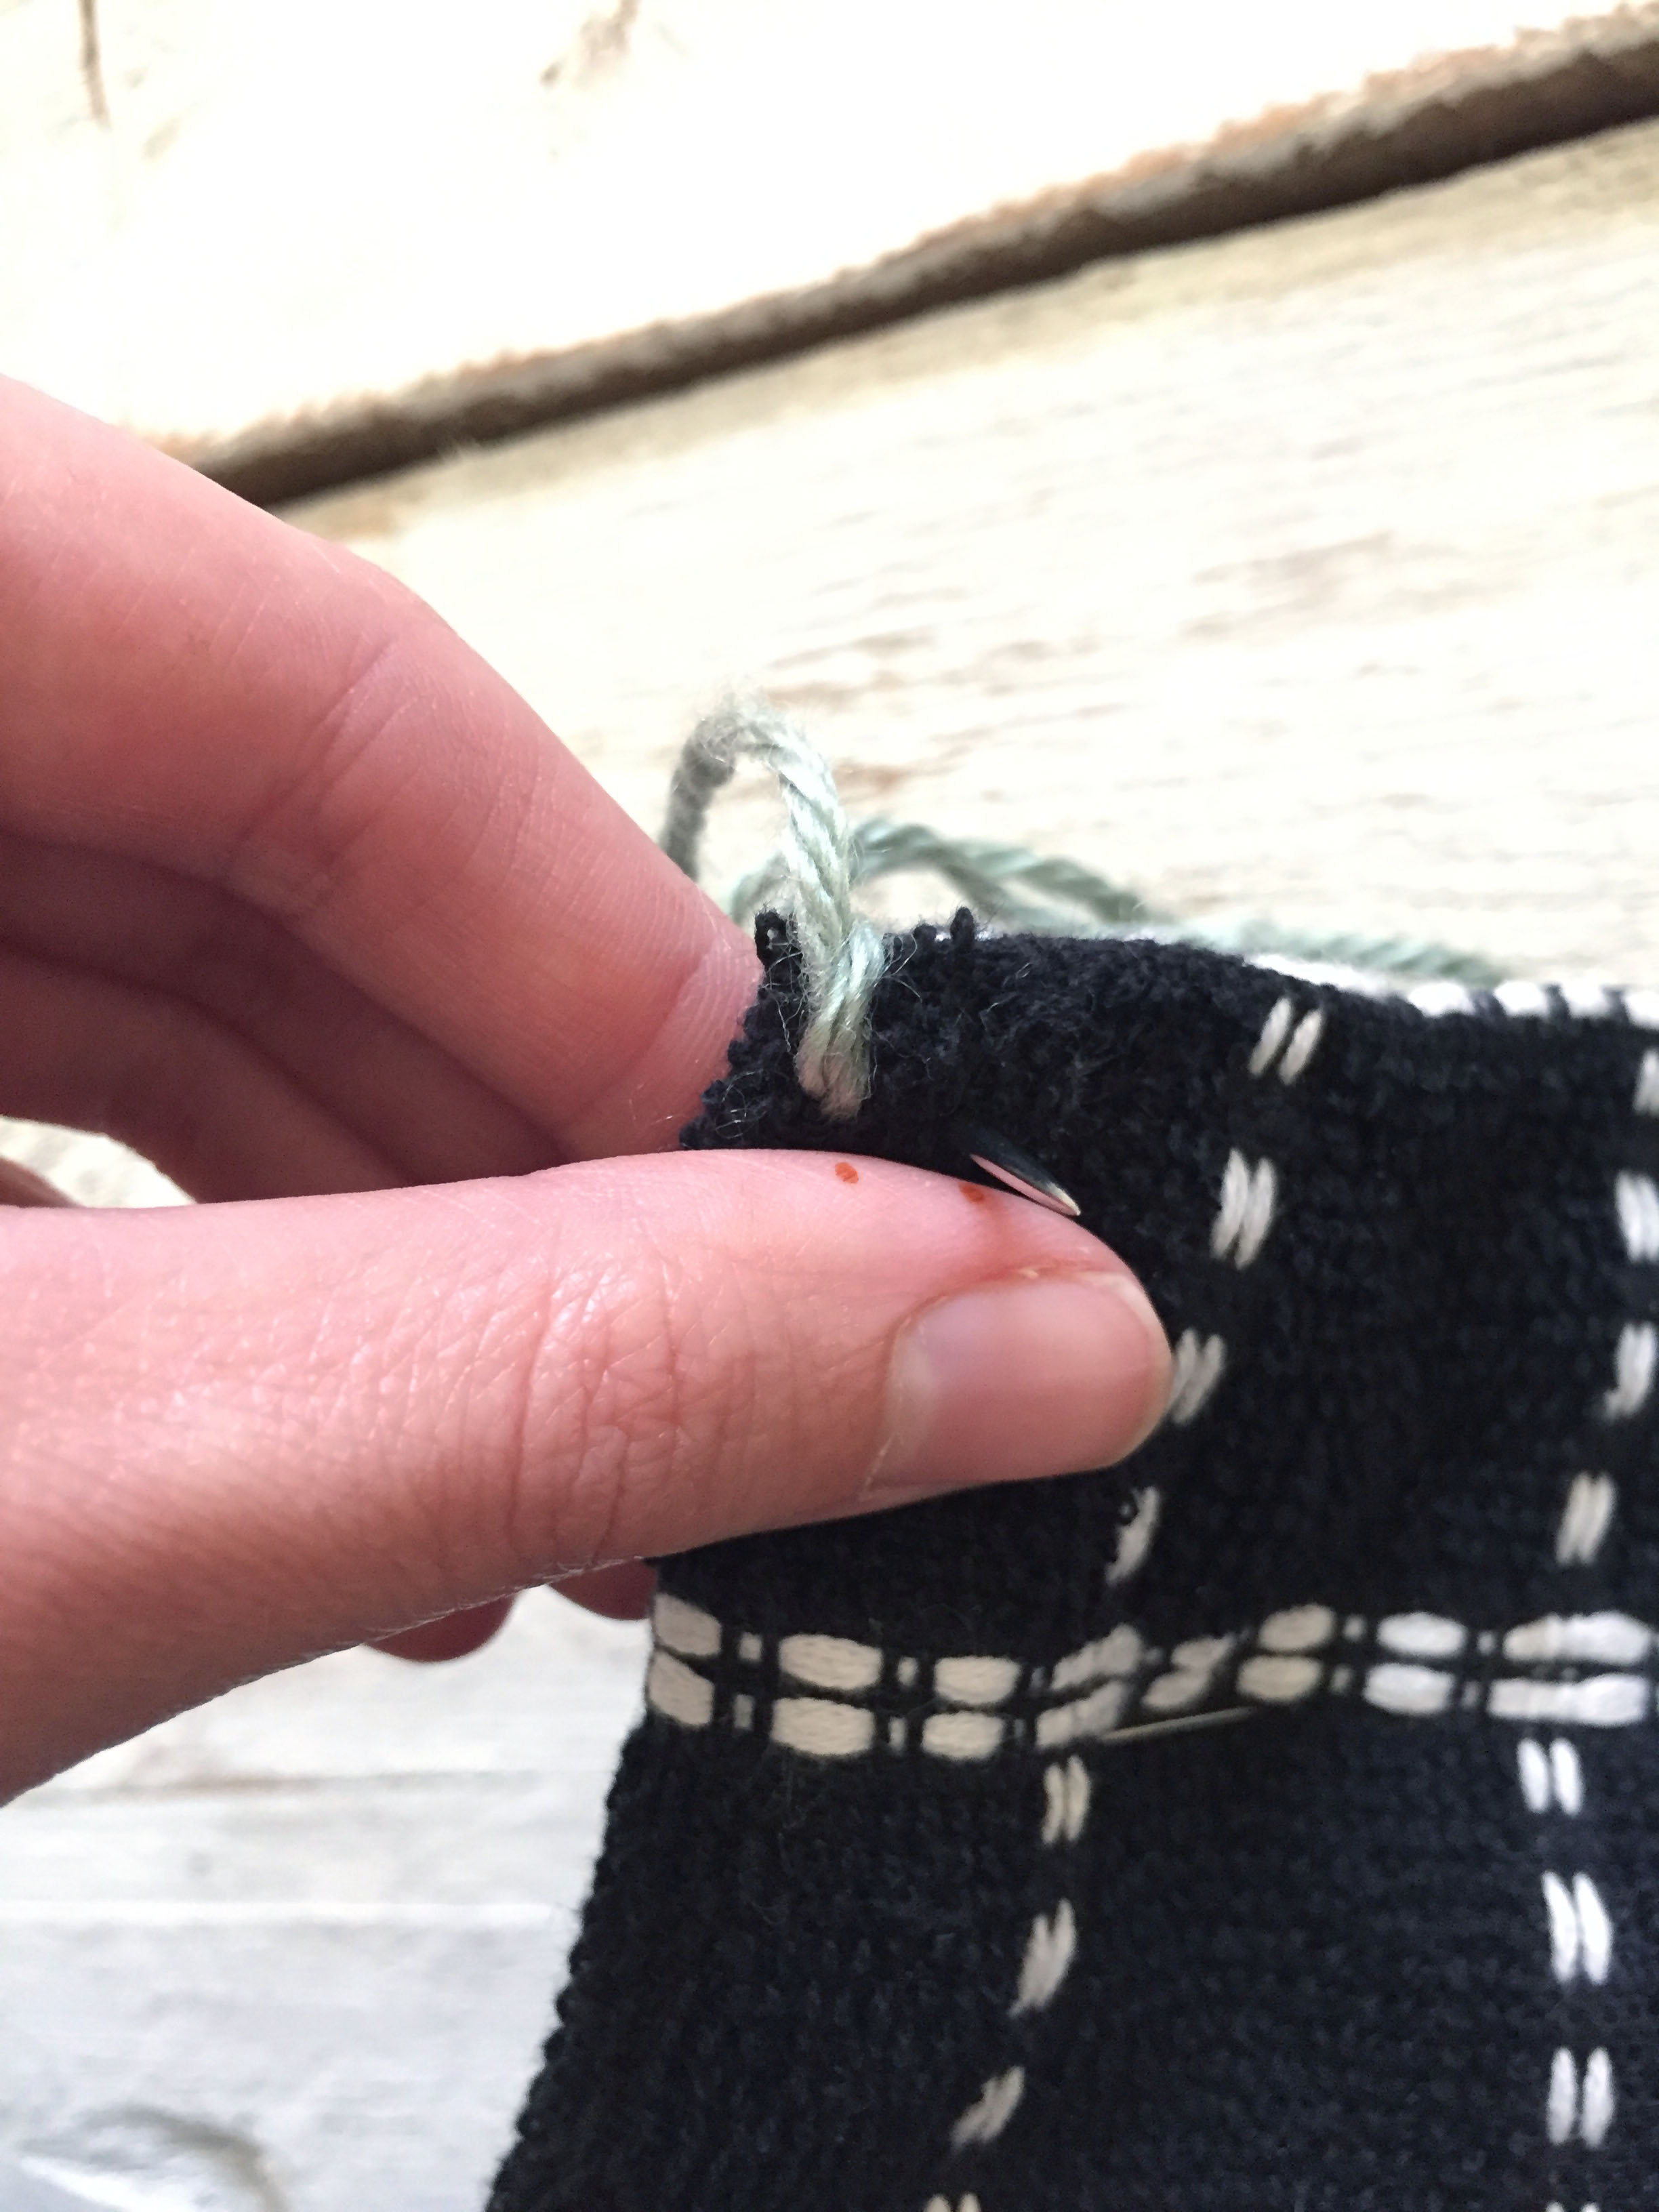
Before pulling all the way, you will insert your needle into the little loop like in the photo above.

Then you will pull the yarn through.
To continue sewing, use the little guide on your thumb to insert your needle 1/4 inch away from your previous stitch, the stitches will also be 1/4 inch down from the top-that you'll have to eyeball. You will ALWAYS insert your needle from the back to the front. Then pull through, but not quite all the way.

Just like with first stitch, before you pull all the way through, you will insert the needle through the loop. Then pull all the way through. Continue the stitch, every 1/4 inch along the top, until you get to the other side. I ended up having 32 total little "ticks" along the top. I wrote the crochet pattern for this amount but it is easy to customize if you end up sewing a slightly different amount.

When you get to the end, insert your needle down into the top of the fold, between the two folds, this is so you can conceal the end. Tie a couple of knots to secure.

In the photo above you can see my 32 tick marks or stitches. When you crochet, you will be inserting your hook into the spaces in between the ticks. This means that I will work 31 sts into the spaces.
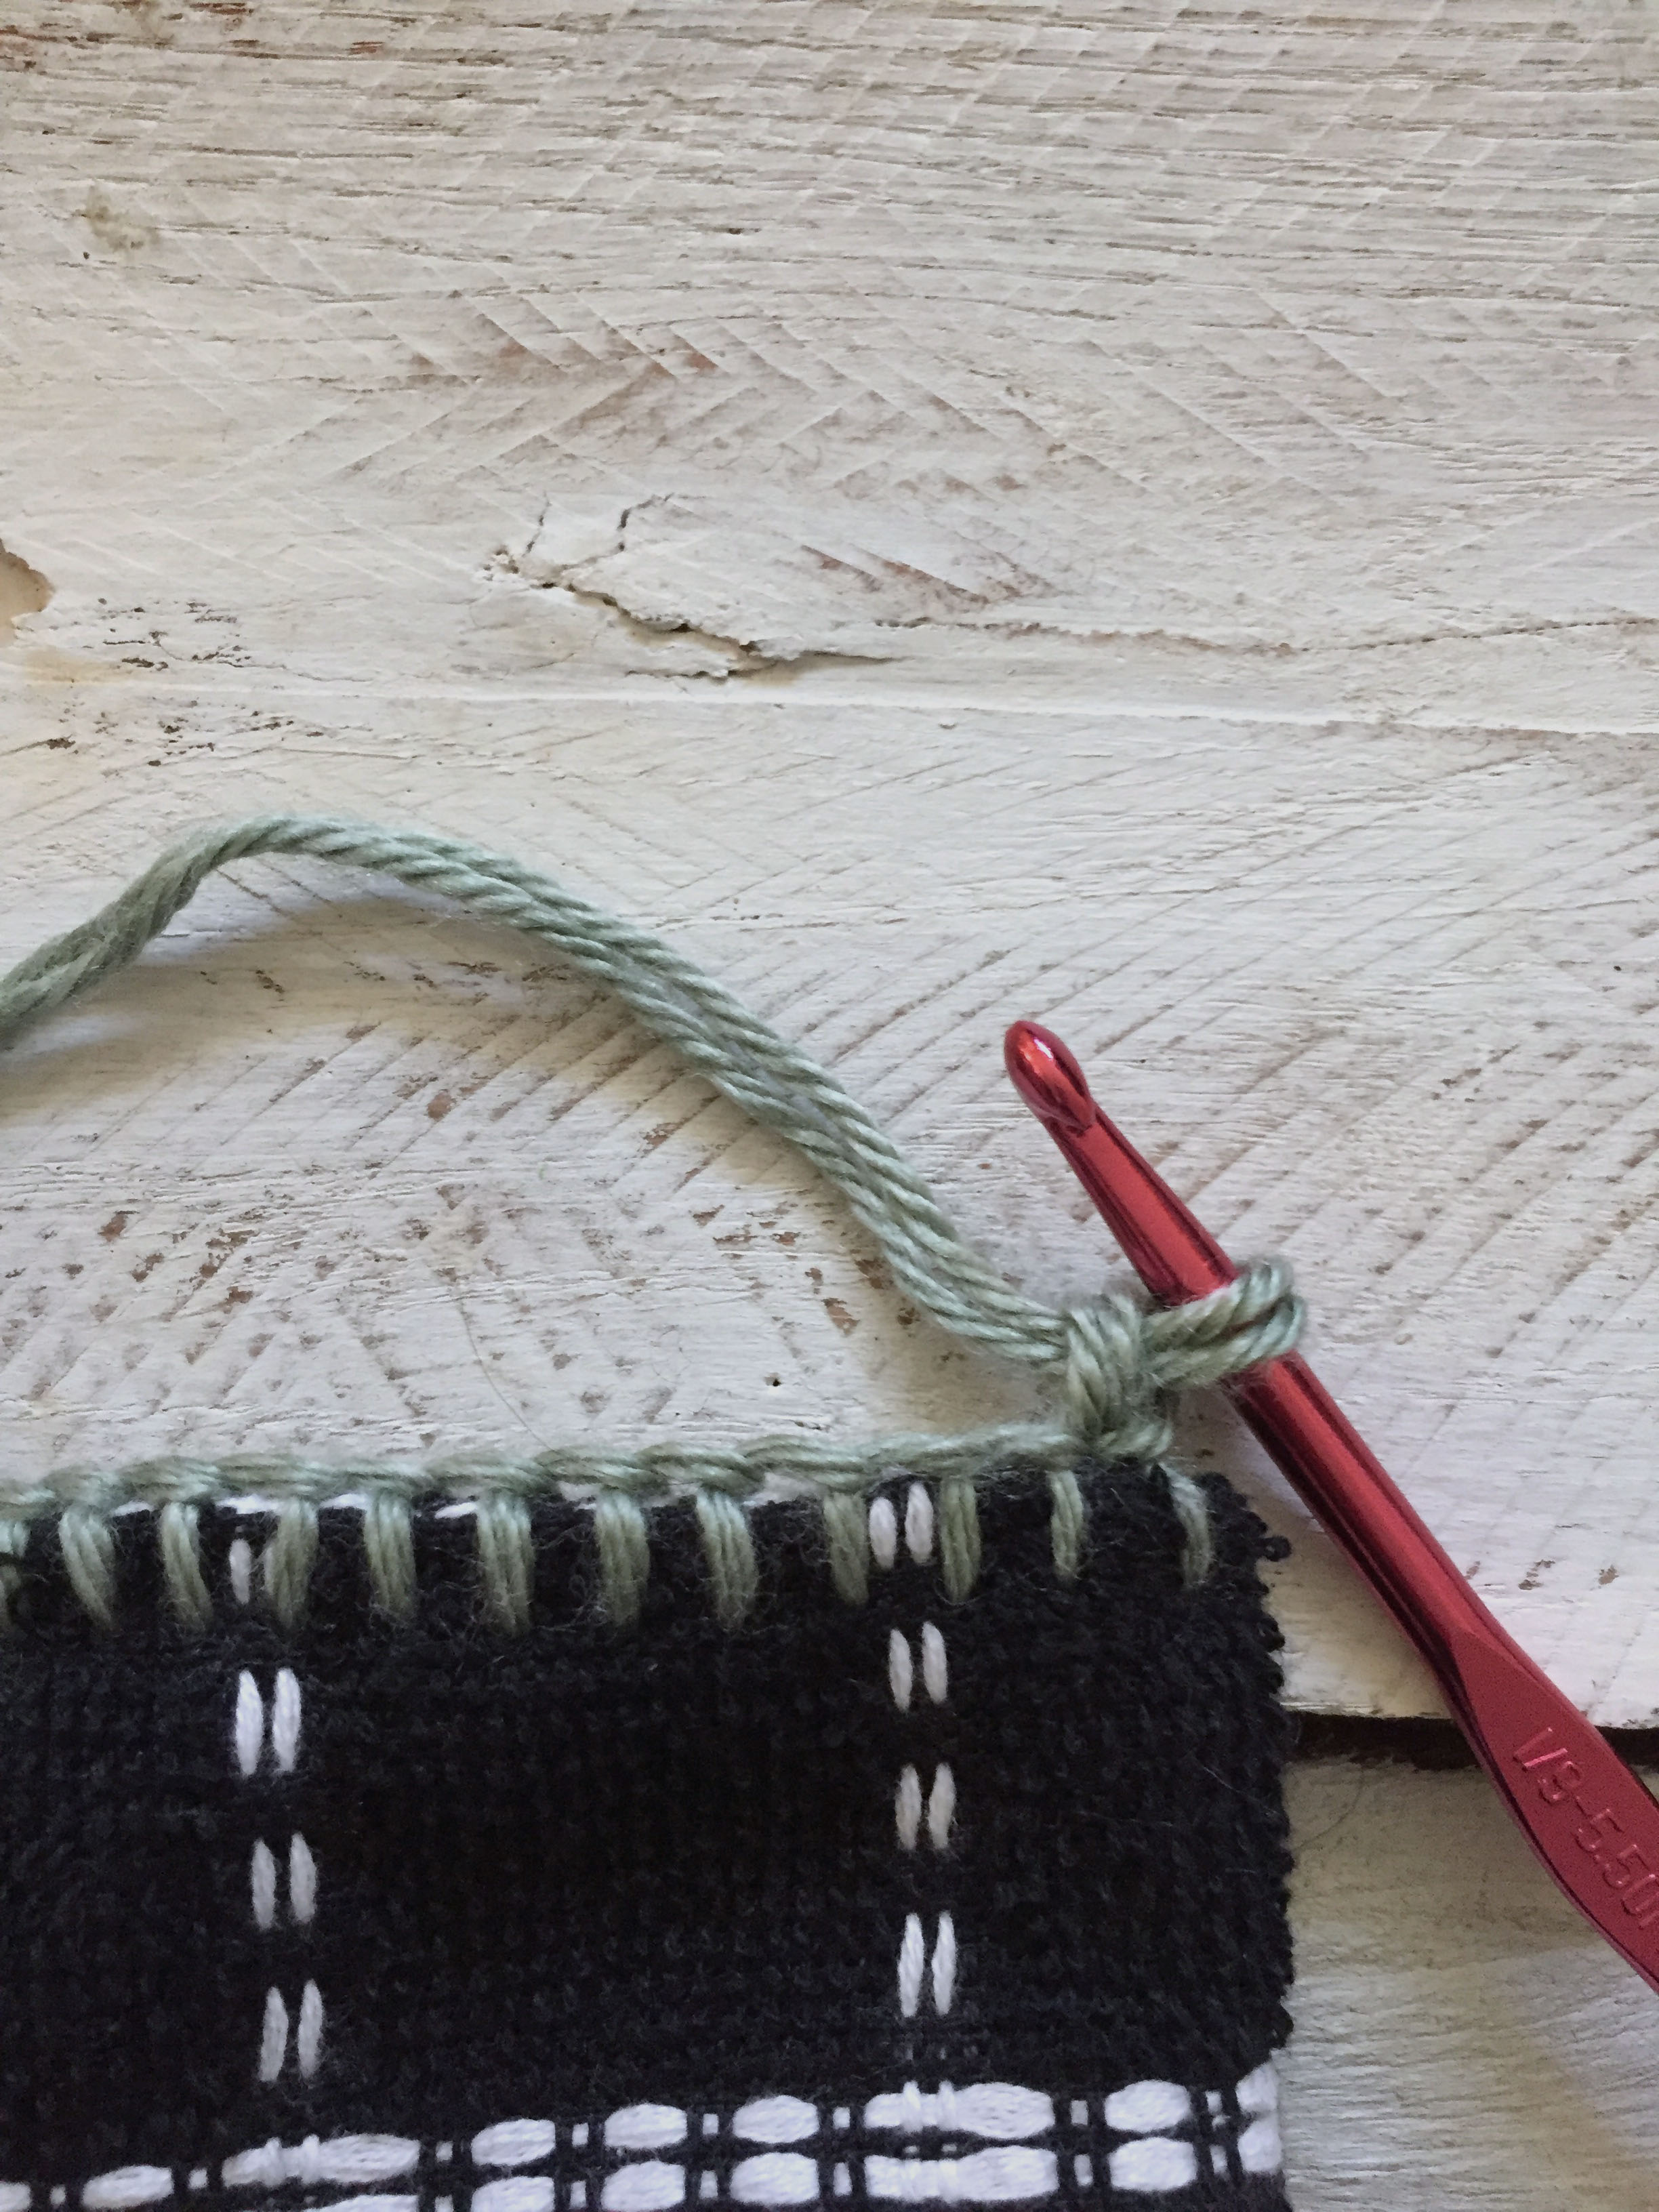
**It's okay if you sew a slightly different amount of "ticks", you will just have a different stitch count than I do.**
Row 1) To begin crocheting, draw up your TWO STRANDS of yarn in the very first space on the edge. Then ch 1. Work one sc into the same sp you drew up in, and one sc across the entire top. (31 total sts)
Row 2) ch 2, turn, dc2tog, dc2tog, dc across the row until there are four sts left, then dc2tog, dc2tog (27 total sts)
Row 3) ch 2, turn, dc2tog, dc across the row until there are two sts left, then dc2tog (25 total sts)
Row 4) ch 2, turn, dc2tog, dc across the row until there are two sts left, then dc2tog (23 total sts)
Row 5) ch 2, turn, dc2tog, dc across the row until there are two sts left, then dc2tog (21 total sts)
Row 6) ch 2, turn, dc2tog, dc across the row until there are two sts left, then dc2tog (19 total sts)
Row 7) ch 2, turn, dc2tog, dc2tog, dc across the row until there are four sts left, then dc2tog, dc2tog (15 total sts)
Row 8) ch 2, turn, dc2tog, dc2tog, dc across the row until there are four sts left, then dc2tog, dc2tog (11 total sts)
Rows 9-12) ch 2, turn, dc across row (11 total sts)
Row 13) ch 2, turn, dc2tog, dc in two sts, ch 2, sk two sts, dc in three sts, dc2tog (9 total sts, including the ch's) ***so for this row, you will be skipping two ch's in the middle of it to create the button hole. If you have a different amount of sts than I do, you'll just have to account for one dc2tog at each end. Then you'll work equal amounts of dc's on each side of the skipped sts. If you have an odd amount of sts, like I did, just add one more to one side***
Row 14) ch 2, turn, dc2tog, dc across row until there are two sts left, then dc2tog (7 total sts)
Finish off, and weave in ends.

Then you will sew on your button. I just folded over the top to see where I'd like the button to sit, and decided I wanted to sew it on about row 3.

I used a strand of yarn and my yarn needle. If your button holes aren't quite big enough for your yarn and needle, thread and regular needle are fine too!
Once your button is sewed on, you'll just fold over the top and insert the button into your button hole.
Then your lovely towel topper is complete!! Weeeee!

Isn't it lovely? I'll be making these babies for multiple people this Christmas for sure! It'd even be a cool gift to pair them with a mug and a package of hot cocoa..
If you make some of these towel toppers, please share! Tag me over on Instagram-- I love seeing your finished pieces. :)
Happy making!
Meg


