


How to Crochet Around Fabric (Three Different Ways!)
/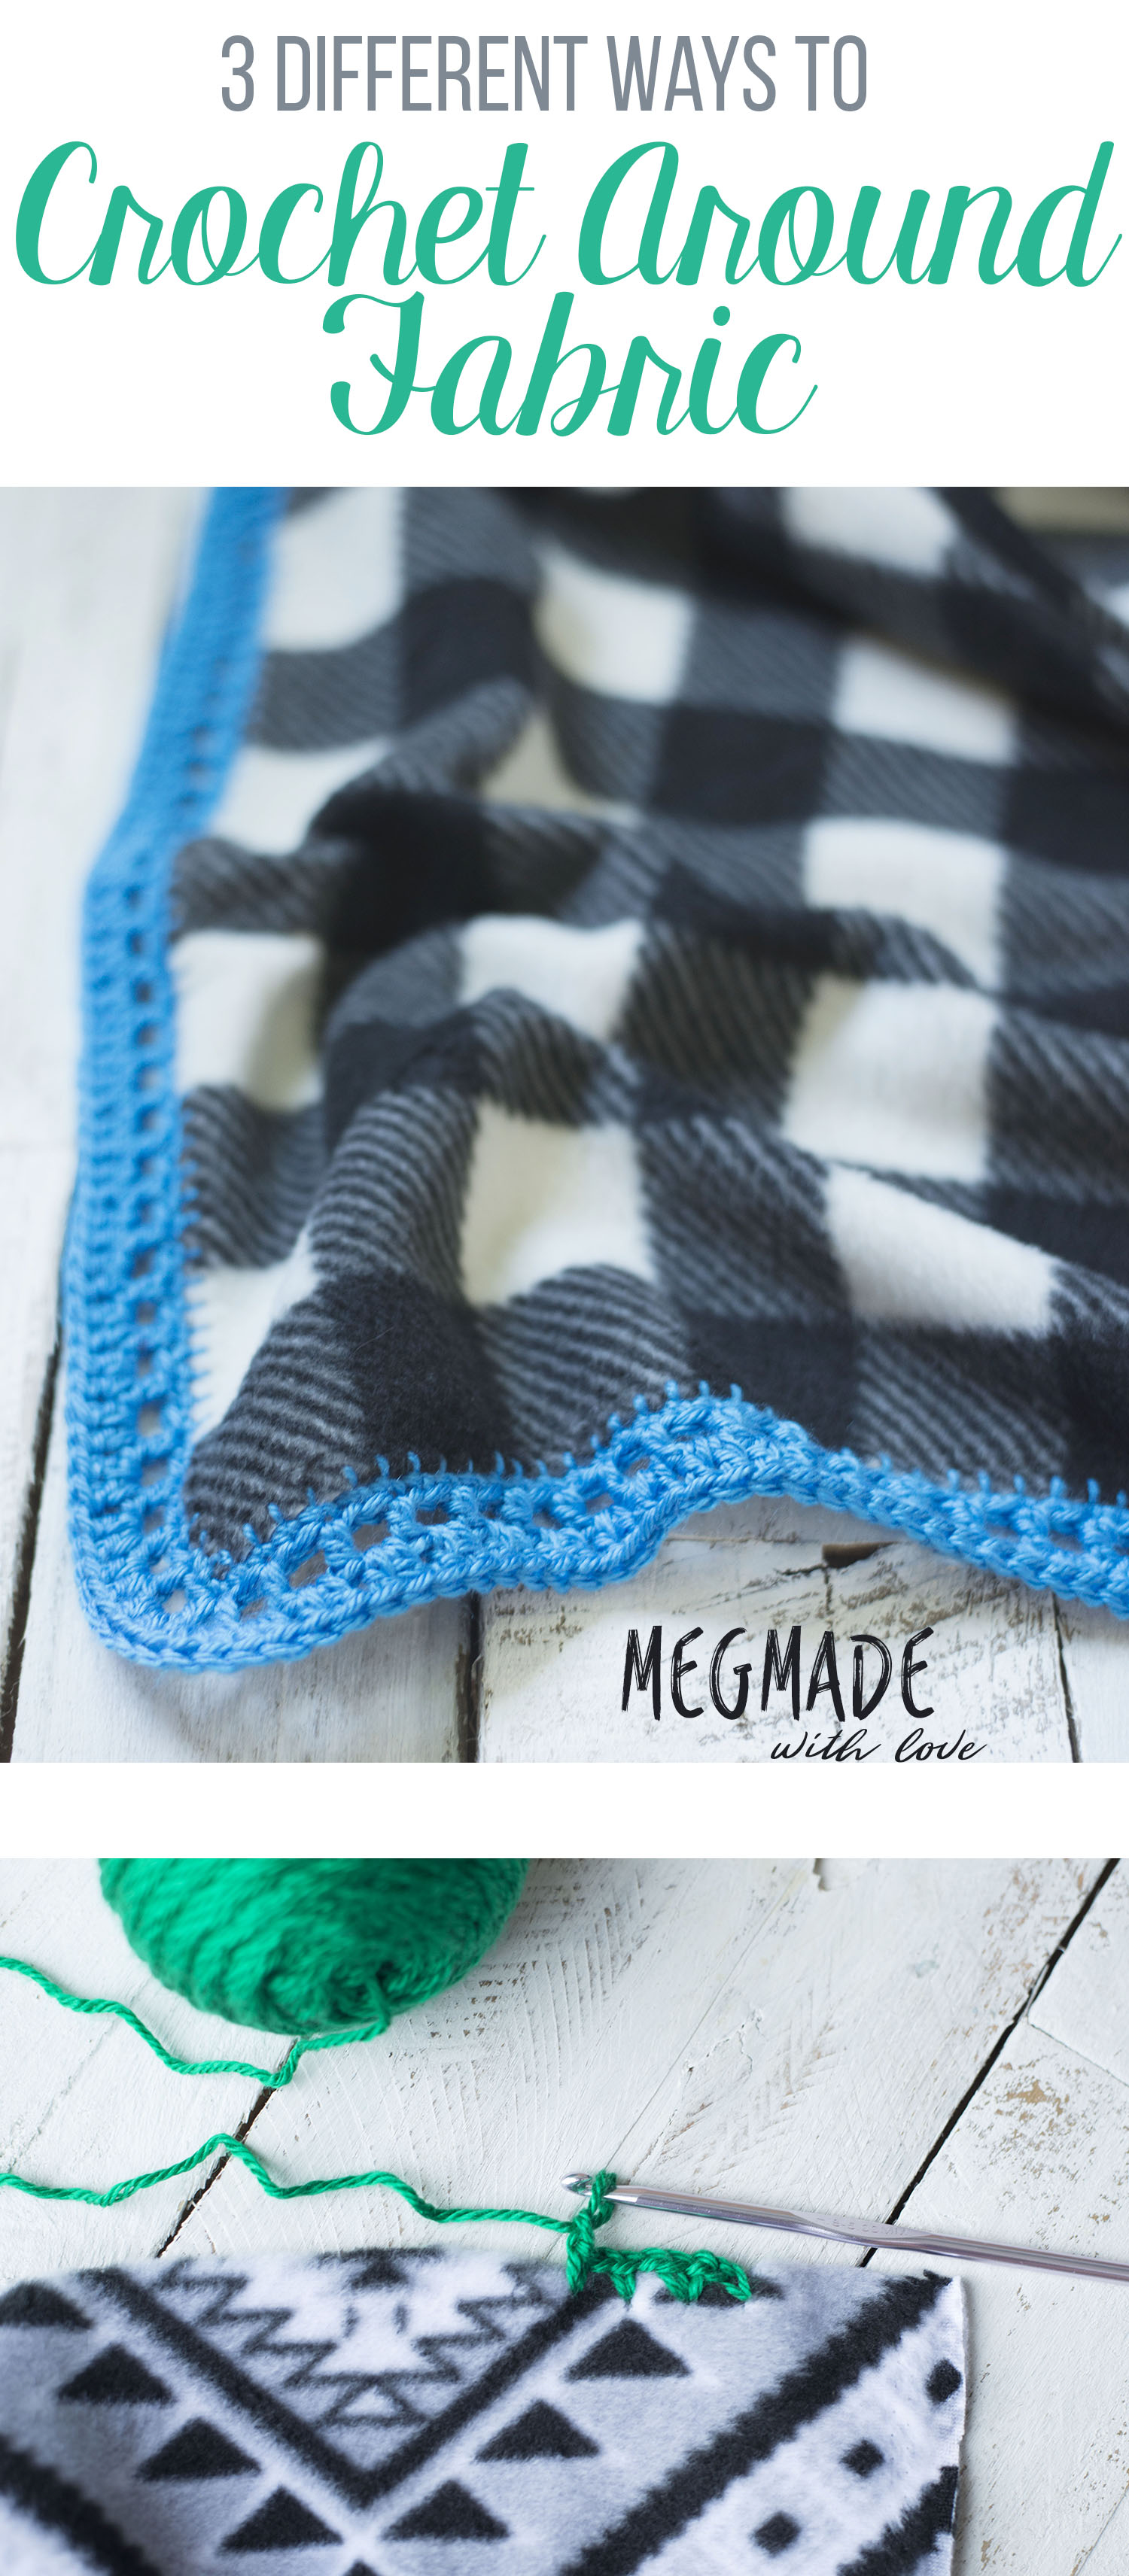
Here recently I was on a baby blanket making spree. One of my friends had a shower, and then another friend asked if I could make a couple for showers she was going to also. And in all honesty, I just didn't want to spend all my time crocheting a full blanket, so I decided to crochet around fleece, because hey, it's nice and quick.
Now, something I try to live by is "use what ya got"... I am a thrifty gal through and through, so if I don't have a certain tool and product to achieve what I'm wanting to make, then I find a way to do it using what I already have on hand. This was one of those times. I've seen where you can make the holes into your fabric using a skip stitch rotary cutter, but I don't have one. Nor do I see myself using one all that much. So, I thought I'd show you here a couple different ways you can crochet around fabric (the last one is a tutorial provided by an outside source, using the rotary cutter).

Blanket Stitch
So for the first example, I'm going to show you how you can do a simple blanket stitch around the edge of your fabric. This was how I did my first blanket. I will say that this way wasn't exactly my favorite, as working the blanket stitch was pretty time consuming, because of the length of yarn you need to get around the whole blanket without running out and starting a new strand. If you are okay with starting new strands, then maybe that would work for you, I just try to minimize the stray ends. This method does work though, and provides a good foundation for your crochet. If you're looking for a faster way, see the second tutorial in this post below.
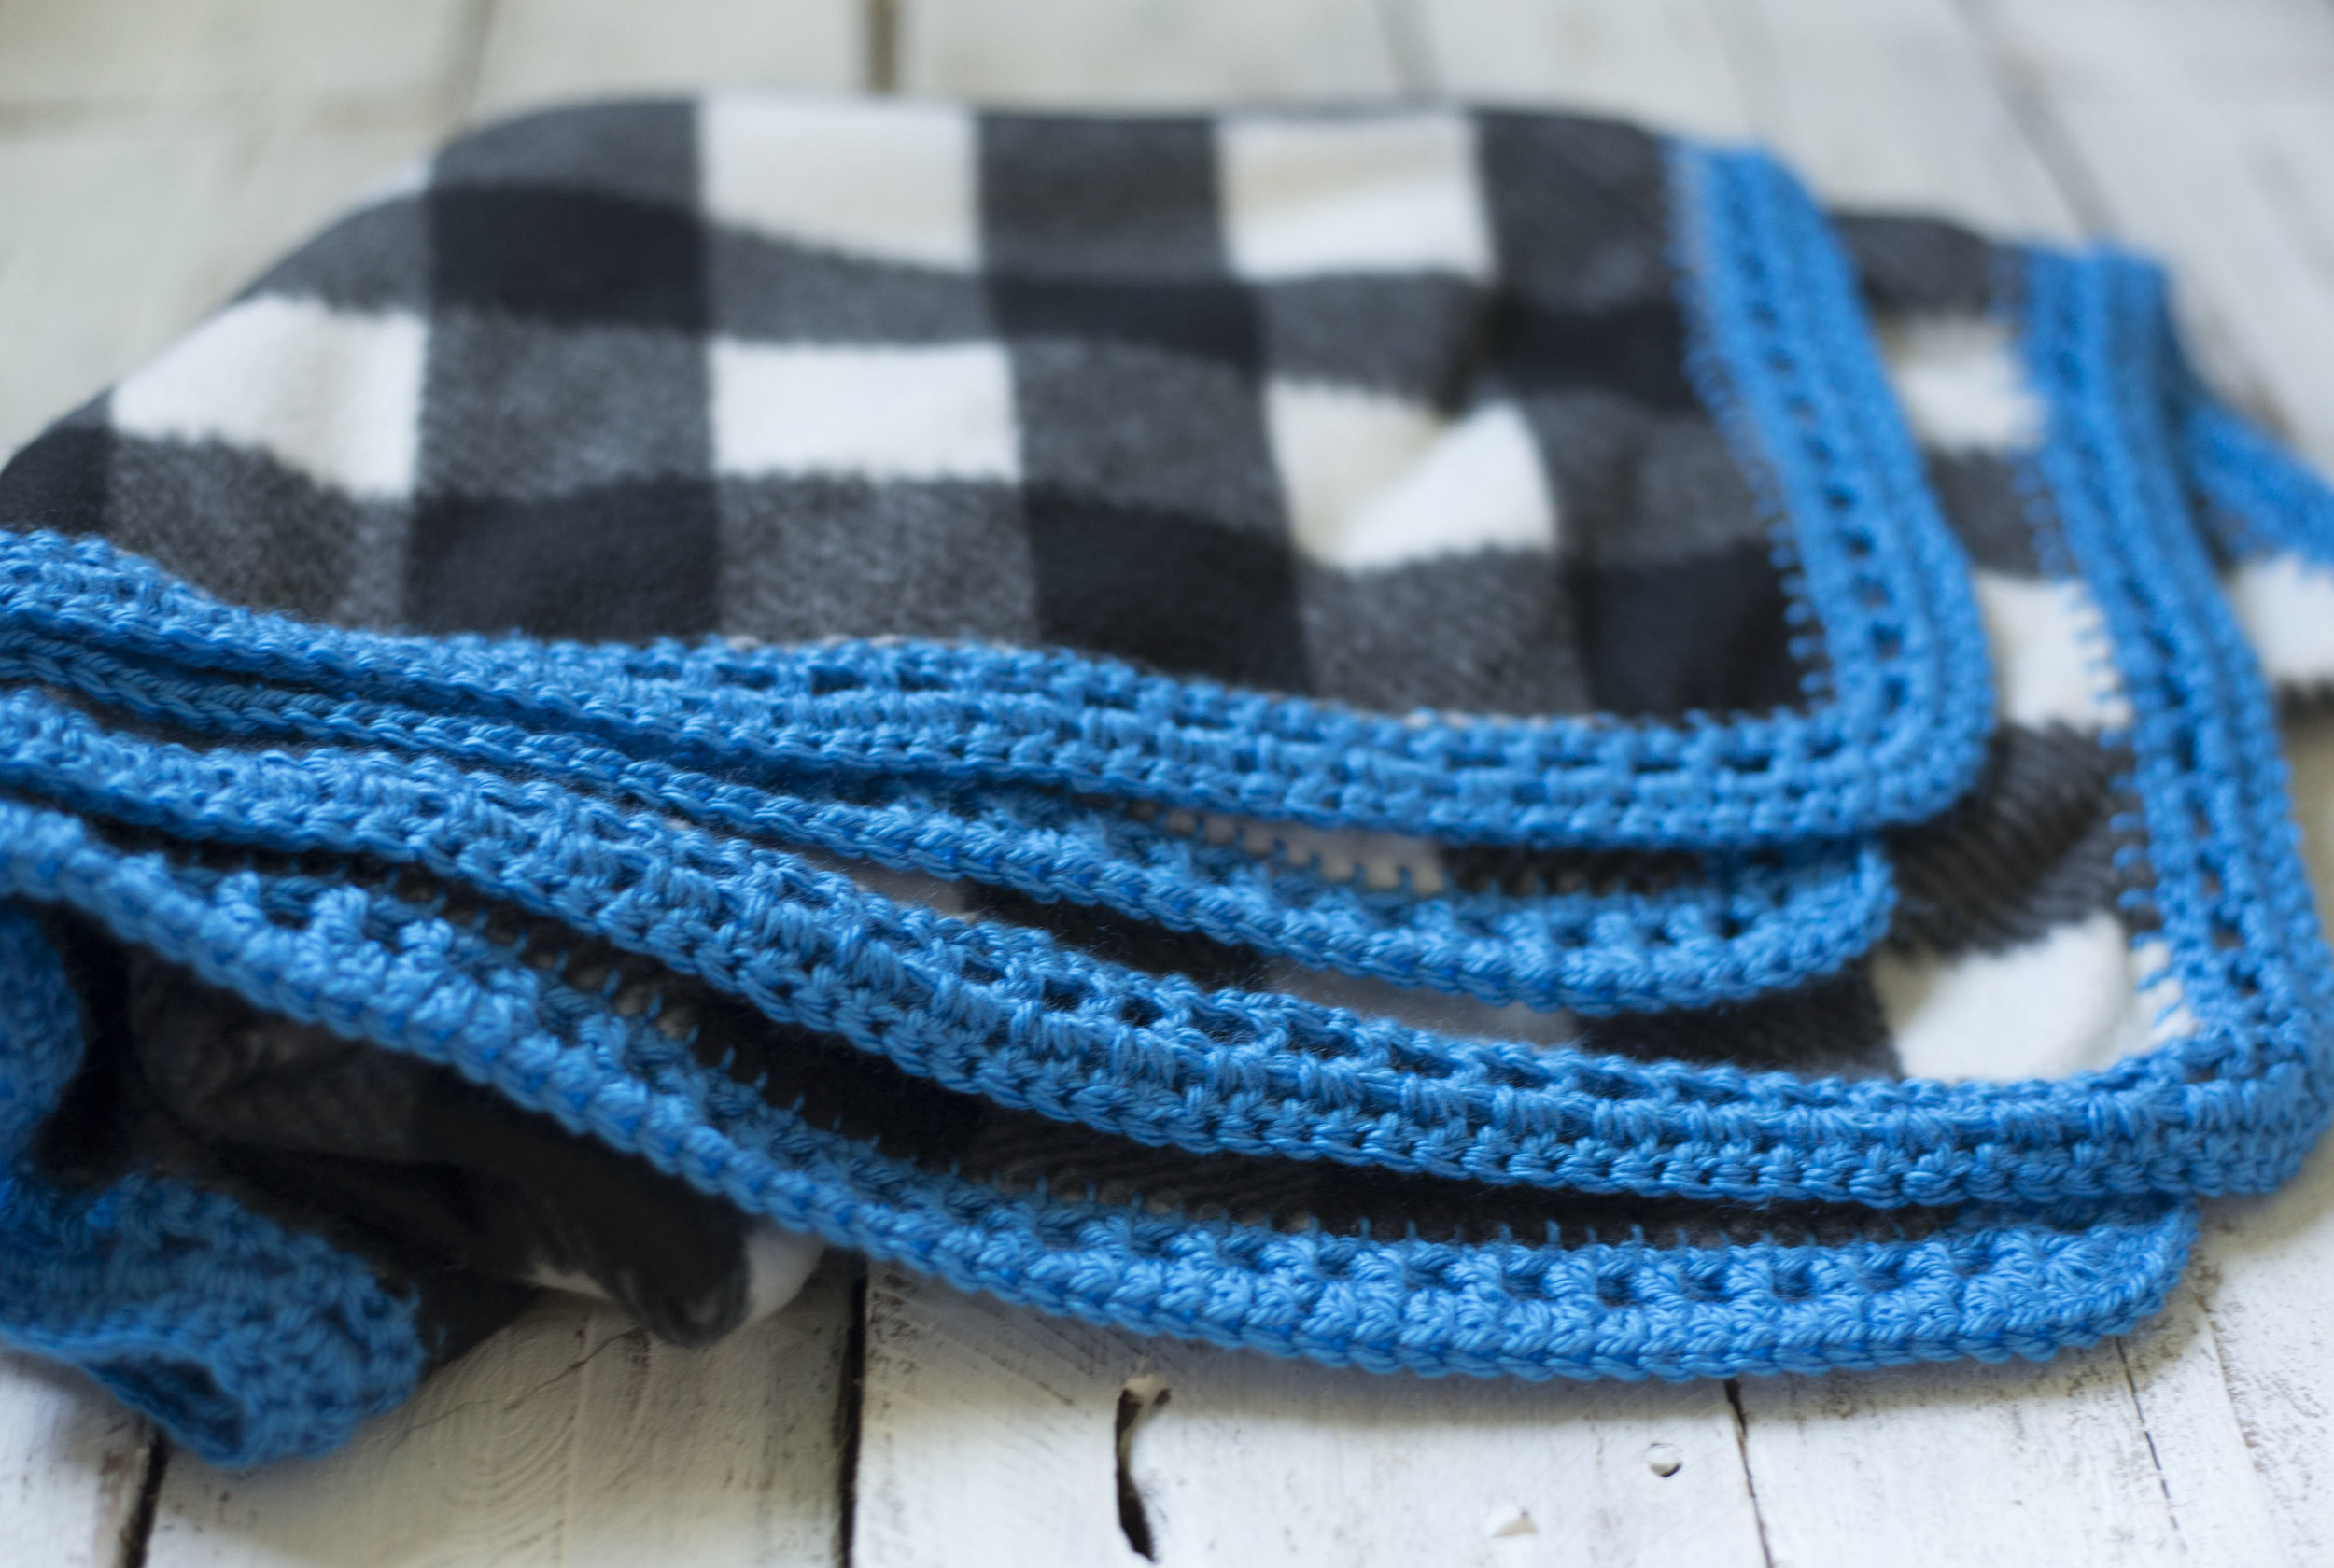
I gathered a yard of this buffalo print fleece I found at Wal Mart, a size H Hook, yarn needle and worsted weight yarn (I used Caron Simply Soft in Cobalt Blue)
*I cut my fabric into a 3x3 foot square*
On the topic of yarn length needed to get around the blanket without having to start a new piece: I figured out (the hard way..) that I needed to use a piece of yarn that was three times the perimeter of the blanket. And to measure that I just took my yarn and lined it up with the edge of my blanket times three.
P.S. When getting fabric, make sure its something that won't fray--unless you're okay with seaming it up.

To achieve evenness between the blanket stitches, I used this trick I saw some time back on Pinterest, where you make little marks on your finger how far apart you'd like your stitches. I chose to do mine 1/4 inch apart, and 1/4 inch from the edge. I wouldn't go more than 1/2 inch in between stitches.
Now I will say this: I just eyeballed how far away from the edge I was, but if you don't feel comfortable doing that you could draw a line on your fabric with washable marker along the edge to give you a guide for how far down to insert your needle. I didn't find it too challenging to make the stitches even from the edge.

To start the blanket stitch you'll need to knot your yarn at the end a couple times, big enough so it won't come through the hole you create with your needle. You'll thread your yarn, and insert your needle from the back and draw it all the way through (this is the bad part of the beginning, such a longgggg strand to pull through.. but it's great for when you're watching a show on Netflix ;).

Then you'll go over the edge, and back through the same spot you just entered in. Pull yarn through.

Then you'll insert the needle sideways through that stitch you just created.

Now for the rest of the stitches you will always insert your needle from the back of the fabric, using your finger as a guide for how far away from the previous stitch.

Once you pull the needle through, tug a bit of yarn through also.

Then you will insert the needle underneath the base of the strand of yarn (see above photo).

When you pull the yarn tight (don't pull too tight, or the edges will ripple!), the above photo indicates how it should look. Then you will continue around until you get to the space before your first stitch you made.
When it comes to the corners, you will follow the above steps, except you will insert your hook into the same hole three times (see photo).
Then you will connect the last and first stitch by inserting your needle sideways into the first stitch.
Then you will insert the needle into the base of that first stitch from front to back. Then cut your yarn long enough to weave in and tie a knot to the beginning strand.

To start your crochet border, you will insert your crochet hook into one of the blanket stitches, then draw through your yarn.

Make two chain stitches to begin your crochet stitches. Then you can tie a knot in your yarn end to secure it before weaving it in. Next you can begin to create any border you would prefer. I am going to provide the border pattern I used. I thought this one was super simple and quick. I didn't want anything frilly because I was making the blankets for baby boys.
So since my blanket stitches were 1/4 inch apart, I single crocheted in every blanket stitch. But if your blanket stitches were further apart, like 1/5 inch I would recommend chaining one between single crochet.

So then I single crocheted around the entire blanket, working two single crochet in the corner blanket stitches.
Join to the beginning chain with a sl st.
Then ch 4.
(Skip a st, then dc into the next st, ch 1) Repeat that around your blanket, working two dc + ch 1 into the corner st, then join to 3rd ch with sl st
sl st into first ch 1 sp, ch 3, then work a dc into the same sp you sl st into
work 2 dc into the ch 1 spaces around the blanket, working 4 dc into the corner st, join to 3rd ch with sl st.
Then finish off, and weave in ends!

Seam Ripper Holes
So for the second tutorial, this was hands down my favorite way to prep the fabric for crochet because it was so easy and fast. I show you a couple ways you can make the holes, but ended up doing the latter of the two. I just couldn't get the first method to work as fast as I wanted it to, so I totally recommend doing the second way, using your finger as a guide rather than the marker and tape measure. I decided to put both of them on here though, because I thought maybe someone would prefer to do it the first way.

This first way, I aligned my tape measure about 1/4 inch from the edge, and put dots on my fabric 1/2 inch apart.

Then using your seam ripper you could slightly push it into the fabric (BEWARE--not too much force!! It can rip through the edge) in each of the marks.

So since that method wasn't 100% my jam, I ended up using my finger as reference for how far apart the holes should go. And to just use the seam ripper as I go. On this blanket, I made them 1/2 inch apart. You can see how I did the ripping in the video below.
*be careful not to poke yourself!!*
For this blanket I also used a 5 mm (H) hook and Caron Simply Soft in Kelly green. This fabric is also at Walmart!

So after all the holes were made then you're ready to start crocheting! Draw your yarn through with your hook..

Then chain 2.

In the above photo I am demonstrating how I knotted up the back: I drew the tail end through the back of the st with my hook, and then tied a knot to secure it.

Then you work your single crochet into the holes. (For this blanket, since the holes were 1/2 inch apart, I chained one in between single crochets, if the holes were closer, at 1/4 inch then I would have just single crocheted around)

Then you continue around single crocheting (plus ch 1, if appropriate) and join to the beginning ch with sl st
*I used basically the same pattern as the first blanket (this one will have a few changes due to having the ch 1 in between the sc, if you just single crocheted around, scroll up and follow the above pattern):
sl st into the ch 1 sp, ch 4
(Skip the sc from previous row, then dc into the next ch 1 sp, ch 1) Repeat that around your blanket, working two dc + ch 1 into the corner st, then join to 3rd ch with sl st
sl st into first ch 1 sp, ch 3, then work a dc into the same sp you sl st into
work 2 dc into the ch 1 spaces around the blanket, working 4 dc into the corner st, join to 3rd ch with sl st.
Then finish off, and weave in ends!
Using a Rotary Cutter

I thought I'd offer this resource in case someone has a rotary cutter and would prefer to prep the fabric that way. I found this one over at Repeat Crafter me and it can be found here.
And that, my friend is how you can use what ya got to crochet around fabric. Which I can attest this makes a great baby shower gift-- It's easy, fast and you still get that special "handmade" touch!
Happy making,
Meg


