How to Apply Eyelets to Your Crochet Projects
/
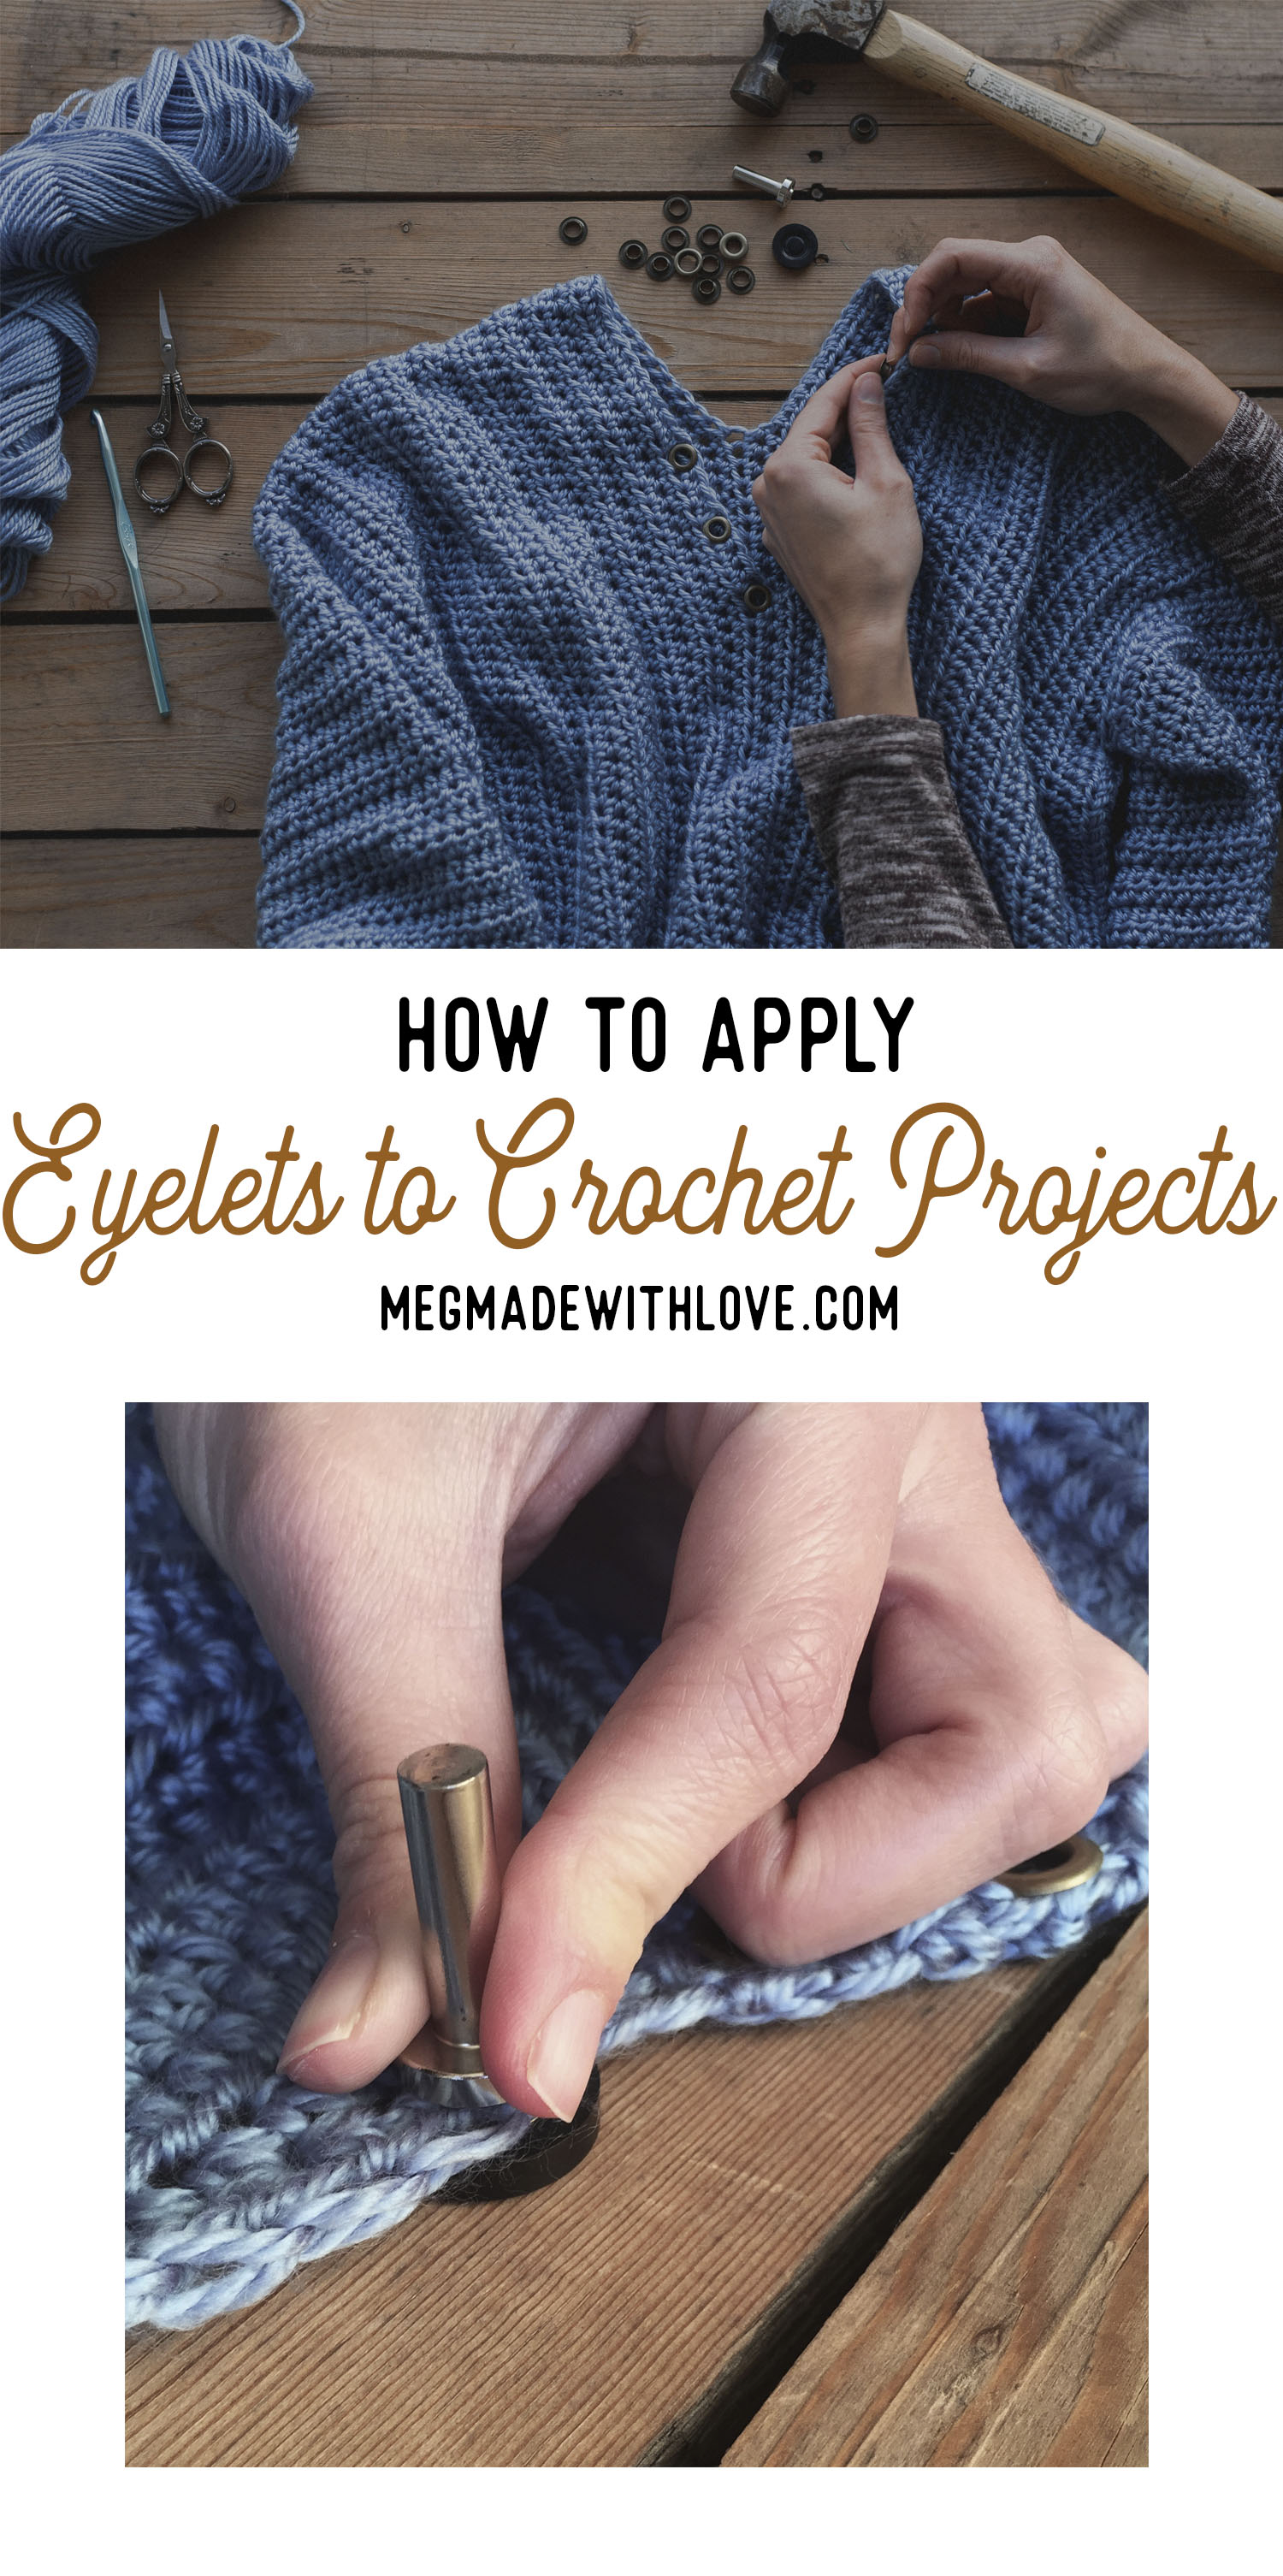
With the release of the new Cross My Heart Sweater on the horizon, I thought I'd release this little tutorial on how to set eyelets on your crochet projects. The eyelets provide such a cool, industrial feel to the softness of the yarn-- I love how they look together!

This tutorial is catered to the sweater's application, but the basic instructions can be applied to your own projects. Since the sweater had a looser stitch, the eyelets were able to fit through the natural holes of the project. If your project has a tighter stitch, then you'd need to make your own holes in the project by skipping a stitch or two, chaining and then carrying on with your pattern.
I used the Dritz brand Large Eyelets and Tool Kit, but you could obviously use whatever size for your project! Just account for the size of hole you're going to need for them. They need to fit snugly into the hole so the surrounding stitches can get caught into it to secure.
Now onto the tutorial....

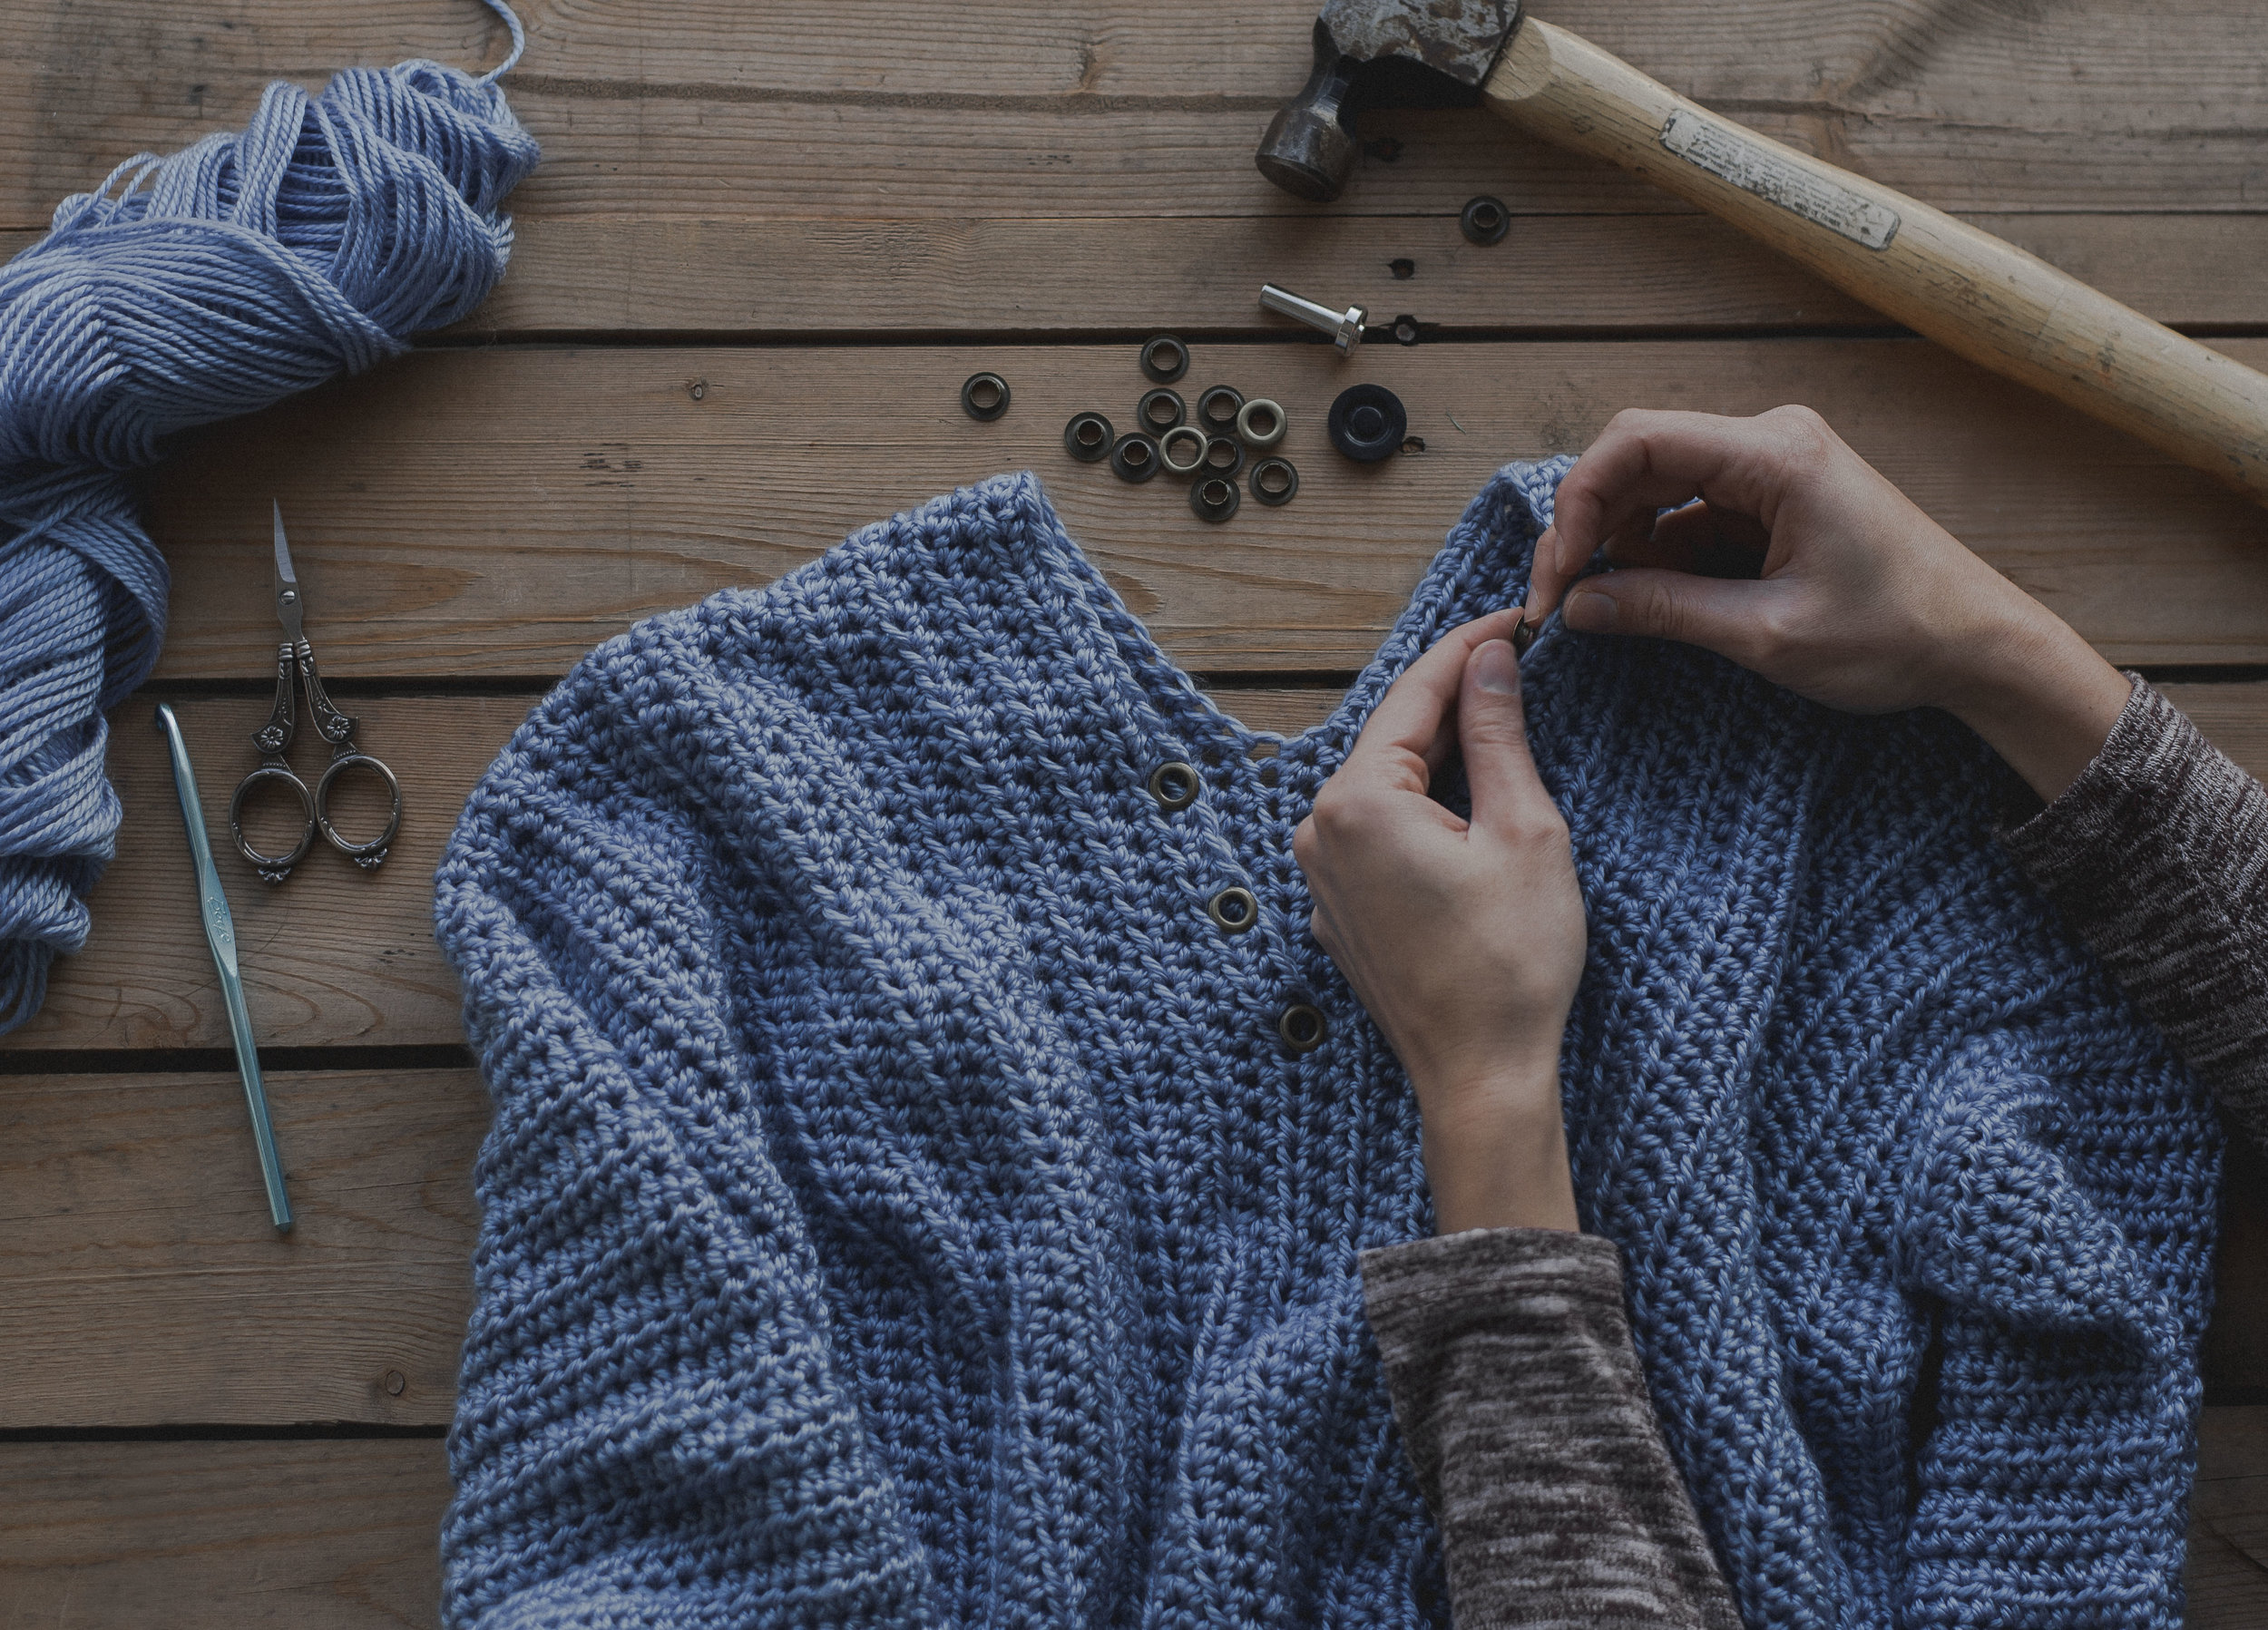
First, gather all your eyelet pieces, and tool set, hammer and your finished sweater. I used the Dritz brand large eyelets and tool kit, both found at Walmart, or on Amazon. As long as your eyelets can fit snugly into the holes of your sts then you should be fine. You’ll also need to work on a hard surface, like concrete.
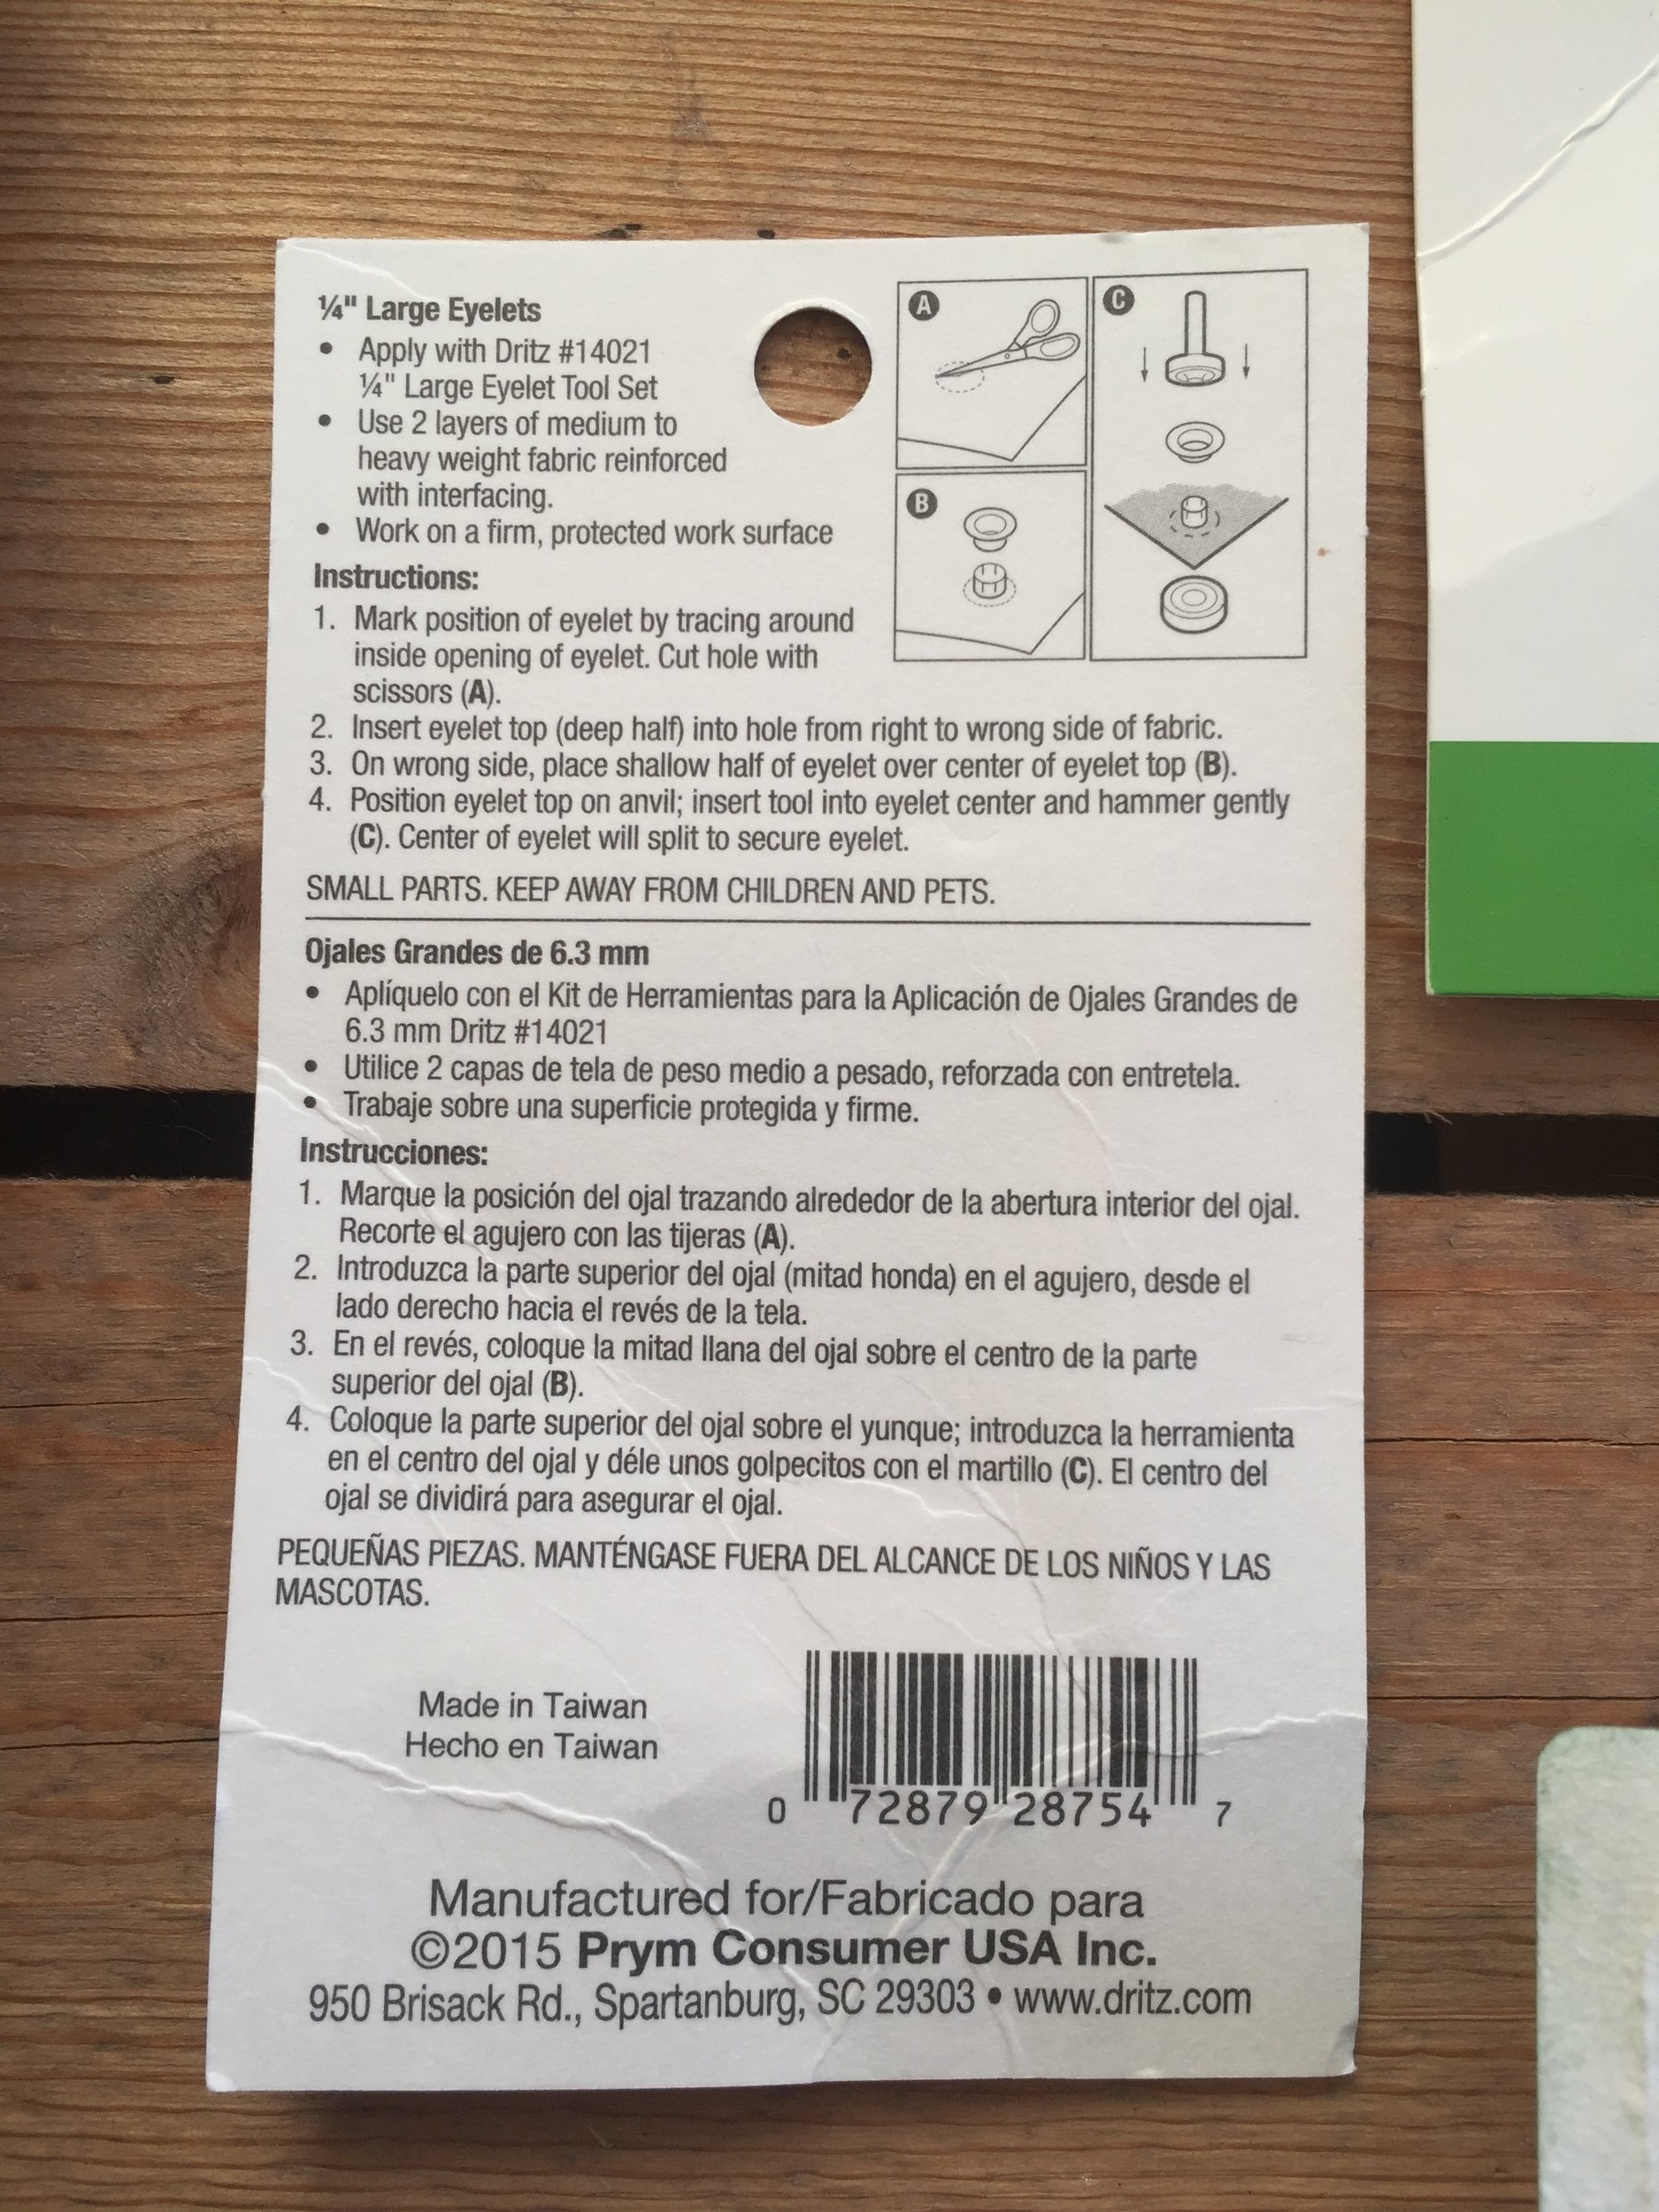
Your package will give the general directions of how to set the eyelets. You can see the diagram on the back of the package if that helps. Disregard the part about cutting the holes, though. You won’t cut any holes, just work in the natural holes of the sweater.

Before I went in, and set the eyelets, I played around with where I liked them. This may be helpful for you so that they all look uniform and line up correctly.

To test out where you’d like the eyelets to go, you can insert the top of the eyelet (the one that has a longer back side) into the holes right next to the neckline. I liked the way they looked fairly close to the neckline but you could put them further away if you’d prefer!

I spaced my eyelets with three sts in between each one. And I made sure they all lined up across as best as I could. You could put as many as you’d like, but I thought three on each side of the neck looked great!
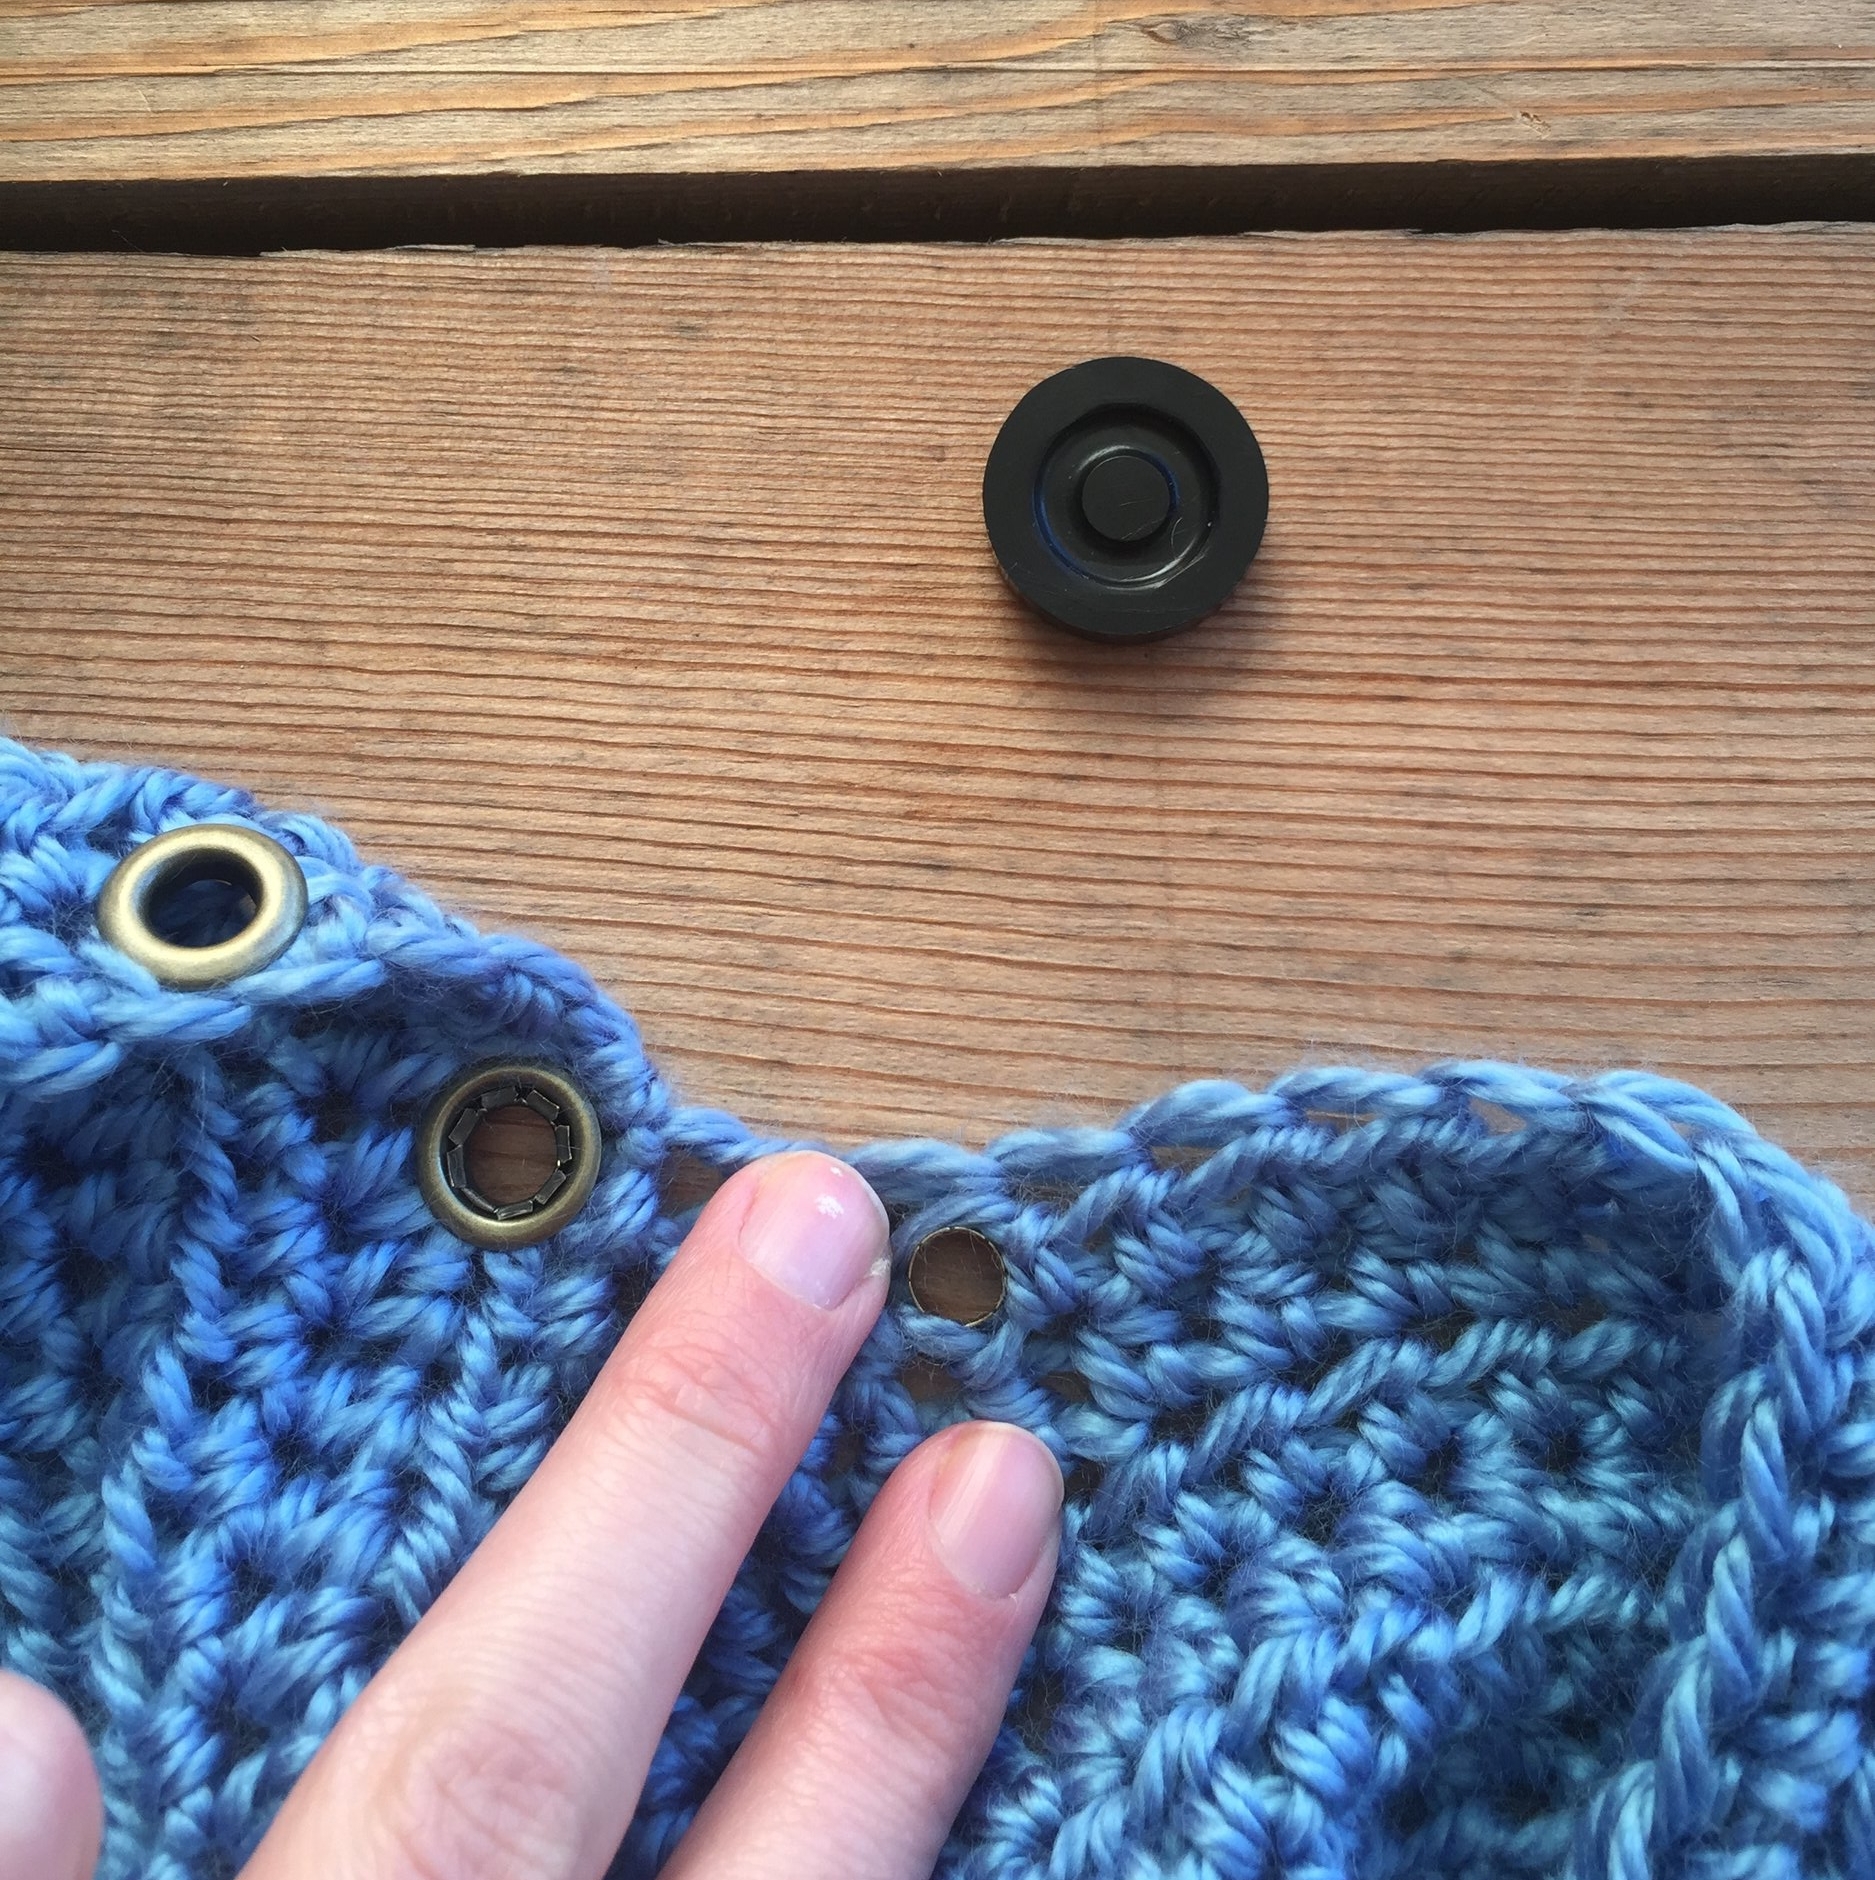
Once you’ve decided where your eyelet will go it’s time to set it. With your eyelet top in place (The eyelet top is what will show on the right side of the sweater, so you will set the right side of the sweater down, and work from the wrong side of the sweater.) You’ll get the Anvil (the black flat thing in the above photo), and that will go on the under side of the sweater.

Then you’ll set your eyelet top (the longer piece) that’s in your desired location on top of that anvil.
Side note, you won’t want any yarn to be inside of the eyelet hole, just snugly around it.

Next you’ll get the shorter eyelet piece, or the “washer” and you’ll set it on top of both the anvil and eyelet top. You are placing this on the wrong side of the sweater. The goal of this is to capture the yarn that surrounds the outside of the eyelet top so it will set correctly. So be sure you’ve got yarn in between those two pieces.

Last, you’ll put on the setter. All the pieces should sort of fit together like a puzzle. Then you’ll take a hammer and tap gently, but firmly to set.

If you take off the setter to check on the eyelet, it should look like the above photo. The little edges should all be split and flattented onto the outside ring. Then your eyelet is set! If the center isn’t split and flattened just add the setter back on and tap with your hammer some more.
Just repeat that process for all your eyelets!

I feel like the possibilities are endless with eyelets and crochet. They offer such a unique look to things... Including this new sweater!! ;)
Be on the lookout for it, coming this weekend to the blog. I think you'll love how simple it is!
Happy making!
Meg