The Cloud Nine Cropped Sweater - Free Crochet Pattern
/
***If you’d like the PDF version of this pattern, you can purchase it by clicking HERE. Great for easy printing, and without ads. For the free version, scroll down into the post.***
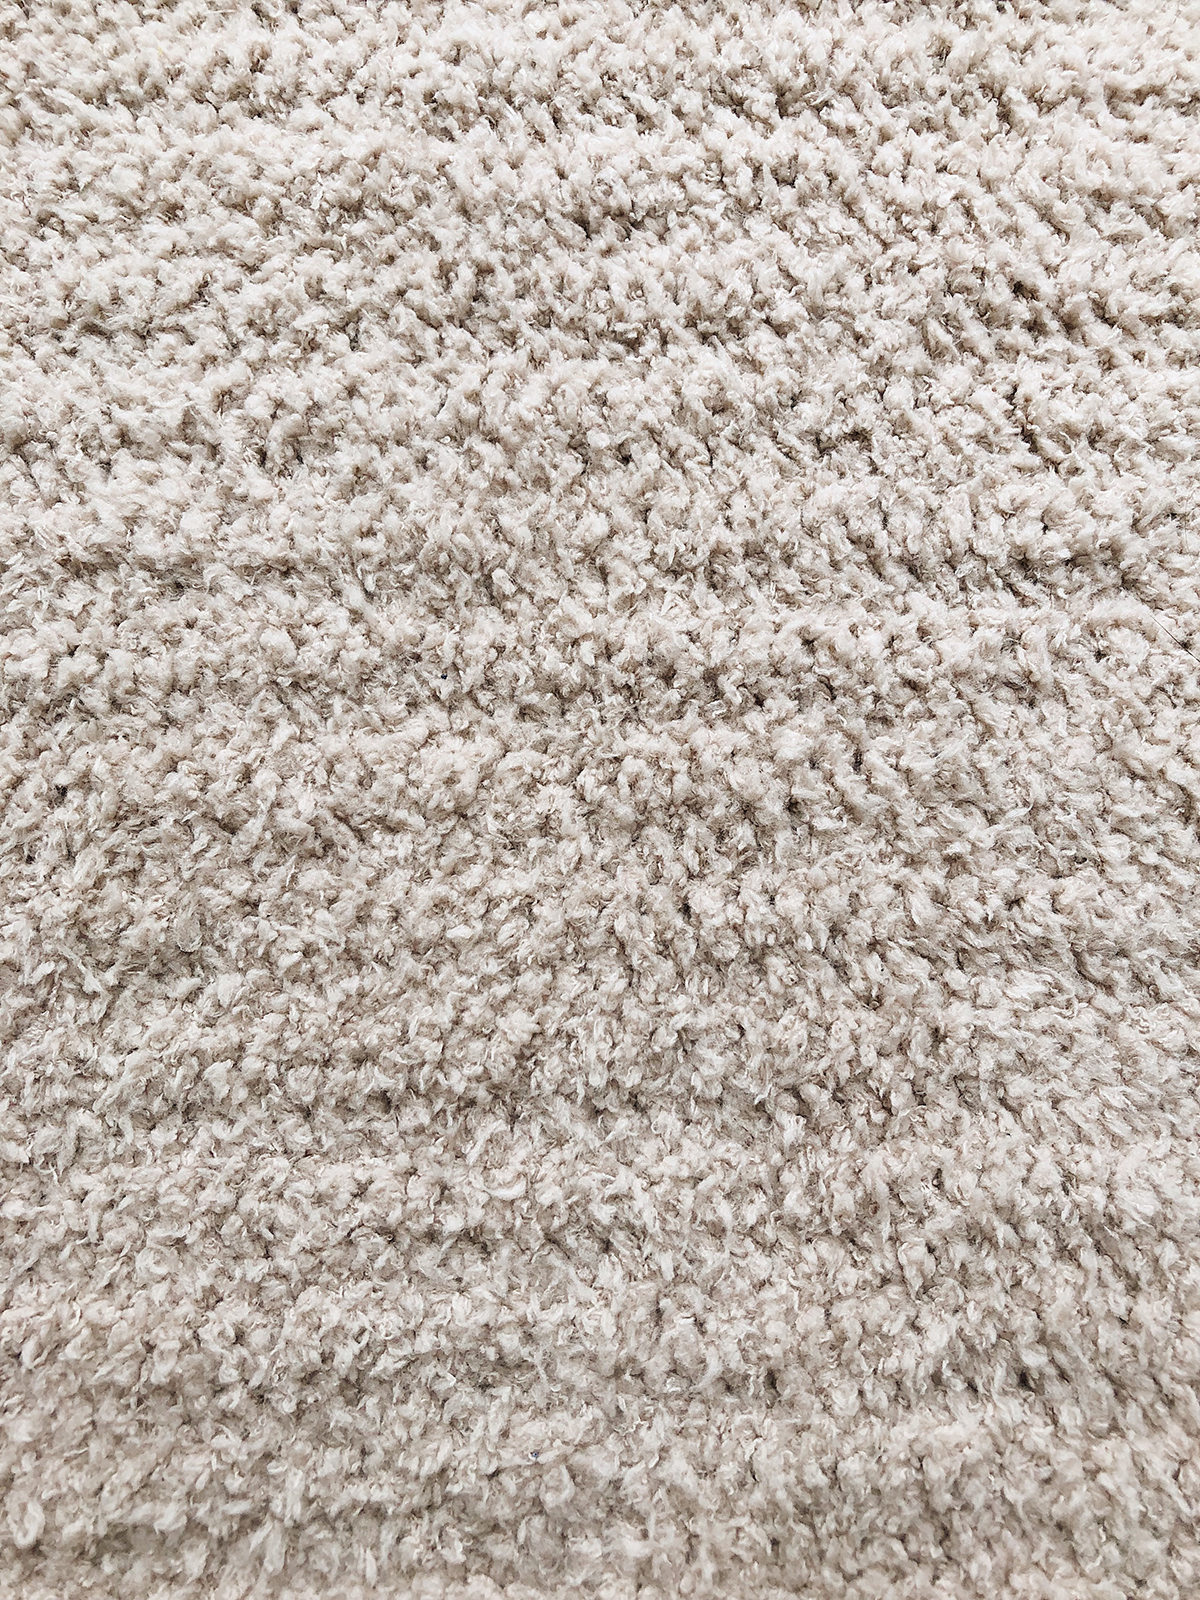
I am just pleased as punch to bring you the new free sweater pattern! The Cloud Nine Cropped Sweater certainly lives up to it’s name, as it’s made with the absolute softest yarn to grace this planet: Yarn Bee Cloud 9 Yarn. Ohhh, what a dream!

I mean, you can see proof in photo above… it’s just one of the most lovely yarns I’ve worked with (and no, this isn’t a sponsored post!). It’s polyester, very lightweight-feeling and the feel is so buttery! The makeup of it is like a thin strand of thread with fluffy bursts coming out of it, if that makes sense whatsoever?? It’s perfect for garments :)

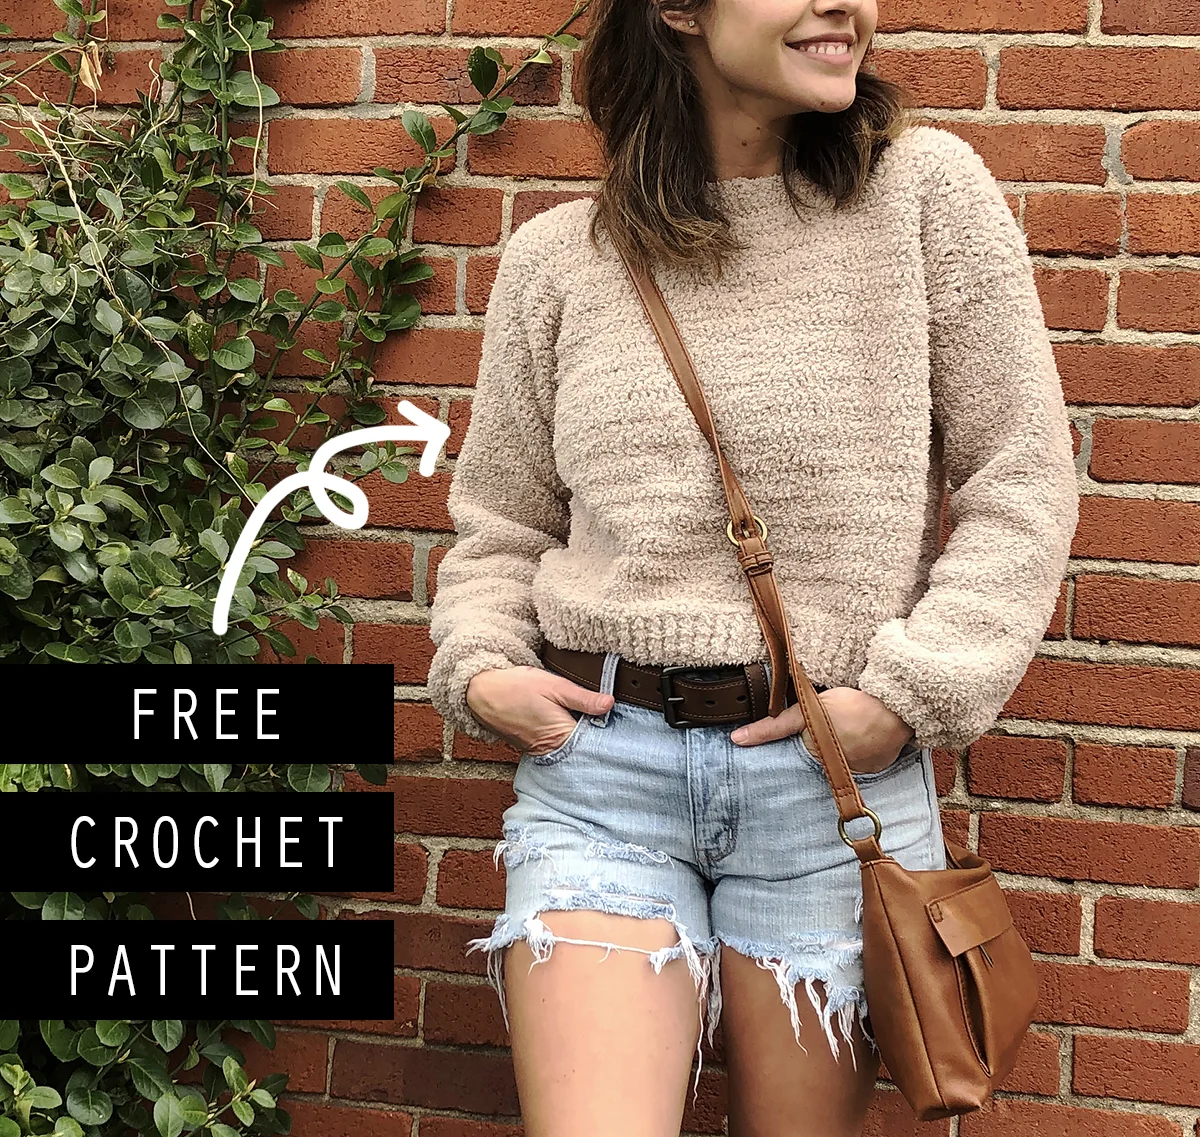
When it comes to the sweater itself, I love the cropped cut! And it pairs well with so many outfits… I thought it looked cool with some distressed shorts for a laid-back Spring look. But I also have dreams of wearing it with a floral maxi skirt or some high waisted black pants. Oooh don’t even get me started, mkkkk.
And if you’re not too big of a fan of cropped sweaters, it’s actually easily adjustable— so you can add the length you’d like.

While this yarn truly is the star of the show when it comes to this sweater, I did find it a bit tricky at first to work with, just because it’s a bit hard to see the stitches. But fear not! I figured out some tricks on how to tackle this issue, and summed them up in the notes section of the pattern. I think figuring out how to work with it is absolutely worth it because the drape and feel of the yarn really just “makes” the sweater in my opinion.


Without further ado, here’s the pattern for the Cloud Nine Cropped Sweater… a staple in your Spring wardrobe, no doubt! I hope you enjoy making this fun and unbelievably soft piece of clothing :)
***If you’d like the PDF version of this pattern, you can purchase it by clicking HERE. Great for easy printing, and without ads. For the free version, scroll down into the post.***


What you’ll need:
-category 3 (light) weight yarn (yardage for each size is found in the “notes” section), I used Yarn Bee Cloud 9 Yarn in color “Mushroom”. I highly suggest using this yarn or one similar in texture for this pattern.
-size g (4.25 mm) hook
-yarn needle
-stitch markers
-sewing pins (optional)
Gauge:
15 dc and 8 rows equals a four inch square
Abbreviations:
ch=chain, dc=double crochet, st(s)=stitch(es), sl=slip, hdc=half double crochet, fpdc=front post double crochet, bpdc=back post double crochet, dc2tog=double crochet two together (decrease)
Notes:
*** Yarn Yardage per size:
Small (approx 38” bust) - 950-1000 yards
Medium (approx 40” bust) - 1000-1050 yards
Large (approx 42” bust) - 1050-1100 yards
XL (approx 44” bust) - 1100-1150 yards
2X (approx 48” bust) - 1200-1250 yards
-ch’s at beginning of rows and rounds do NOT count as sts
-I learned some little tricks while working with this yarn, which is so soft… and flowy… and awesome, yet very hard to distinguish stitches with. I found out that good lighting while working with it made all the difference. Also working into the initial chains was the hardest part for me, so I took it super slow. I usually just went by feel when it came to where to put the next stitch, but if I ever had doubt, I held it up to the light to see better.
-sweater is worked up in a front and back body panel, and the sleeves and collar are crocheted onto the body once it’s sewn. Both front and back panels are worked from the bottom-up.
-you could easily add rows to the body to make this sweater fit longer— just add them before you begin to work the neck hole on the front panel. When sewing the panels, just add the amount of rows to row 22 to figure out what row to sew up to on each side.
-size worn in photos is small
Pattern:
***Back Panel :
Formated S (M, L, XL, 2X)
Row 1) ch 77 (81, 85, 89, 97), dc in 3rd ch from hook and across, I found it easier to work dc’s into BLO of ch’s (75, 79, 83, 87, 95 total sts)
Row 2) ch 1, turn, hdc in 1st st, fpdc, [bpdc, fpdc] across row— work hdc in last st (75, 79, 83, 87, 95 total sts)
Row 3) ch 1, turn, hdc in 1st st, bpdc, [fpdc, bpdc] across row— work hdc in last st (75, 79, 83, 87, 95 total sts)
Row 4) repeat row 2
Row 5) repeat row 3
Row 6) ch 2, turn, dc across row (75, 79, 83, 87, 95 total sts)
——-FOR SIZES SMALL & MEDIUM:
Rows 7-38) repeat row 6
-finish off
——-FOR SIZES LARGE AND XLARGE:
Rows 7-40) repeat row 6
-finish off
——-FOR SIZES 2X:
Rows 7-42) repeat row 6
-finish off
***Front Panel:
——--SIZES SMALL & MEDIUM, formatted S (M) :
Rows 1-5) repeat instructions from back panel
Rows 6-32) ch 2, turn, dc across row (75, 79 total sts)
(now working one side of the neck hole)
Row 33) ch 2, turn, work 27 (28) dc, sc, sl st in next 19 (21) sts, sc, dc in last 27 (28) sts (75, 79 total sts)
Row 34) ch 2, turn, work 26 (27) dc, sc in next st (27, 28 total sts)
Row 35) turn- do not ch, sl st into 1st st (does not count as st), sc, dc in last 25 (26) sts (26, 27 total sts)
Row 36) ch 2, turn, work 25 (26) dc, sc in last st (26, 27 total sts)
Row 37) turn- do not ch, sl st into 1st st (does not count as st), sc, dc in last 24 (25) sts (25, 26 total sts)
Row 38) ch 2, turn, work 24 (25) dc, sc in last st (25, 26 total sts)
finish off, leave long tail to sew the top seam
(now working on the opposite side of the top of the front panel, to complete the other side of the neck hole, you will draw up your yarn in the very last st of row 33. View “photo A” below for assistance.)
Once yarn is drawn up, you will repeat rows 34-38 to complete the other side of the neck hole. Then finish off and leave long tail to sew up top seam.
——-SIZES LARGE & XLARGE, formatted L (XL) :
Rows 1-5) repeat instructions from back panel
Rows 6-34) ch 2, turn, dc across row (83, 87 total sts)
(now working one side of the neck hole)
Row 35) ch 2, turn, work 29 (30) dc, sc, sl st in next 23 (25) sts, sc, dc in last 29 (30) sts (83, 87 total sts)
Row 36) ch 2, turn, work 28 (29) dc, sc in next st (29, 30 total sts)
Row 37) turn- do not ch, sl st into 1st st (does not count as st), sc, dc in last 27 (28) sts (28, 29 total sts)
Row 38) ch 2, turn, work 27 (28) dc, sc in last st (28, 29 total sts)
Row 39) turn- do not ch, sl st into 1st st (does not count as st), sc, dc in last 26 (27) sts (27, 28 total sts)
Row 40) ch 2, turn, work 26 (27) dc, sc in last st (27, 28 total sts)
finish off, leave long tail to sew the top seam
(now working on the opposite side of the top of the front panel, to complete the other side of the neck hole, you will draw up your yarn in the very last st of row 35. View “photo A” below for assistance.)
Once yarn is drawn up, you will repeat rows 36-40 to complete the other side of the neck hole. Then finish off and leave long tail to sew up top seam.
——SIZE 2X :
Rows 1-5) repeat instructions from back panel
Rows 6-36) ch 2, turn, dc across row (95 total sts)
(now working one side of the neck hole)
Row 37) ch 2, turn, work 32 dc, sc, sl st in next 29 sts, sc, dc in last 32 sts (95 total sts)
Row 38) ch 2, turn, work 31 dc, sc in next st (32 total sts)
Row 39) turn- do not ch, sl st into 1st st (does not count as st), sc, dc in last 30 sts (31 total sts)
Row 40) ch 2, turn, work 30 dc, sc in last st (31 total sts)
Row 41) turn- do not ch, sl st into 1st st (does not count as st), sc, dc in last 29 sts (30 total sts)
Row 42) ch 2, turn, work 29 dc, sc in last st (30 total sts)
finish off, leave long tail to sew the top seam
(now working on the opposite side of the top of the front panel, to complete the other side of the neck hole, you will draw up your yarn in the very last st of row 37. View “photo A” below for assistance.)
Once yarn is drawn up, you will repeat rows 38-42 to complete the other side of the neck hole. Then finish off and leave long tail to sew up top seam.


After both panels are completed, you’re ready to sew the body together. Place your front panel on top of the back panel, like shown in photo above. It doesn’t matter which sides are on the inside because they look the same at this point.
Then you will want to mark where you will sew up to on the sides of both panels with a stitch marker— you will be sewing up to row 22 (this goes for all sizes). It is important your rows line up on the front and back panels so you will have the exact amount of rows left for the sleeve hole—it also may help to use sewing pins to keep panels secure and in place.
for SIZES SMALL & MEDIUM there will be 16 rows on both the front and back panel not sewn for the sleeve hole
for SIZES LARGE & XLARGE there will be 18 rows on both the front and back panel not sewn for the sleeve hole
for SIZE 2X there will be 20 rows on both the front and back panel not sewn for the sleeve hole

Using yarn needle and long piece of yarn, sew up on each of the sides of the front and back panel through row 22. I used the whip stitch along the very outer edge of both pieces, and made sure to have a pretty loose tension when sewing.
Then you will sew the tops of your panels together using the same loose whip stitch. Sew starting on the outside then move in, and stop when the neck hole forms on the front panel.

After the two panels are sewn along the top and sides, you will begin on the sleeves. Begin by drawing up your yarn in the bottom of one of the sleeve holes AKA the armpit (I found it didn’t make any difference if you flipped the sweater right side out when working the sleeves— because this yarn disguises rows and rounds well). ch 2, then you will begin working dc’s into the very edge of each row of your sleeve hole. You will work a sequence of [2dc, dc] all the way around the sleeve hole, then join to 1st dc with sl st. This completes the first round of the sleeve.
***Total SLEEVE sts worked into sleeve hole for each size:
SMALL & MEDIUM: 48 total sts (24 on each side)
LARGE & XLARGE: 54 total sts (27 on each side)
2X: 60 total sts (30 on each side)
Remainder of sleeve:
formatted (S, M, L, XL, 2X)
Rounds 2- 37) ch 2, dc around, join to 1st dc with sl st (48, 48, 54, 54, 60 total sts)
Round 38) ch 2, dc2tog around, join to 1st st with sl st (24, 24, 27, 27, 30 total sts)
Round 39) ch 2, dc around, join to 1st dc with sl st (24, 24, 27, 27, 30 total sts)
Round 40) ch 1, [fpdc, bpdc] around, join to 1st st with sl st (24, 24, 27, 27, 30 total sts)
Round 41) repeat row 40
finish off
***repeat instructions for other sleeve
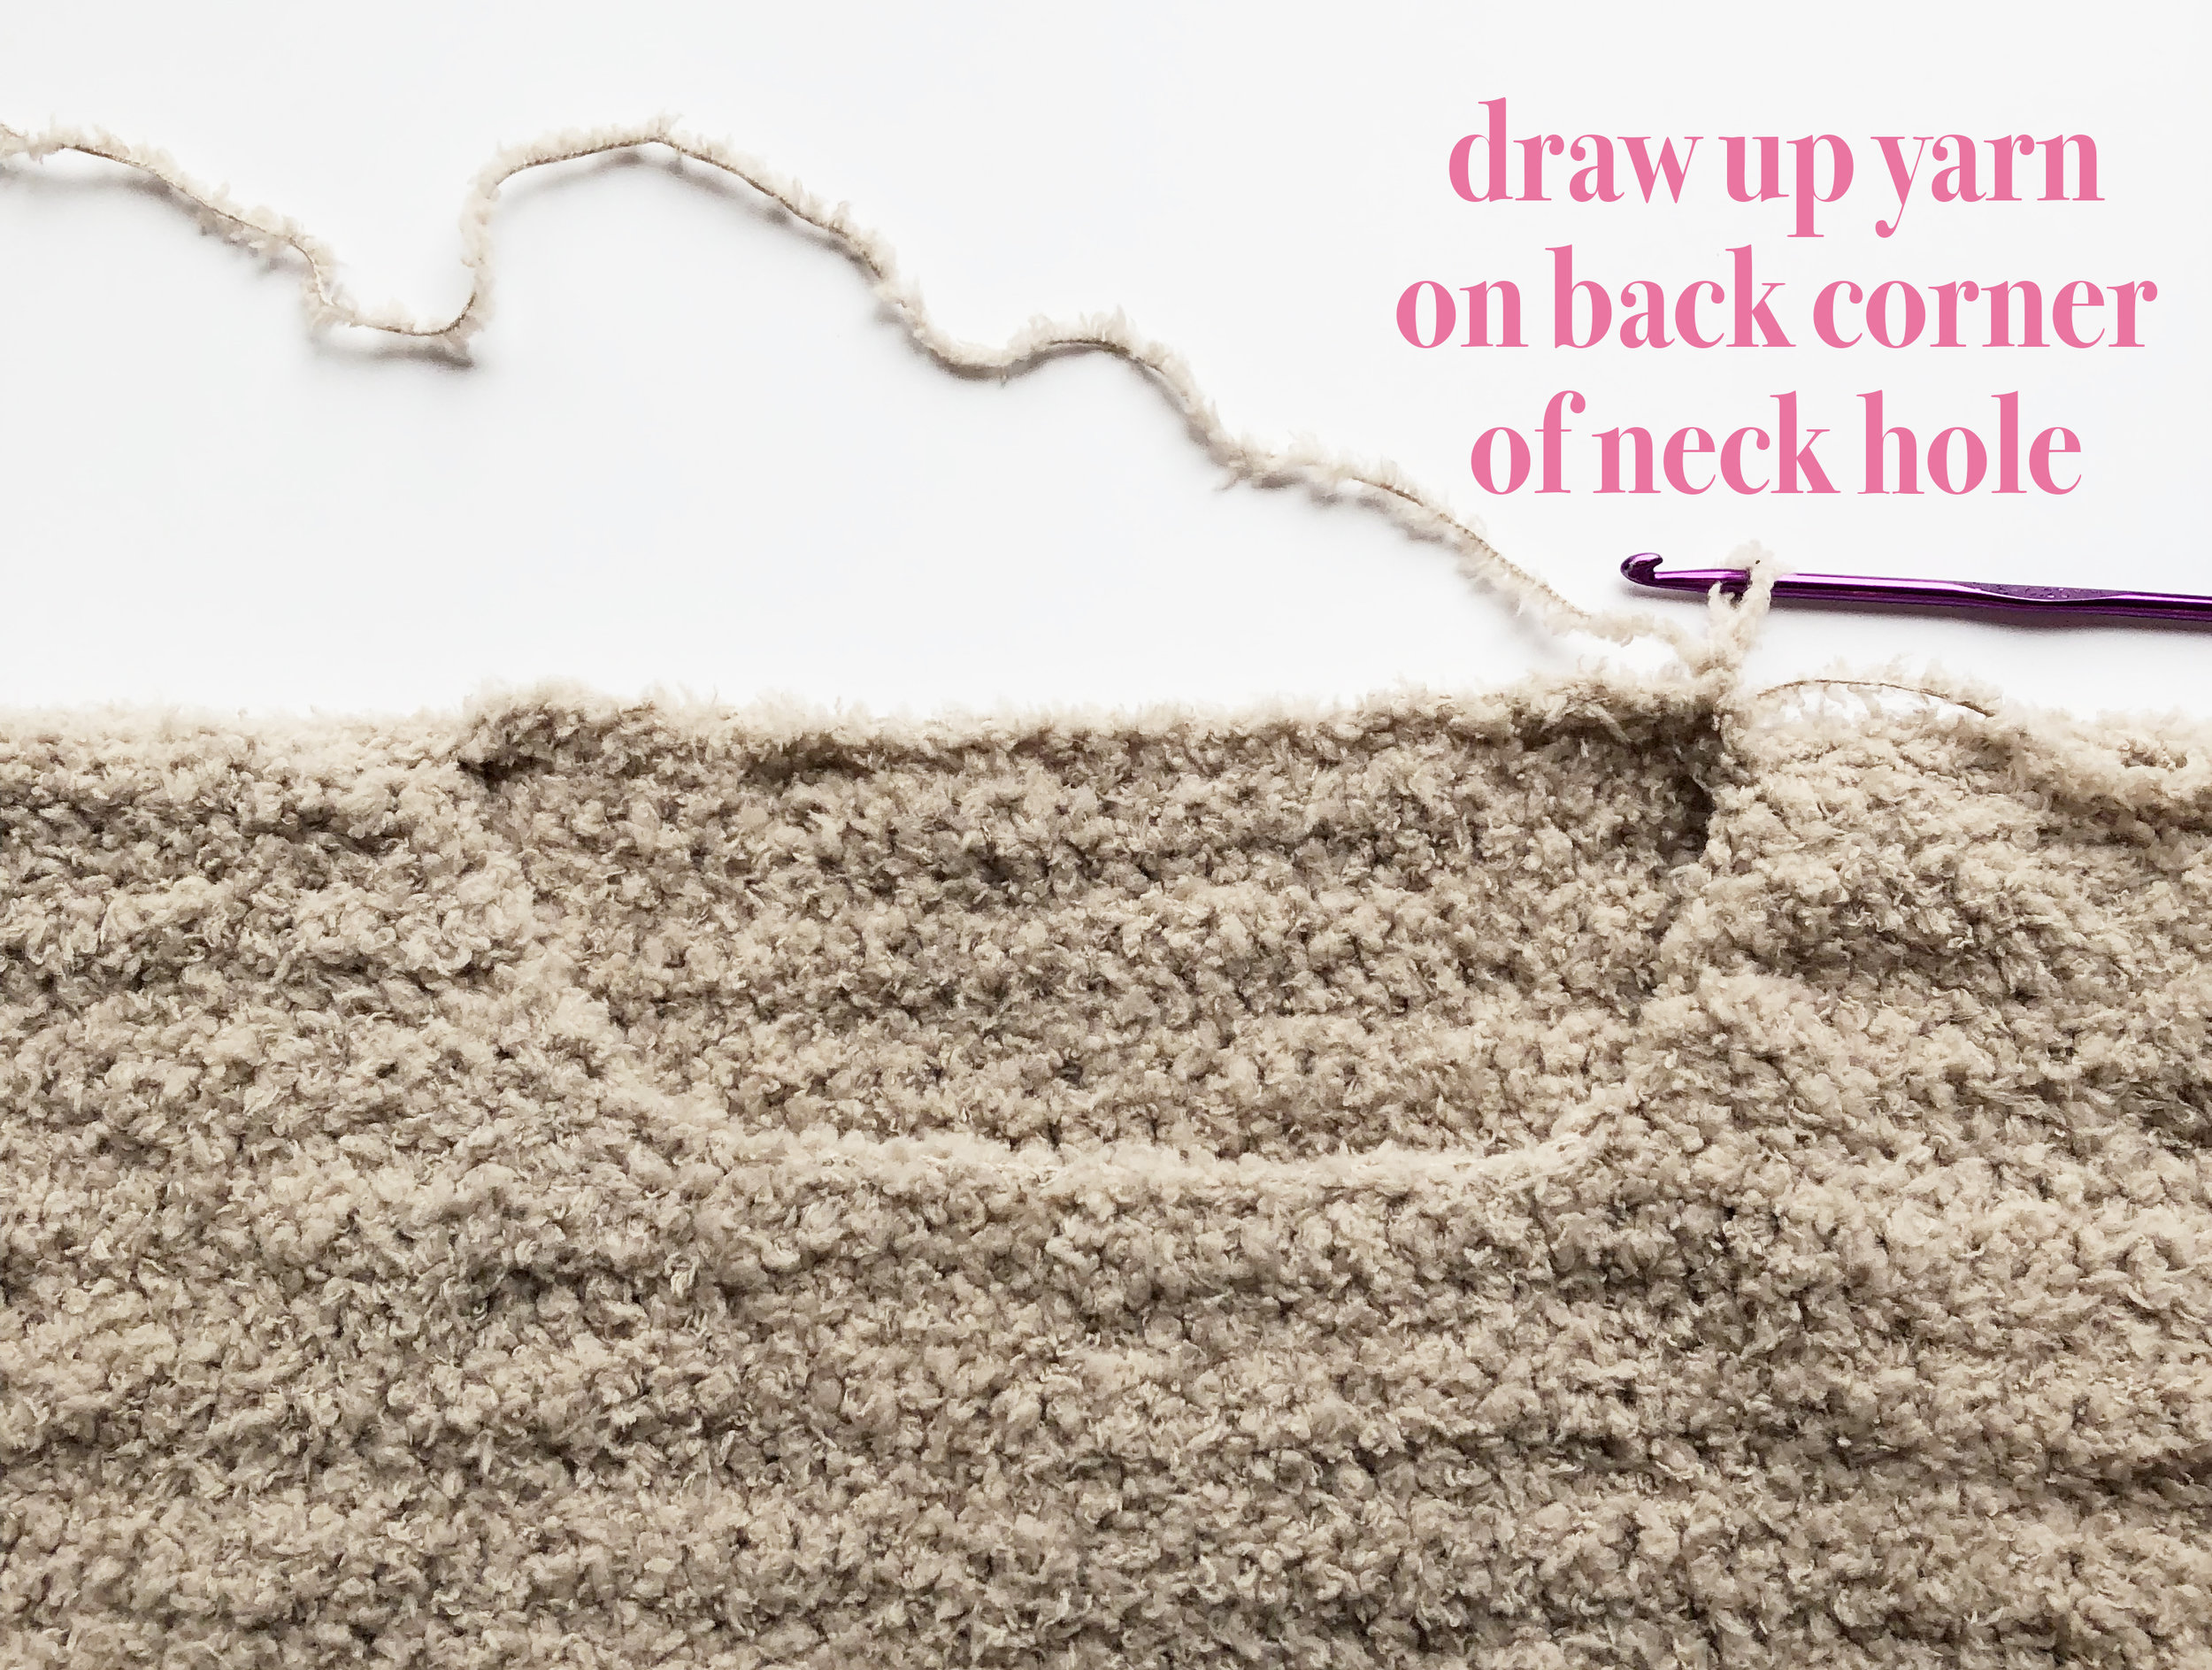
You will finish up your sweater by crocheting around the neck hole to create the collar. Draw up your yarn in the back corner of the neck hole and ch 1. Work hdc’s around the very edge of the entire neck hole, then join to first hdc with sl st.
Rounds 2-3 of neck hole) ch 1, [fpdc, bpdc] around, join to 1st st with sl st
After the neck hole is finished, and all ends woven are in, you’re ready to slip on the loveliest sweater ever! And even better that YOU made it?!

I hope this pattern/sweater brings value to your life! It’s so fun making the stuff we wear… or even making something for someone else— it’s just so special. Now go give someone a hug with your cuddly new sweater!! Teehee.
Take care and happy hooking,
Meg