


Bohemian American Flag Crochet Pattern
/***You can find the PDF version of this pattern in my shop by clicking here. Great for easy printing!***

So...
I feel like I come on to my blog every week and get super excited about the latest pattern release (which, I can't help it, I really love every new thing I put out into the world). But this week, man.....
I. love. this. creation.
This is just such a cool piece. It's simple and boho-vibin'. And just so cute!
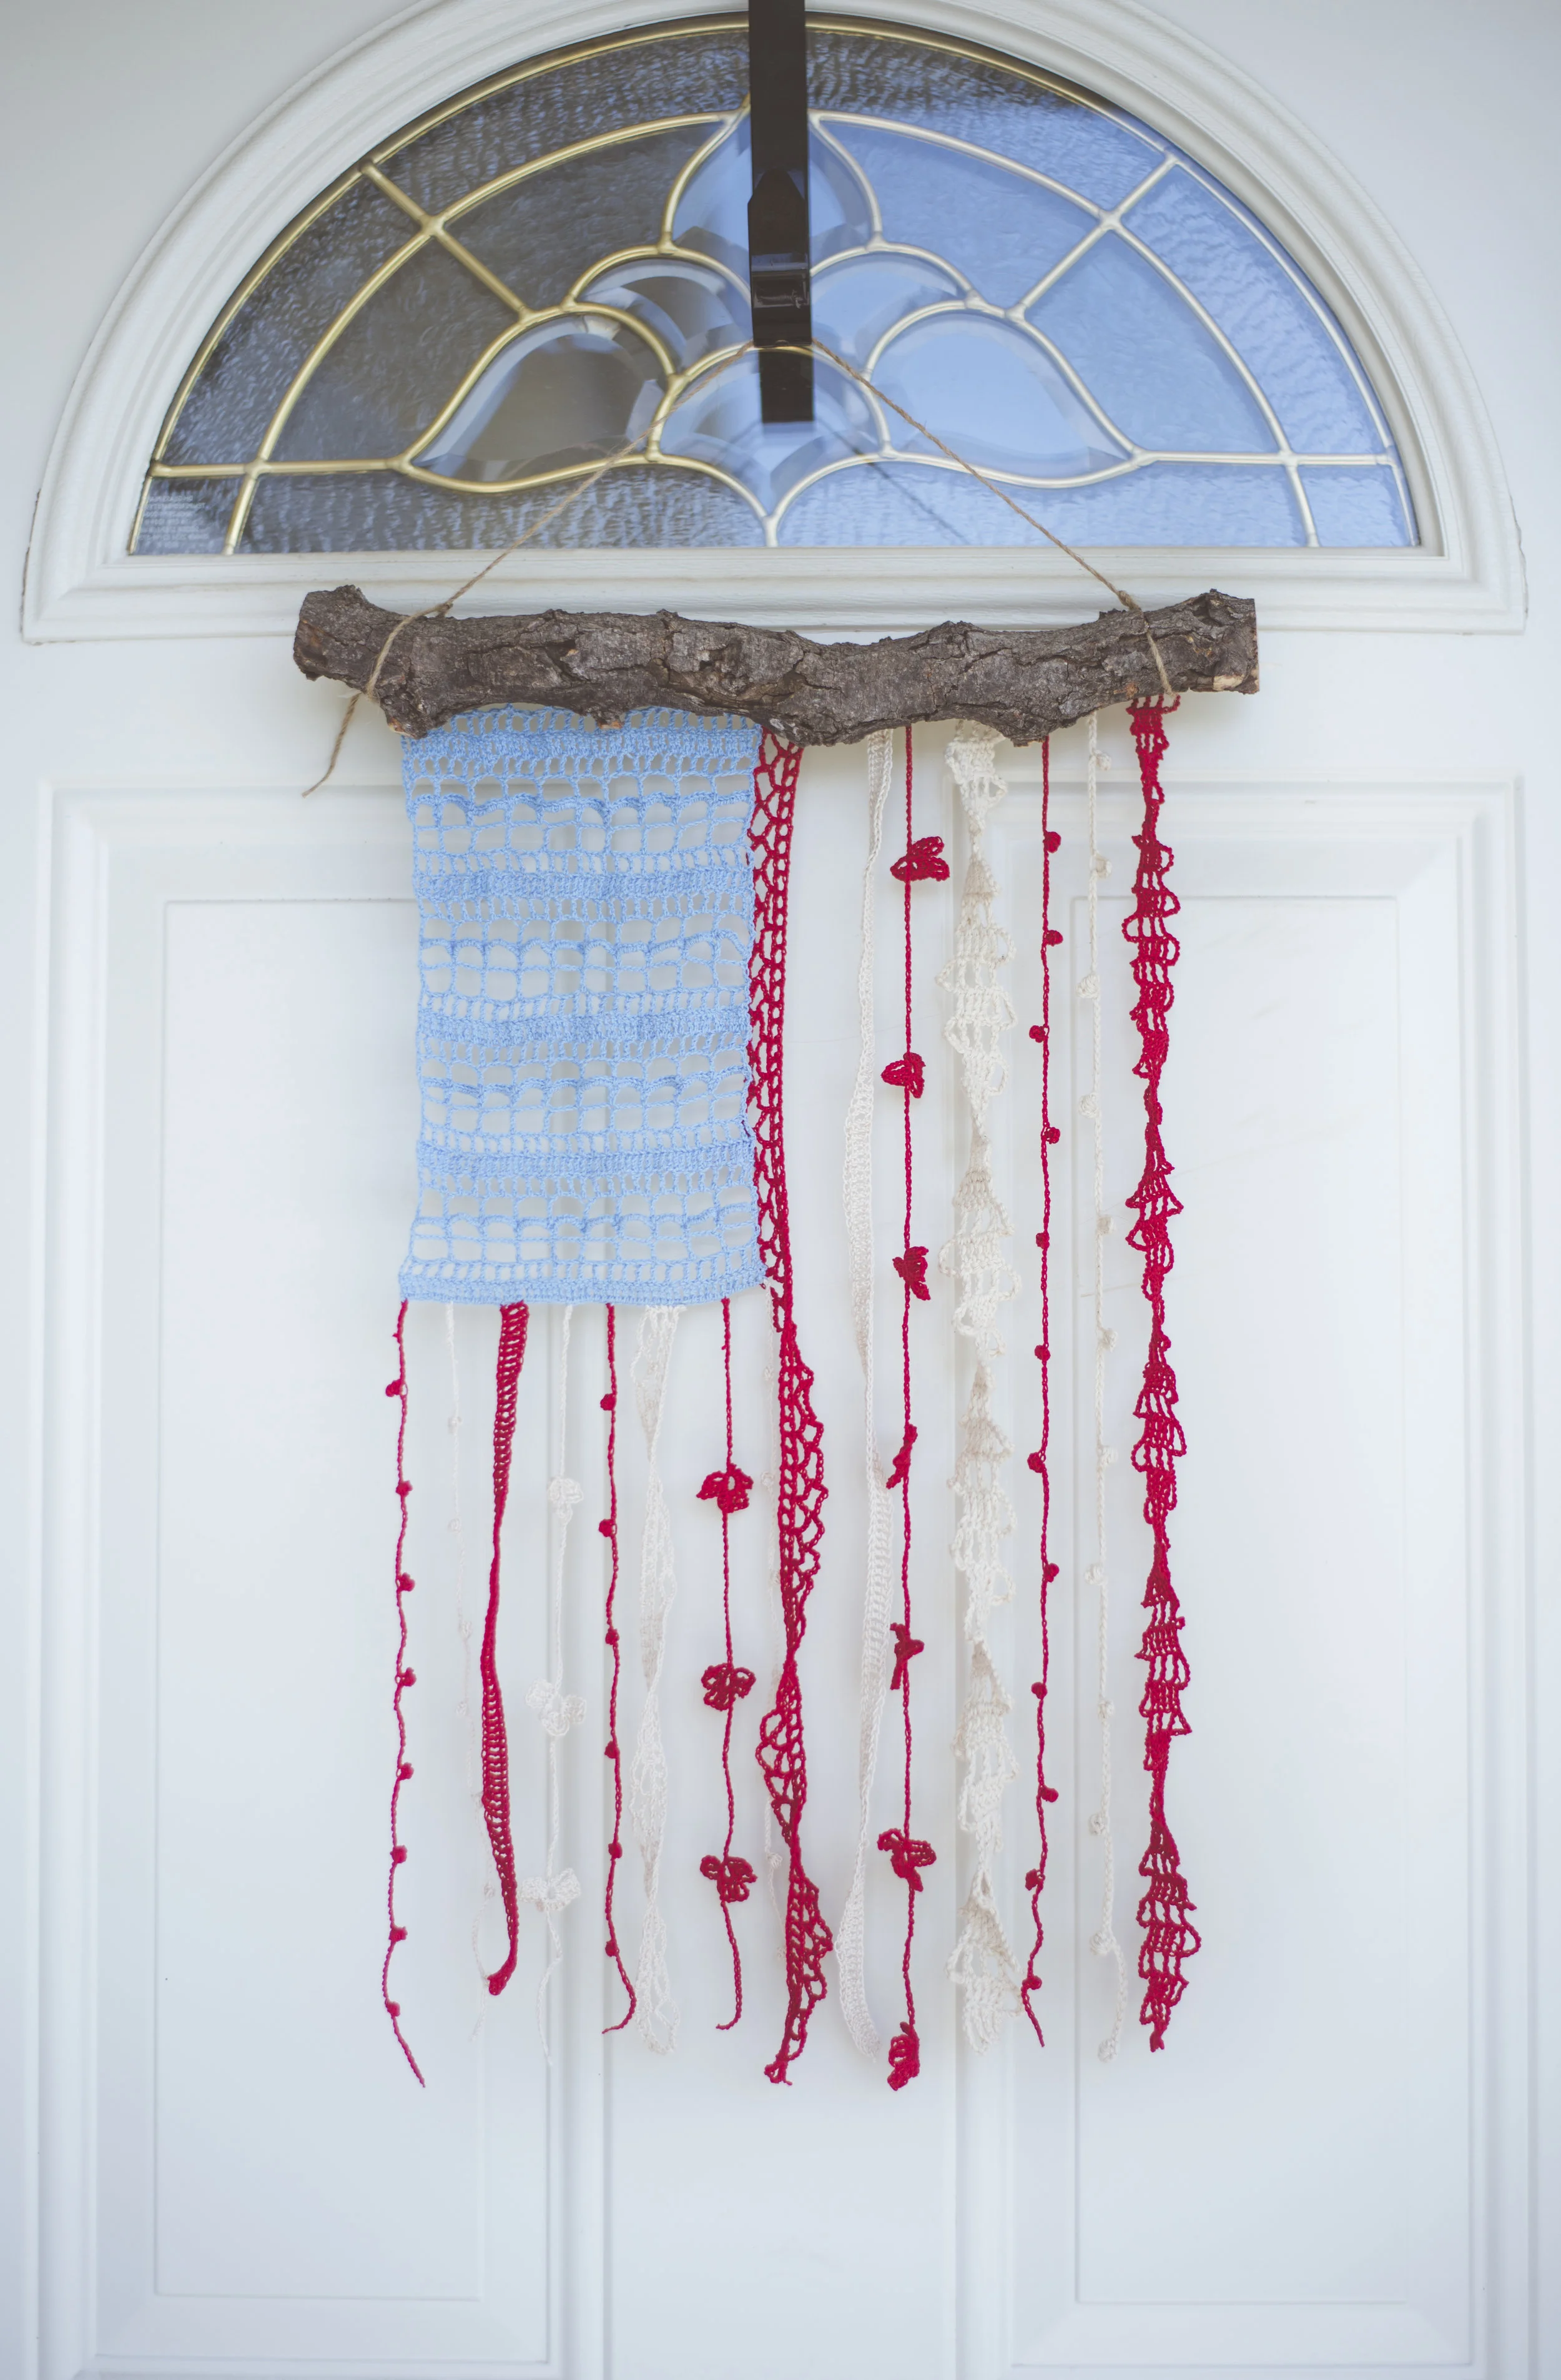
It's a perfect summer project, and with July 4th coming up, even more perfect. This would look great on your front door hanging from a wreath hanger, or even in your favorite living space (I put it on an old window in my living room and it looked pretty cool!)

The pattern calls for crochet thread size 10, so it's a little time consuming. And Iet me be honest with you, sewing it all together and also dealing with the ends was not the funnest thing. BUT seeing the final project was without a doubt worth all the trouble.
I provide a pattern for my size of flag, but I will say that it is very customizable. You could even use a different yarn weight and hook if you so chose.
Also PLEASE READ ALL THE NOTES!
Anywho, enough talky. Now for the pattern... (I hope you think it's as cool as I do. :) )
What you'll need:
Size 10 crochet thread (I used Red Heart Crochet Thread in Victory Red and Natural as well as South Maid Crochet Thread in Delft)
1.4 mm crochet hook
yarn needle
14" branch, stick or wooden dowel (I used a branch I found at the park, because hey.. it's free)
Ribbon for the top
Glue gun/sticks
Dimensions:
for findished piece:
width= 12" length=20"
Abbreviations:
ch=chain, st(s)=stitch(es), sc=single crochet, sl= slip, tr=treble, sk=skip, yo=yarn over, dc=double crochet
Notes:
Like I said above, this pattern is customizable. You can use larger yarn with corresponding hook size if you chose (I made a few with fingering cotton yarn and size B hook). You can also make your pieces longer or shorter than what I described.
The flag has longer pieces (stripes), and shorter pieces that go under the blue part. I talk more about those in the pattern. And I will say how many of what I made.
I didn't use the correct amount of 13 stripes on the flag, just because it didn't look right to me. But you could always do that for your flag if that bothers you!
I contemplated adding additional lace, yarn, material and string to the flag but decided it would look best with just the crocheted pieces. You could always add to it if you thought it needed more!
**For each short piece you make leave a long tail to sew with!**
Stitch explanation:
puff st: (yo, insert into st, yo, draw back through) 4 times, yo, draw through all loops on hook
Pattern:

For lacy ladder stitch in above photo:
ch 13, in 9th ch from hook, tr and across (5 total tr)
1) ch 8, turn, (tr, ch 1, sk st) 2 times, ending with a tr in the last st
2) ch 8, turn, tr across row
Repeat rows 1-2 until desired length.
-I repeated 28 times for the long pieces. I didn't make one in a shorter style that goes under the blue part, but if I did I would repeat 14 times.
-I made one red and one white in the longer style

For the little pom chain in above photo:
[ch 16, in 3rd ch from hook, puff st (see above for explanation), ch 1, sl st into st before the one the puff was worked] repeat from [] until desired length
-for the longer pieces I had 12 puffs, 13 "ch 16"'s, for the shorter pieces, I had 6 puffs, 7 "ch 16"'s
-For these, I made one red and one white long pieces and two red and two white short pieces

For the cute lil' flower chain in above photo:
*Note- I made some with four petals and some with three petals*
[ch 30, in 6th ch from hook, sl st to form little circle, sl st into the circle, (ch 5, tr, tr, ch 5, sl st into circle again-- this is one petal) repeat 3 times to make 4 total petals)] repeat [] until desired length
-For the longer pieces I repeat [] 6 more times, for the shorter pieces I repeat [] 2 times + ch 30
-I made one red long piece and one red and one white short piece

For foundation tr crochet piece in above photo:
ch 4, yo 2 times, insert hook into first ch, yo, draw back through, yo, draw through 1st loop on hook (this will be called "ch1"), then continue to work a normal tr st: (yo, draw through two loops) 2 times, yo, draw through the last two loops
1)[insert hook into the "ch1" you just worked, yo, draw back through, yo, draw through 1st loop on hook (this will be called "ch1"), then continue to work a normal tr st: (yo, draw through two loops) 2 times, yo, draw through the last two loops] repeat [] until desired length
-I made 165 total foundation tr stitches for the long pieces and 90 for the short pieces
-I made one white long piece and one red short piece

For the fun lacy piece in photo above:
*If you would like to make this one custom- it needs to be worked on an odd-numbered multiple of 5 (for example, 55)*
for short piece:
ch 115
1) in 6th ch from hook (these 5 ch count as a dc + ch 1), [dc, sk st, ch 1] across- ending with a dc in last ch
2) turn, [ch 6, sk 4 sts, sc in next st] across
3) turn, sl st into 3 ch's, [ch 6, sc into 3rd ch of next "loop" (a.k.a the "ch 6" from the previous row)] repeat [] across
for the long piece ch 185 then do the same steps as above in 1-3
To crochet the blue piece:
ch 53
1) in 5th ch from hook (these 4 beginning ch count as a tr st), tr, and across (50 total tr)
2) ch 5 (counts as tr+ch 1), turn, sk st, tr, [ch 1, sk st, tr] across row (25 total tr)
3) ch 8 (counts as tr+ch 4), turn, sk 4 sts, tr [ch 4, sk 4 sts, tr] across row (11 total tr)
4) ch 9 (counts as sc+ch 8), turn, sk 4 sts, sc [ch 8 sk 4 sts, sc] across row (11 total sc)
5) ch 1 (does not count as st), turn, work 7 sc in "ch 8" sp, [work 7 sc in next "ch 8" sp] across (70 total sc)
6) ch 8 (counts as tr+ ch 4), turn, tr into sp between "loops" (this is the break in between where you worked the 7 sc), [ch 4, tr into the sp between "loops"] across, on the last loop you will work the last tr st into the "ch 1" you did at the beginning of row 5 (11 total tr)
7) repeat row 2
8) ch 4 (counts as tr st), tr across (50 total tr)
Repeat rows 2-8 three times, then work rows 2 & 3 (this is for the length that I wanted) you may need to work more or less if you want it custom
Assembly of piece:

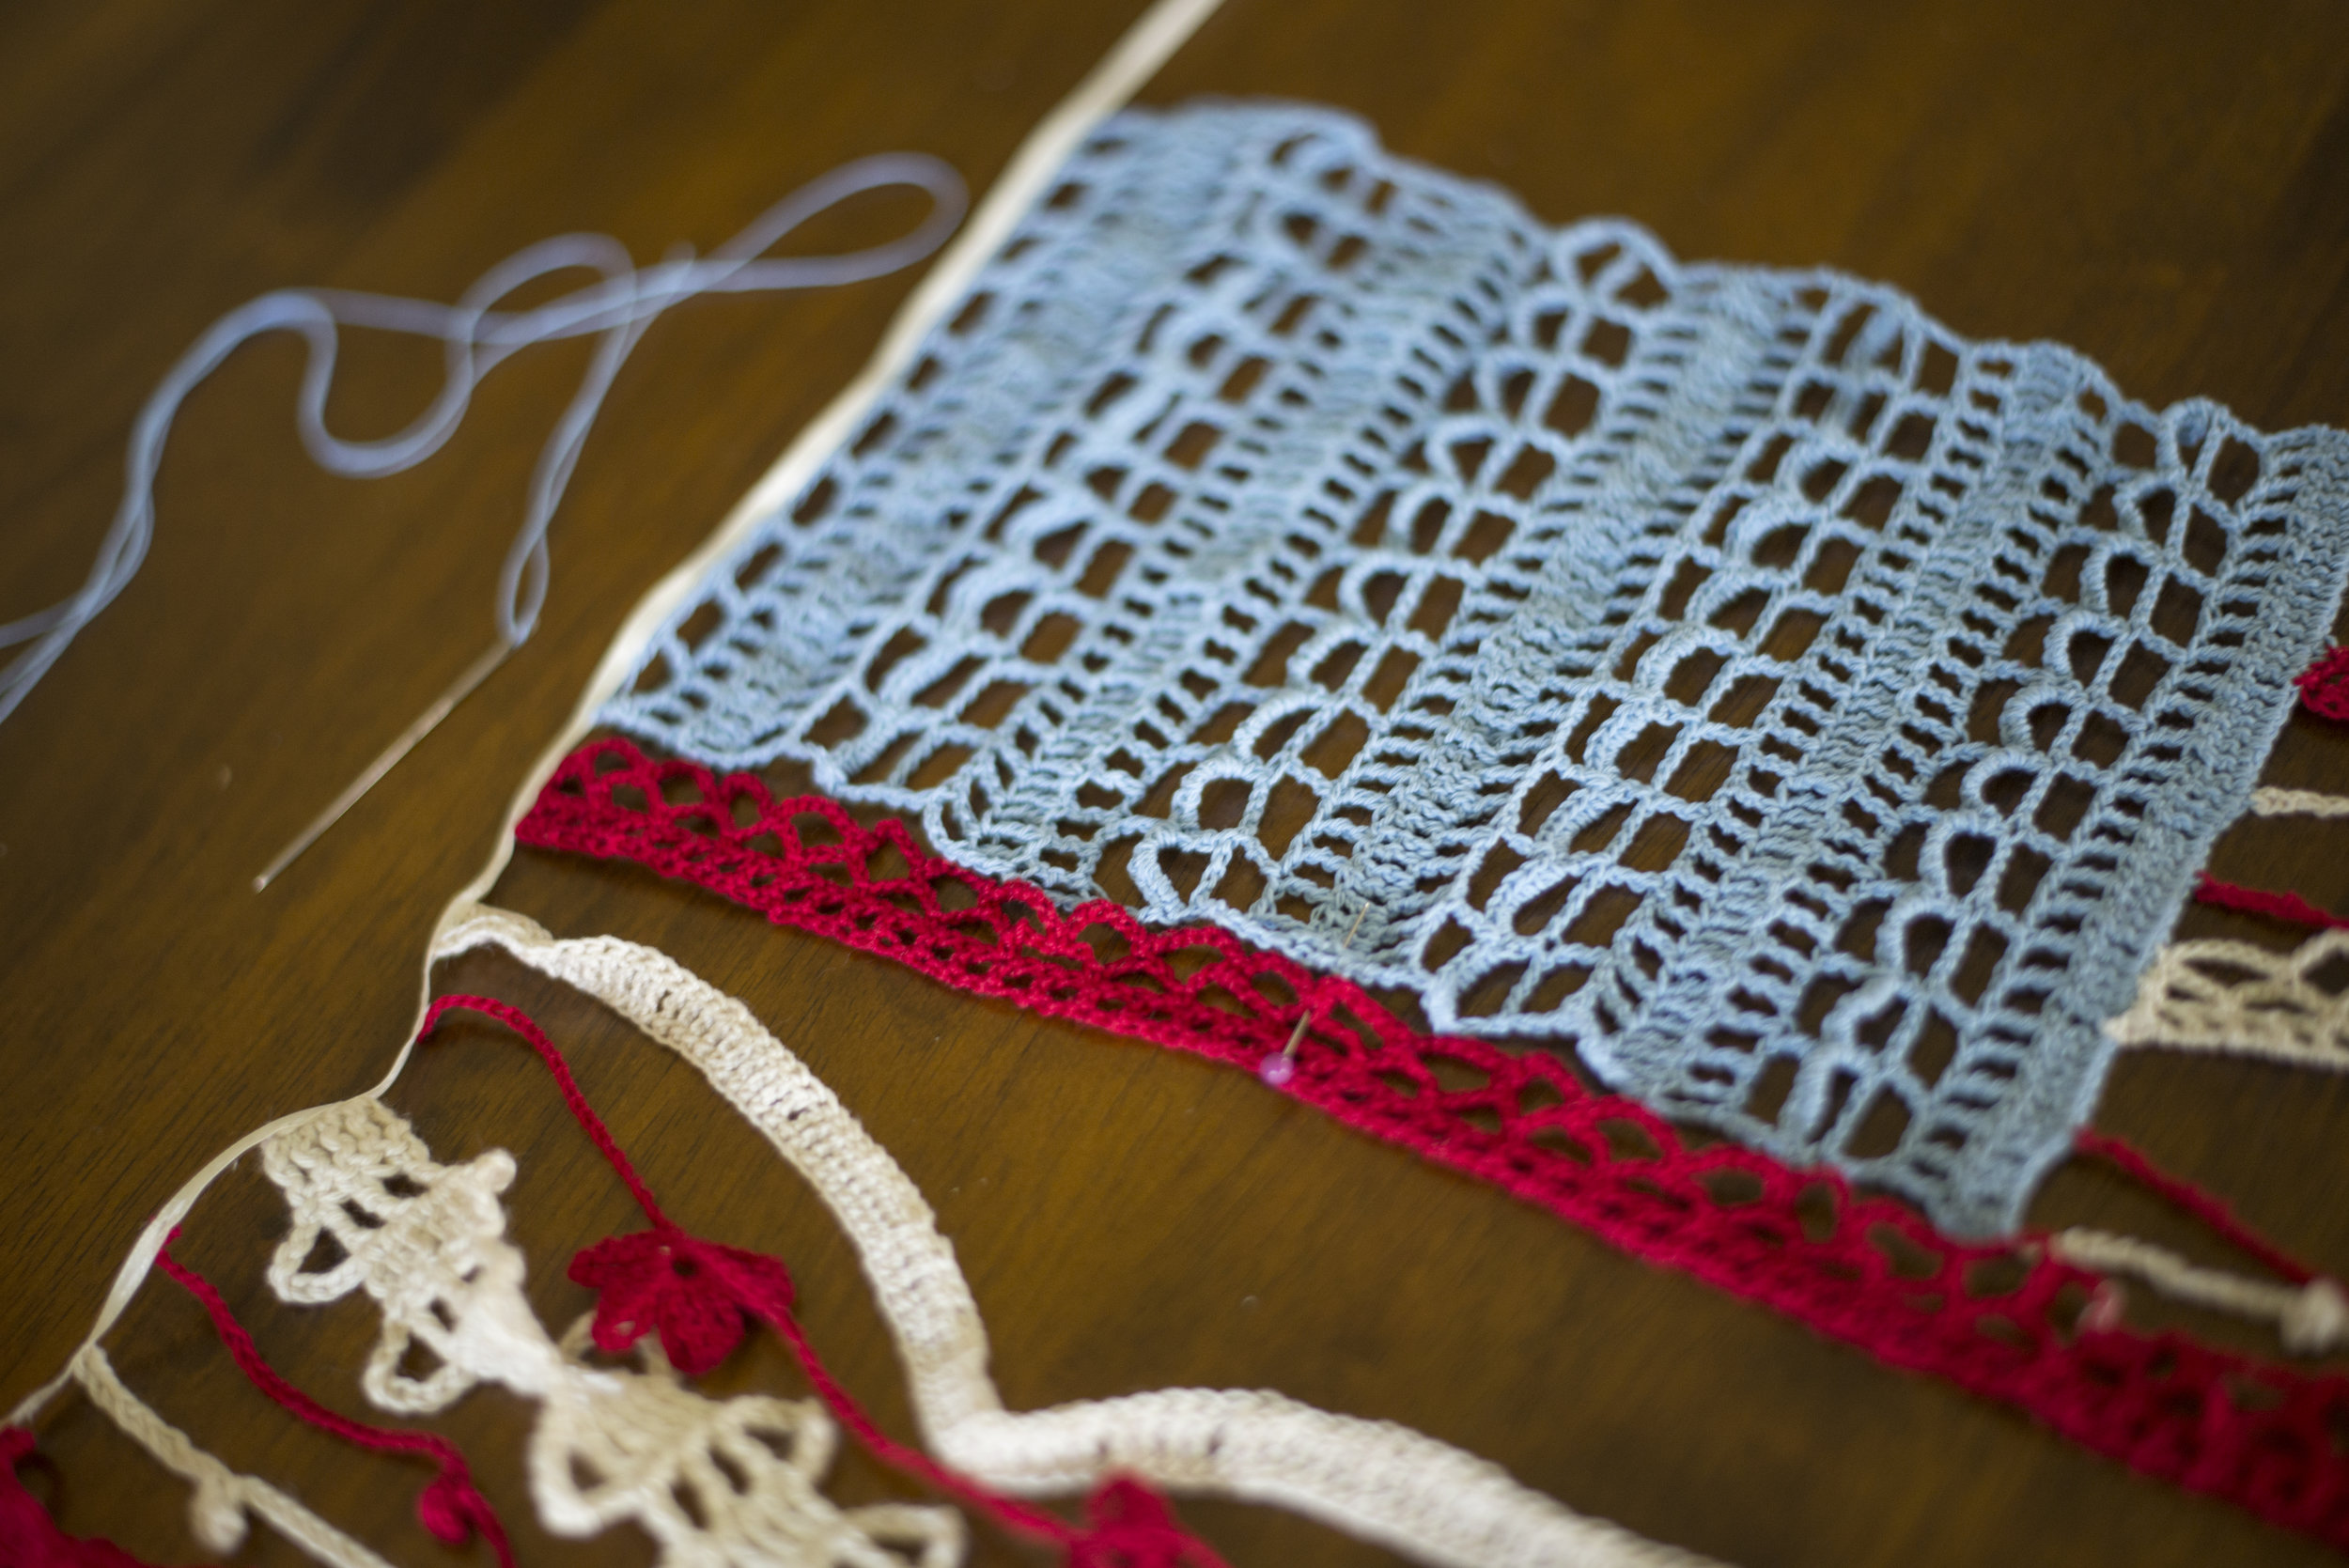
First, I laid out all my pieces on a flat surface to see how I wanted it to look. You may want to make more or less pieces than I did.
Then I began to sew the top of the pieces to a thin piece of white ribbon to connect them all. Looking back I realize I guess I didn't have to do this, because I could have just glued them to the branch if I really wanted to. But then again I'm glad I did because it seems like it would be more secure this way. Anyways, see the photo below for how I stitched the pieces to the ribbon.
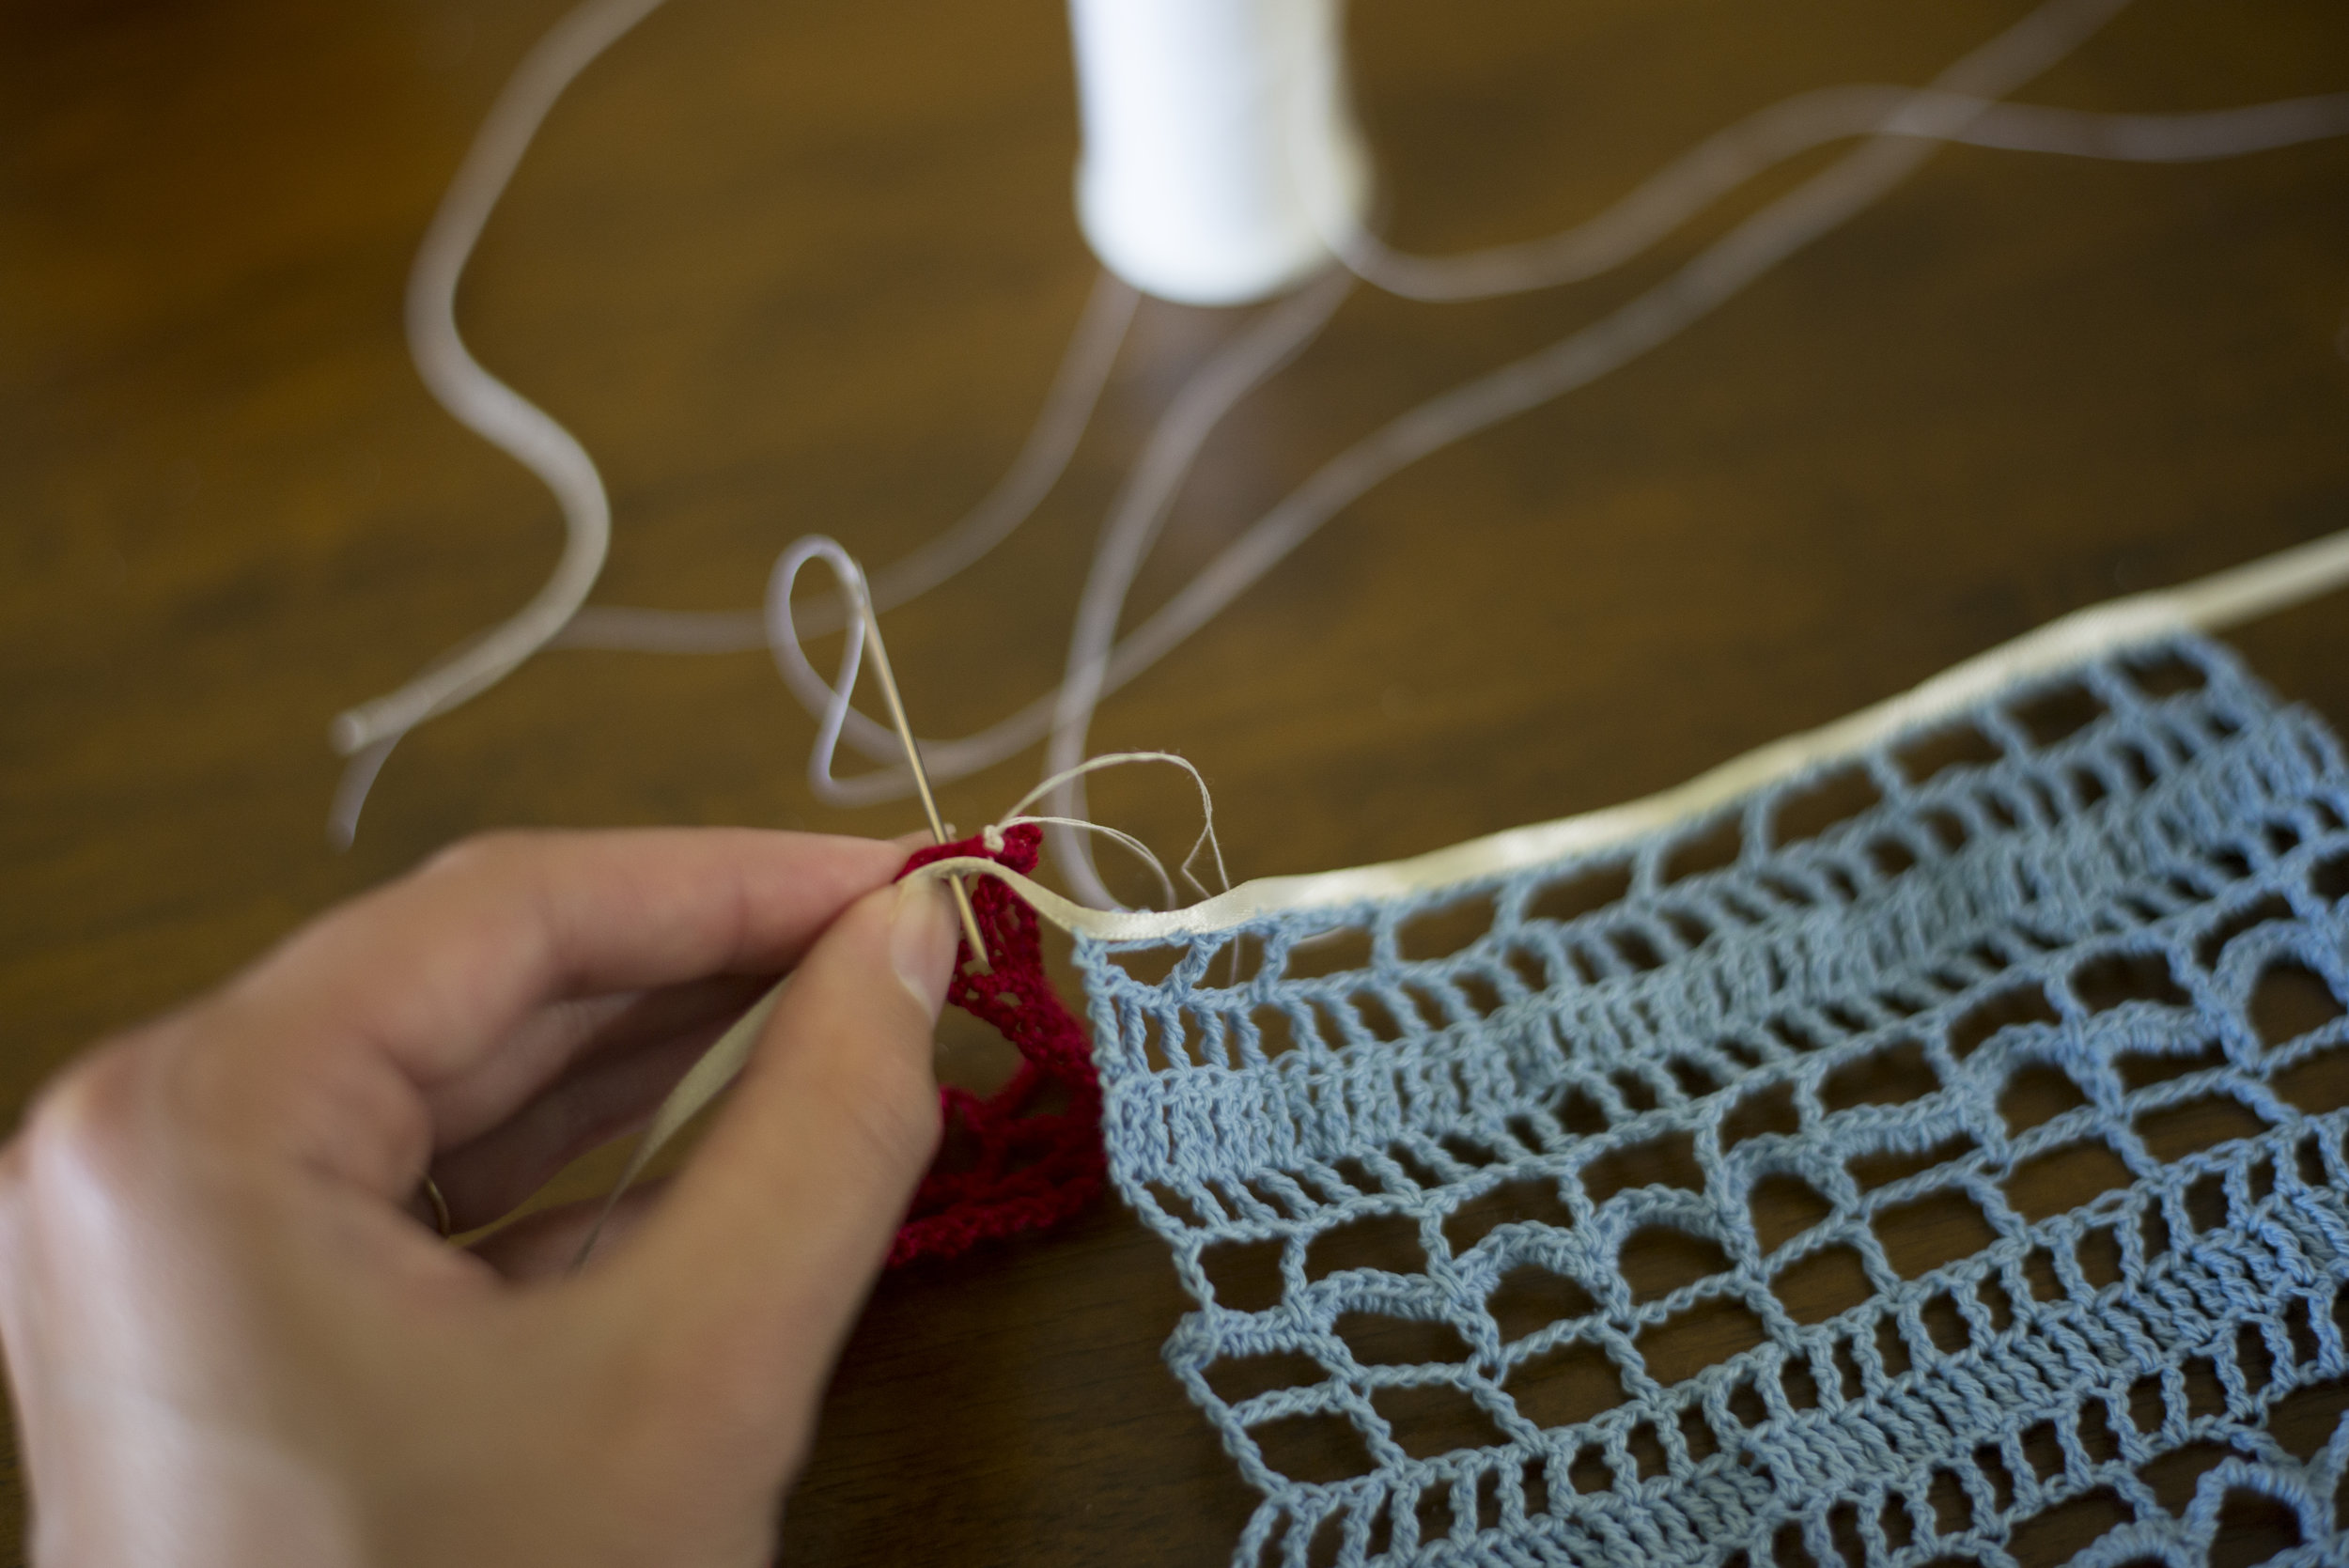
To attach the pieces I took a piece of white thread and my needle and then put my "pieces" on the back side of the ribbon and made a running stitch along the ribbon to connect them. First I attached the blue piece then I spaced the pieces about 1/2 to 3/4 inch apart. Not being too picky about how far apart they were.
Then I sewed the shorter pieces onto the very bottom stitch of my blue piece using the long tails of the short pieces and my needle. I just passed it through a couple times to make sure it was secure then I wove in the ends. Then I connected my blue piece to the first stripe to the left of it. I think this helped it lay more flat, and just overall looked better.
Then weave in allllll your ends (ugh).

Last, you will glue your ribbon + sewn pieces to the back of your branch/dowel. It helps to do this on a flat surface so you can center it and get it just to your liking.
Then to finish it, I tied a piece of jute string at each end for hanging.

WHEW!!!
I feel like that was just about the longest tutorial ever. Geez. It sure was worth it though. And I hope you find this valuable, friend.
I'd love to see your finished projects... If you would, tag me over on Instagram!
Enjoy this pattern, and happy summer makin'! :)
-Meg


