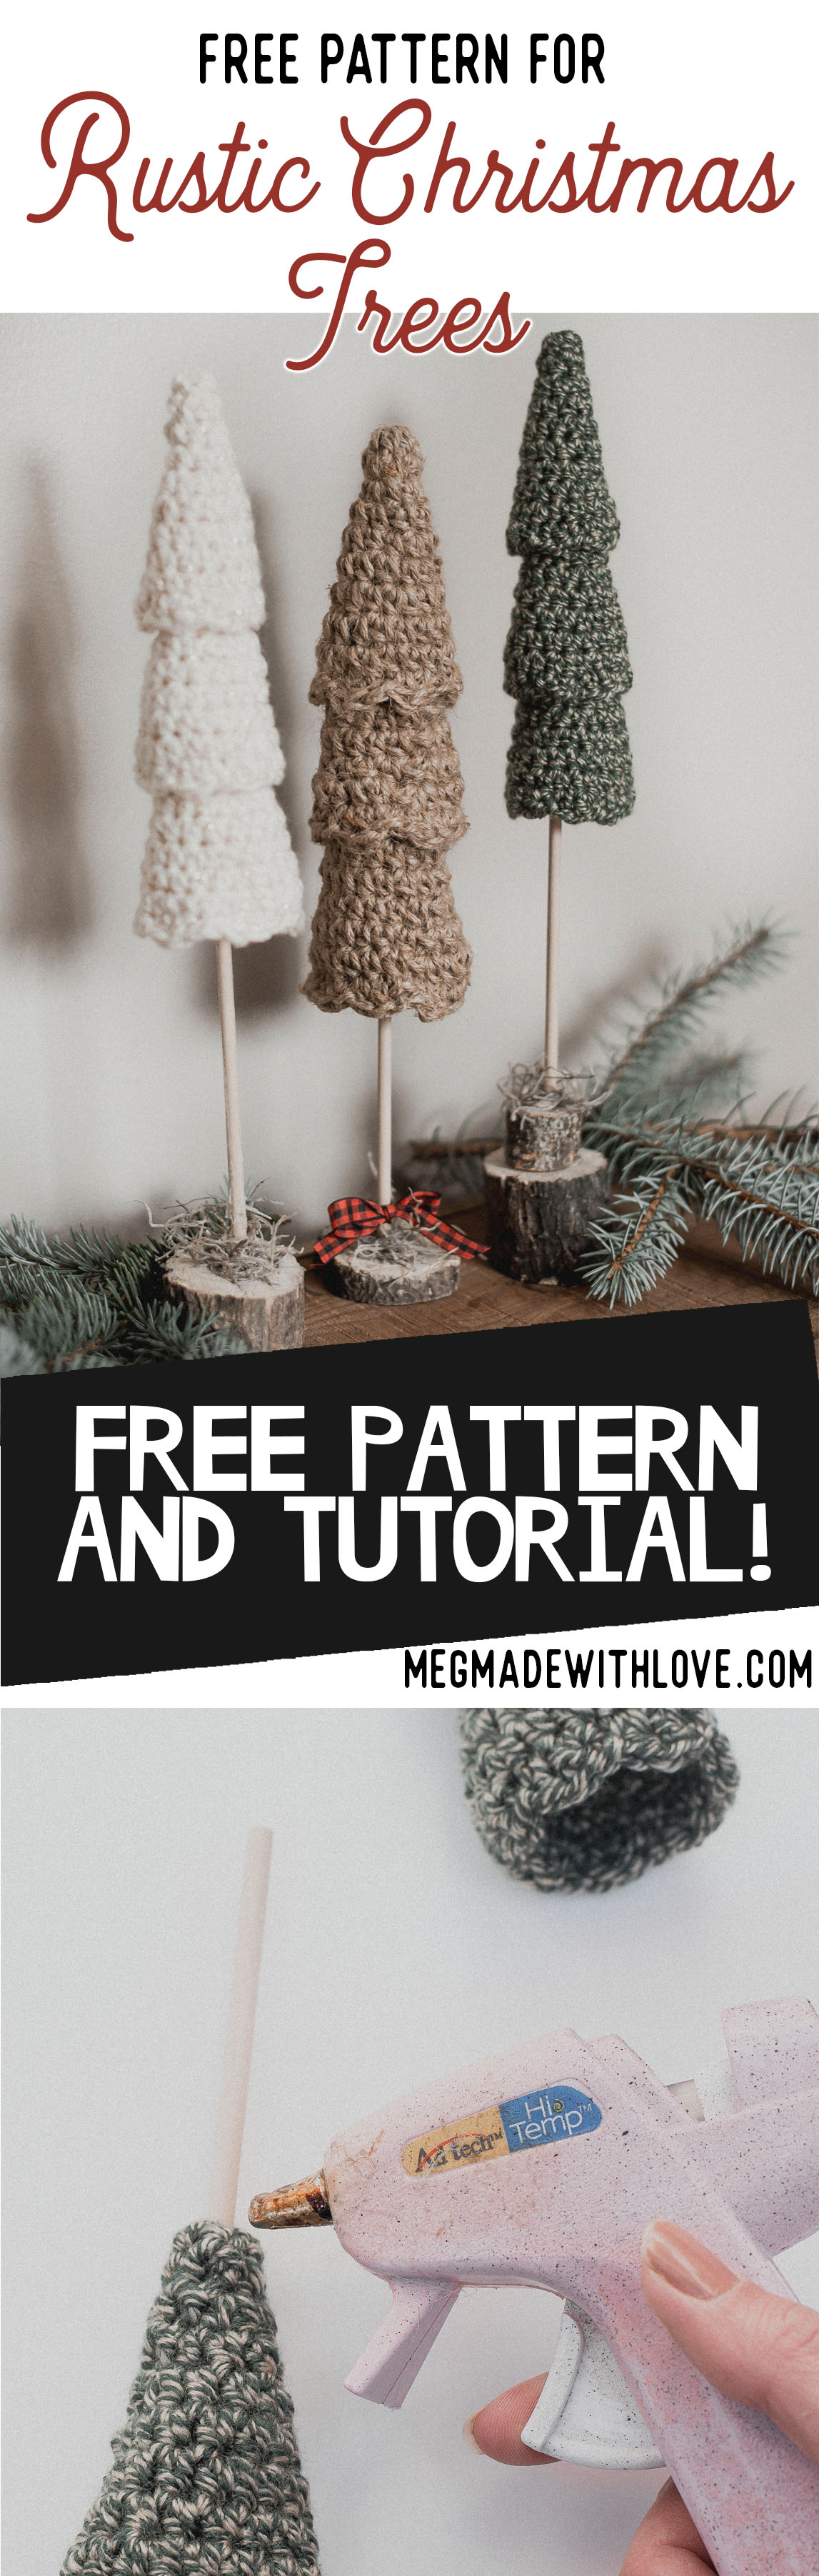
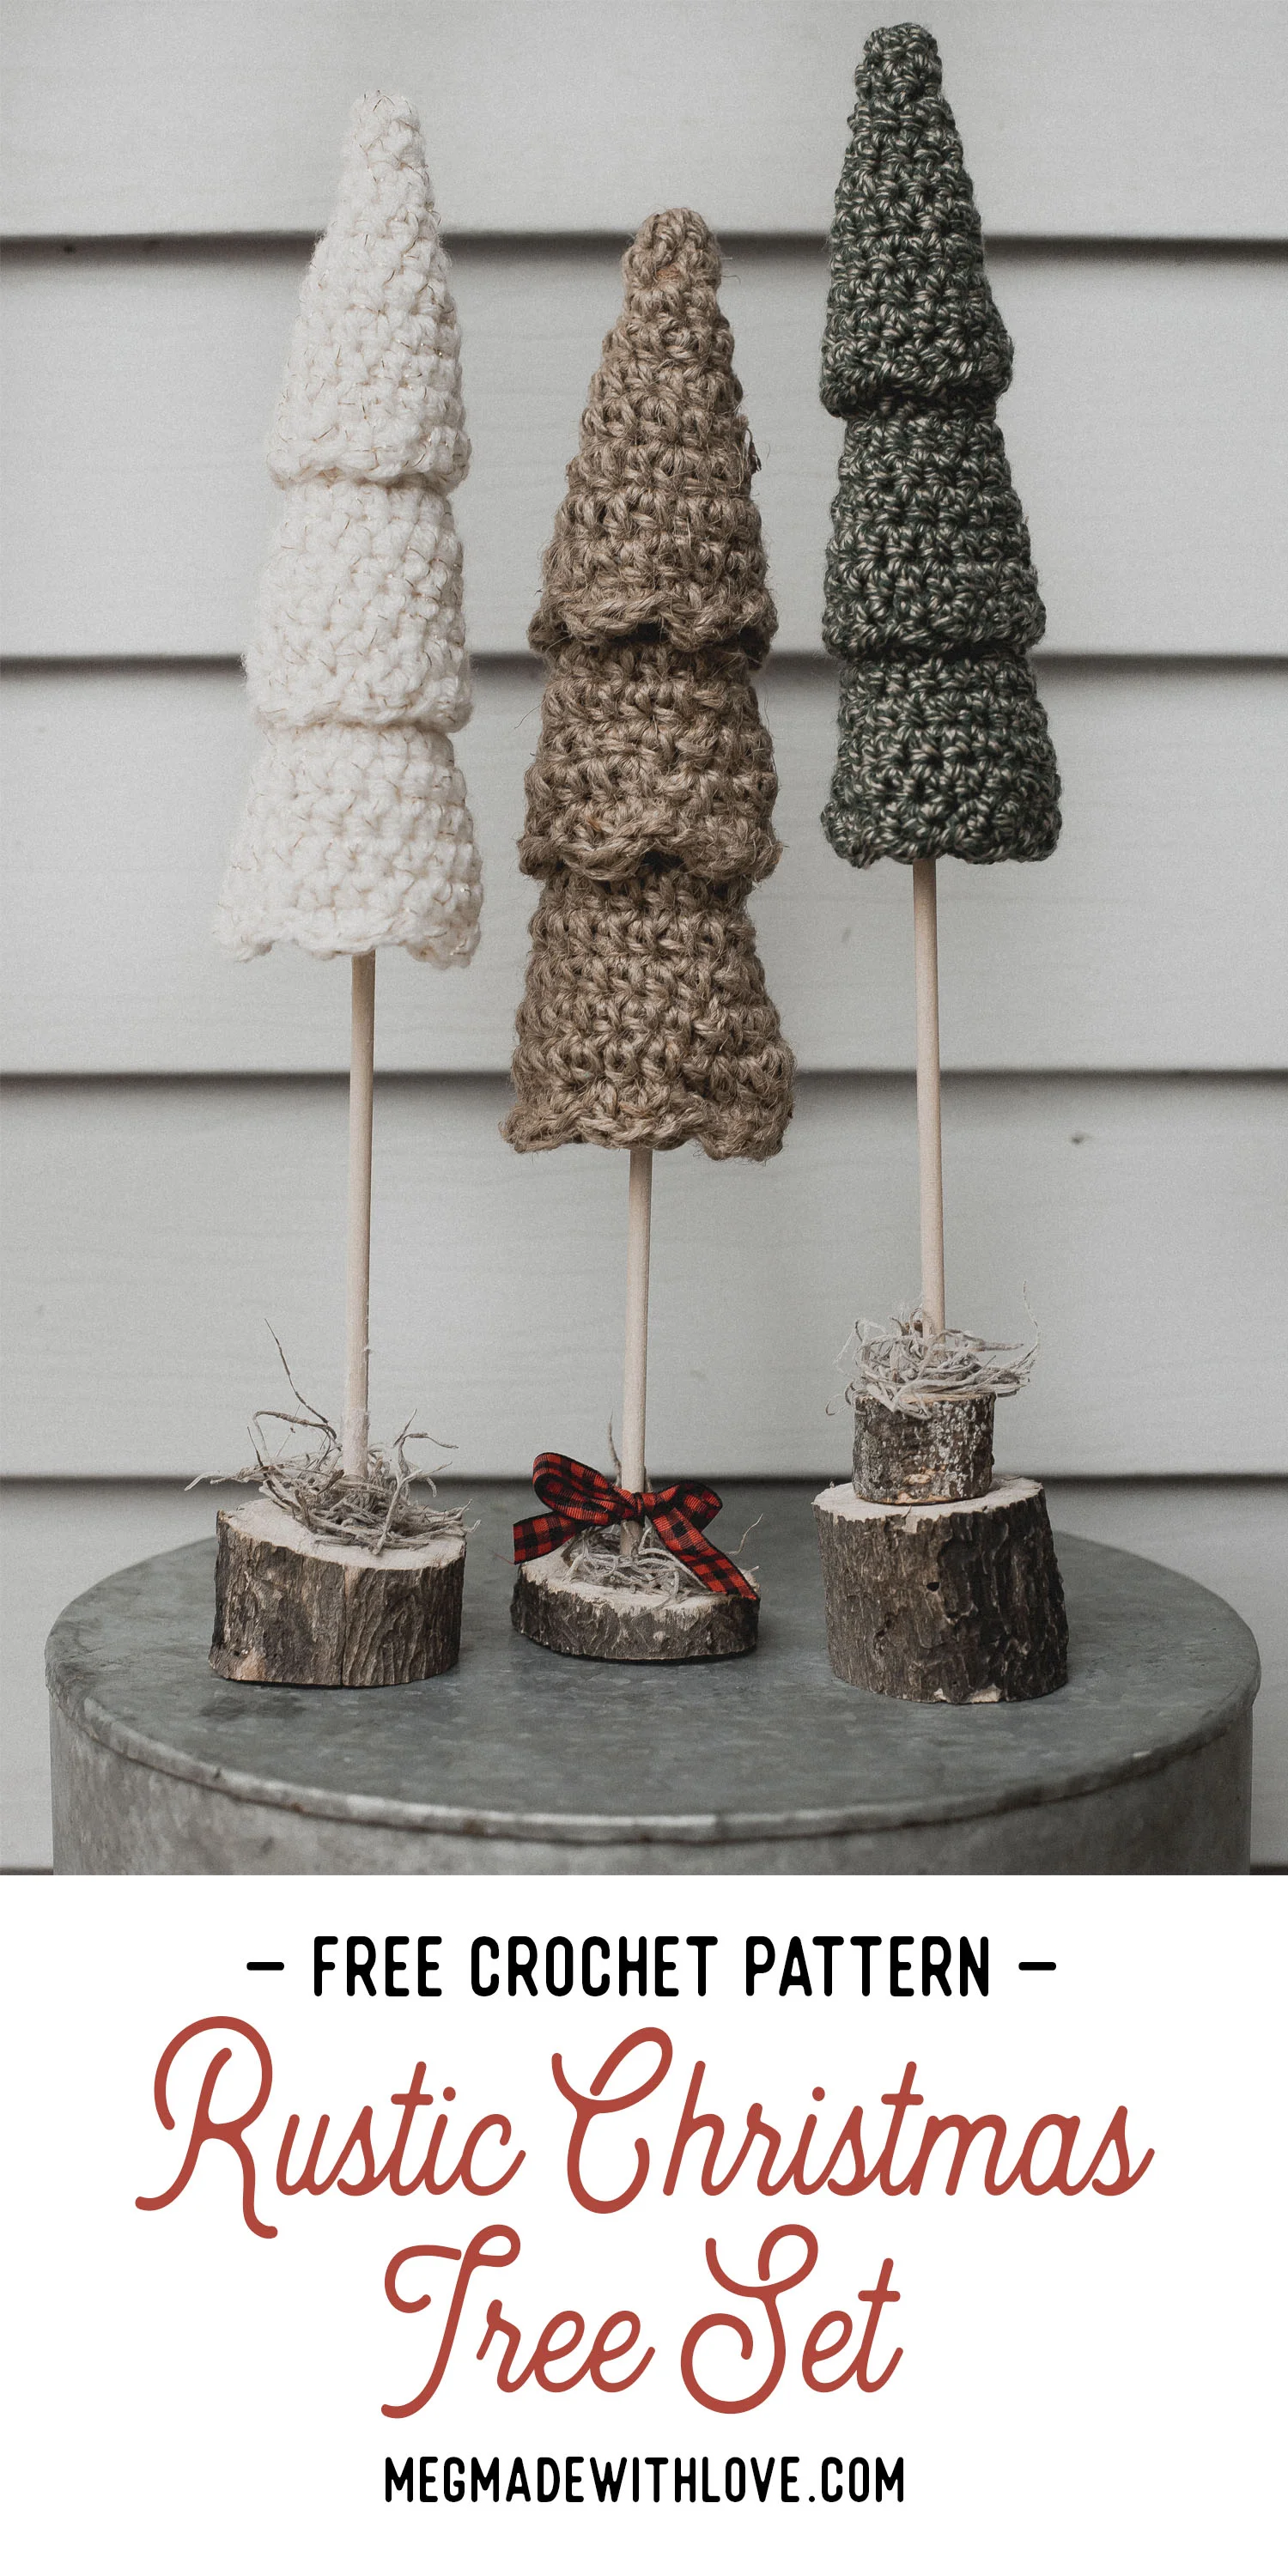
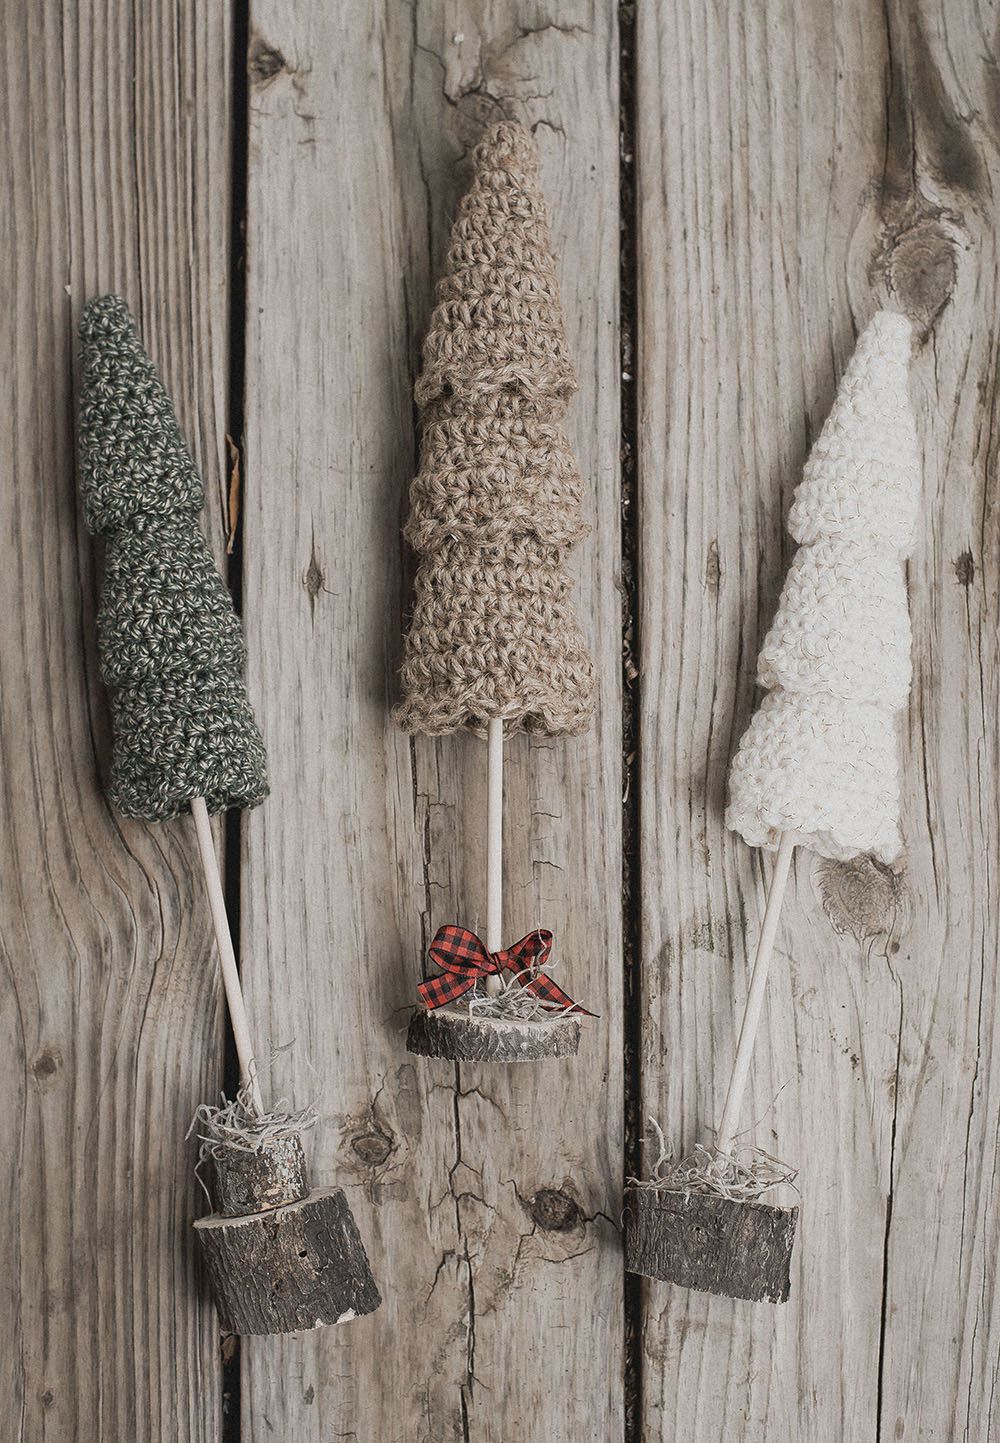
Free Crochet Pattern for the Rustic Christmas Tree Set
/
**If you’d like the PDF version of this free pattern click HERE. Great for easy printing!!
Have I got a fun holiday project for you today! This rustic tree set would make the perfect decor just about anywhere in your home— I can picture them on an entryway table surrounded by greenery or even on a side table!
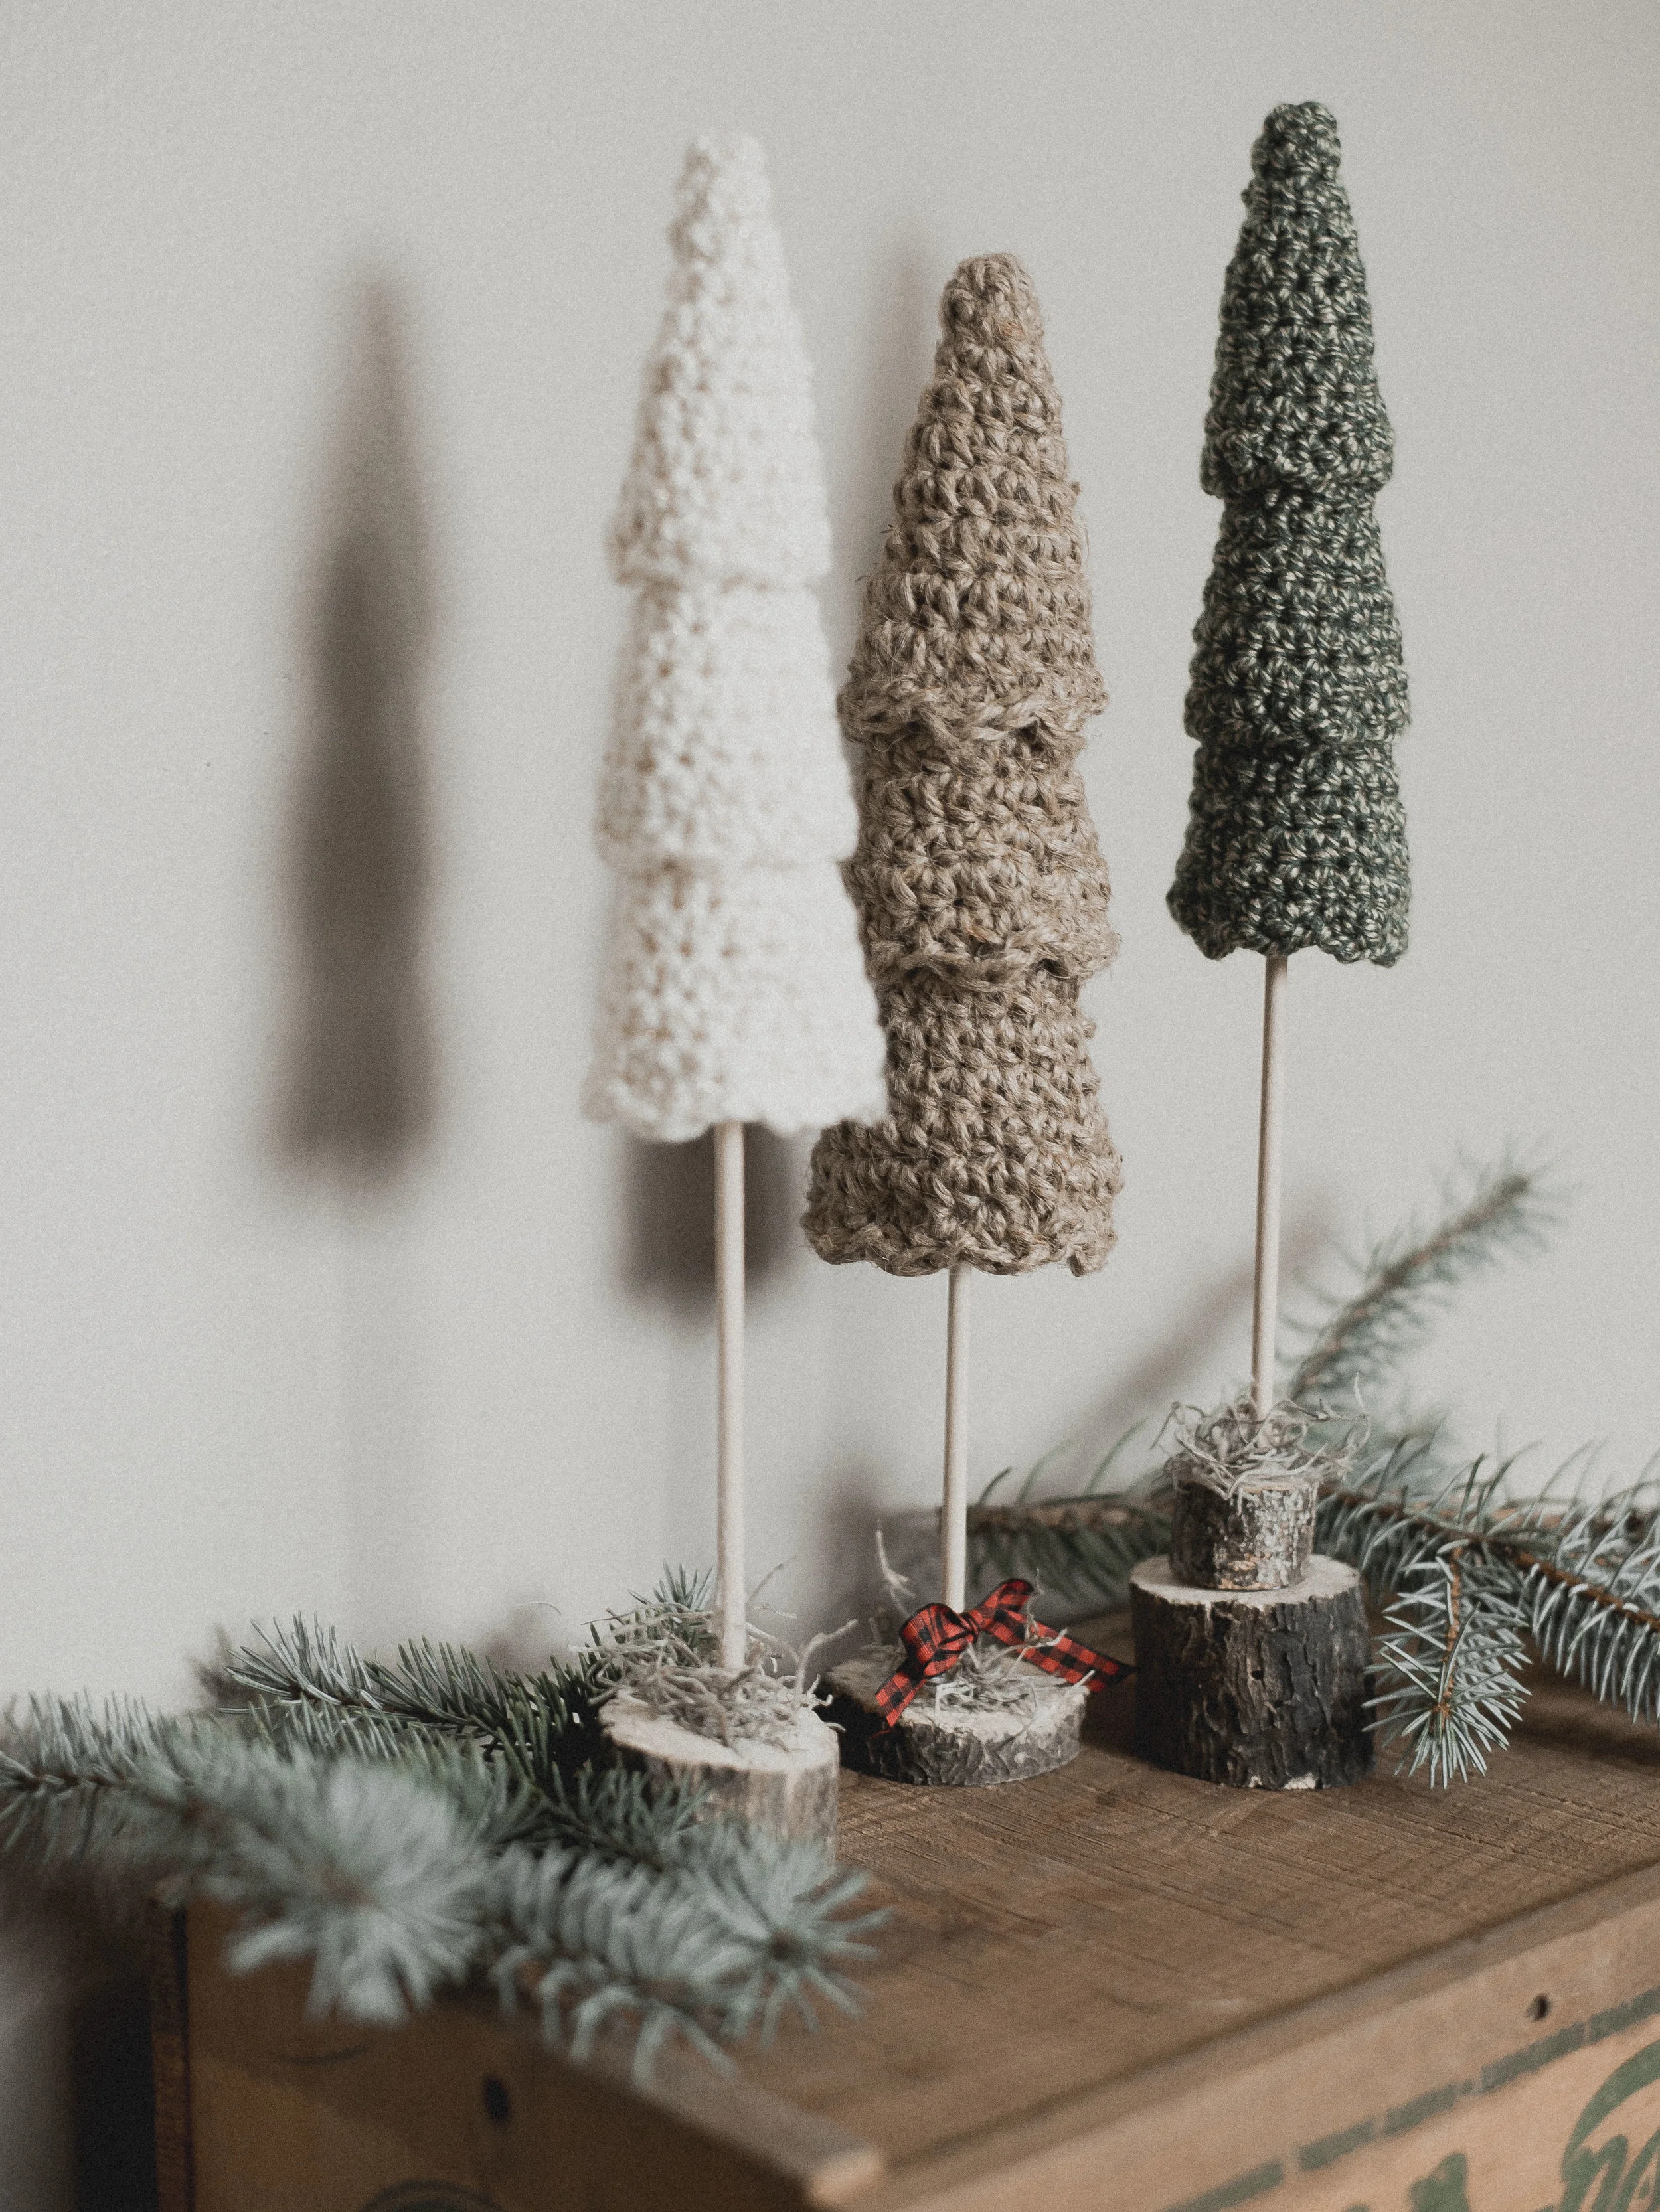
They’re actually incredibly simple to make— if you can half double crochet you can make these trees! The trees are made up of three different-sized pieces, stacked on top of each other then glued to a wooden dowel.
I honestly had a ton of fun scouting for tree branches to use for the base. You can use a chop saw or even a jigsaw to cut your branches. Then I drilled a little hole in the tree chunks for the dowel to fit in for a more secure bond.

You can add so many little decorations to the trees also to personalize to your own style! Like little beads for ornaments or a star on top.. ribbon… moss.. It’s fun to think of the ways to jazz them up! I hope you love making these trees as much as I did!
**If you’d like the PDF version of this free pattern click HERE. Great for easy printing!!
What you’ll need:
-approximately 50 yards of worsted weight (4) yarn/jute per tree
-size G crochet hook (or hook size to obtain gauge)
-3 wooden dowels, 3/16” wide by 12” long
-wooden rounds for the base of the tree, drilled to make a hole for the dowel
-other little embellishments for decoration (moss, ribbon, star, ornaments)
-hot glue gun
Gauge:
15 hdc by 11 rows = 4 inch square
Notes:
-fully-assembled trees measure from 12-15” tall by 2” wide
-if using jute, the first couple of rows are a little tough to manage the stiffness, but it gets easier as the sts increase
-ch’s at the beginning of rounds do not count as sts
Pattern:
Bottom piece:
1) make magic circle, ch 1, work 6 hdc in circle, join to 1st st with sl st (6 total sts) *at this point just tighten the circle, don’t tie off*
2) ch 1, hdc around, join to 1st st with sl st(6 total sts)
3) ch 1, [work 2 hdc in st, hdc in next st] around, join to 1st st with sl st (9 total sts)
4) ch 1, hdc around, join to 1st st with sl st (9 total sts)
5) ch 1, [work 2 hdc in st, hdc in next two sts] around, join to 1st st with sl st (12 total sts)
6) ch 1, hdc around, join to 1st st with sl st (12 total sts)
7) ch 1, [work 2 hdc in st, hdc in next three sts] around, join to 1st st with sl st (15 total sts)
8) ch 1, hdc around, join to 1st st with sl st (15 total sts)
9) ch 1, [work 2 hdc in st, hdc in next four sts] around, join to 1st st with sl st (18 total sts)
10) ch 1, hdc around, join to 1st st with sl st (18 total sts)
11) ch 1, [work 2 hdc in st, hdc in next five sts] around, join to 1st st with sl st (21 total sts)
12) ch 1, hdc around, join to 1st st with sl st (21 total sts)
13) ch 1, [work 2 hdc in st, hdc in next six sts] around, join to 1st st with sl st (24 total sts)
14) ch 1, [sl st, dc] around, join to 1st st with sl st (24 total sts)
Finish off
Middle Piece:
Follow pattern instructions of bottom piece through round 11.
12) repeat instructions from round 14 of bottom piece (21 total sts)
Finish off
Top Piece:
Follow pattern instructions of bottom piece through round 9.
10) repeat instructions from round 14 of bottom piece (18 total sts)
Finish off

After all 3 pieces are crocheted you are ready to assemble the tree. You’ll weave in your ends, but don’t tighten the top too tight because the dowel will need to fit through. You’ll begin with the largest, bottom piece and will place it on the dowel a couple of inches from the top of the dowel. It may help you to stack all the pieces on the dowel to see where you’d like to put it. v

Slide the bottom piece down a tad from where you’d like it to be, then place a good amount of hot glue right above it, on the dowel. Scoot the piece up to sit on top of the glue.

Then have your middle piece ready to stack on top of the bottom piece. Put a generous amount of hot glue on the dowel above the bottom piece as well as the top of the bottom piece. Slide the middle piece onto the dowel, on top of the bottom piece.
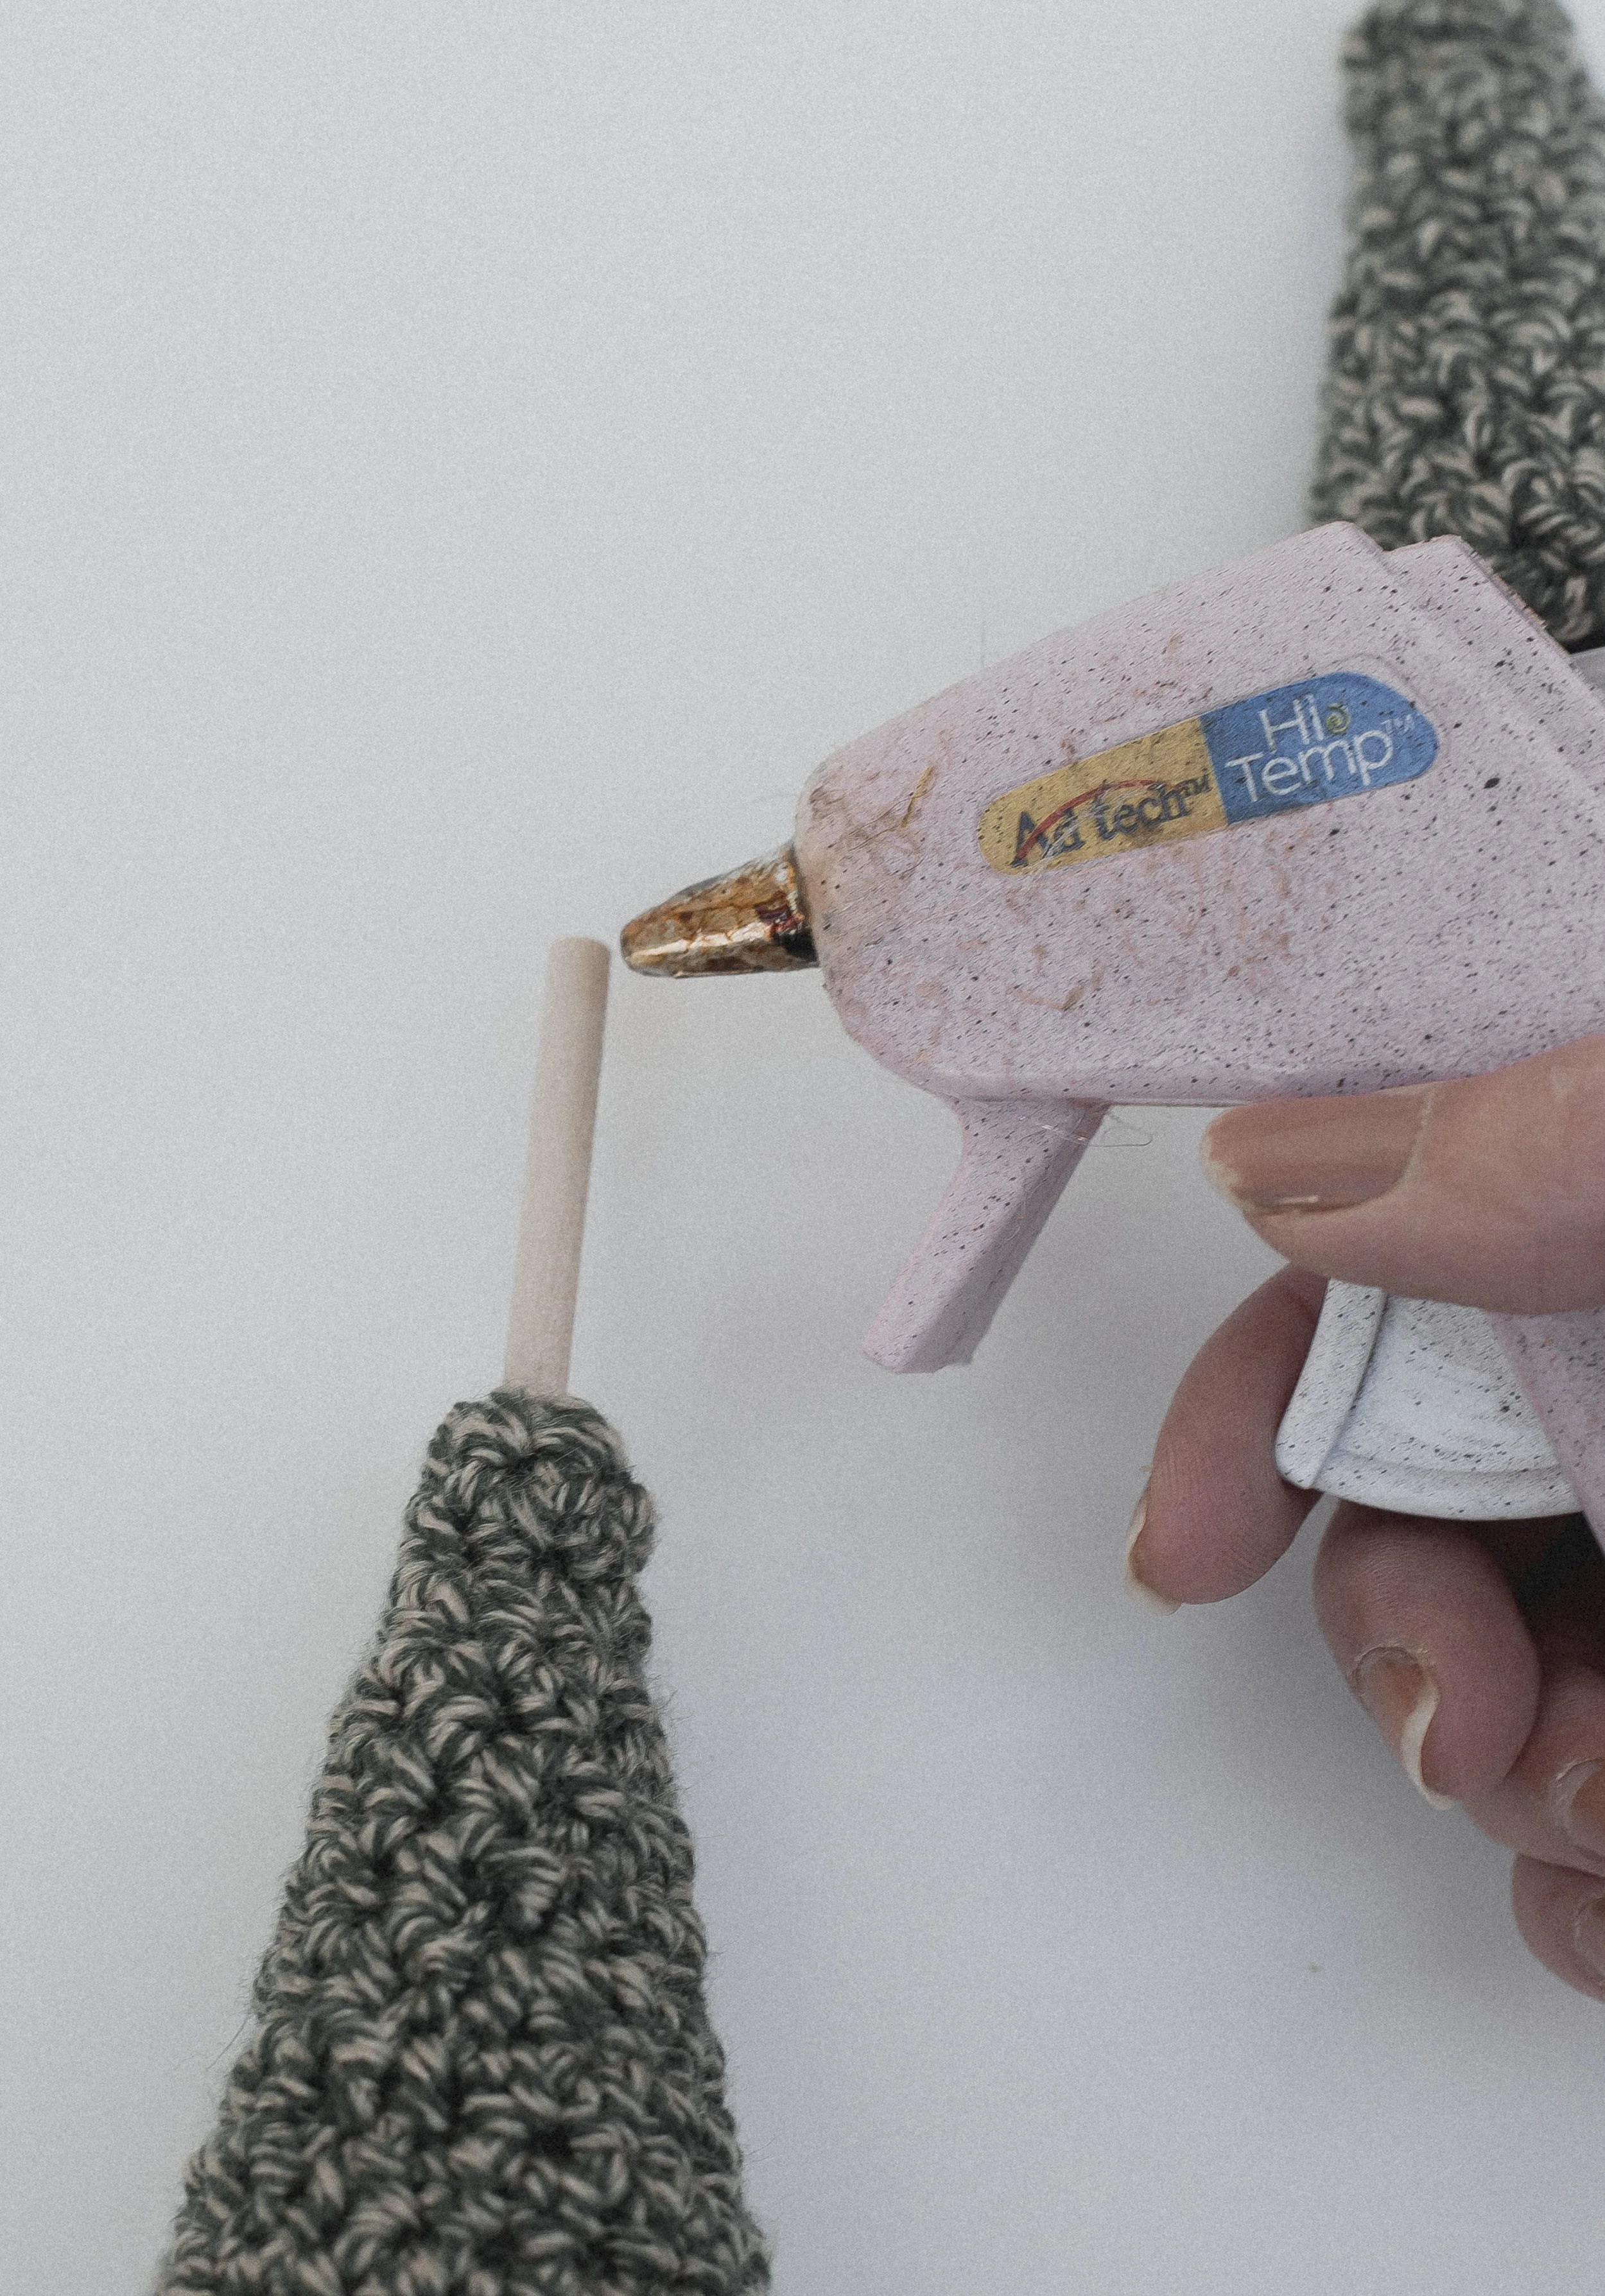
You’ll do the same thing for the top piece-- placing glue on the top of the dowel then putting the top piece on top of it.

Glue your stacked wood rounds together. Then to join the dowel to the wood chunks, fill the drilled hole with hot glue then put the dowel into the hole, and hold up straight until the glue cools.

To add the moss, put more glue around the base of the dowel, then top with moss. Tie on your bow, and add any other decorations of choice... then your tree is complete. Repeat for the other two trees to make a fun, rustic holiday set!
I hope you enjoy these for the holidays! So much rustic goodness.
Happy hookin’
Meg