8 Free Boho Summer Top Crochet Patterns

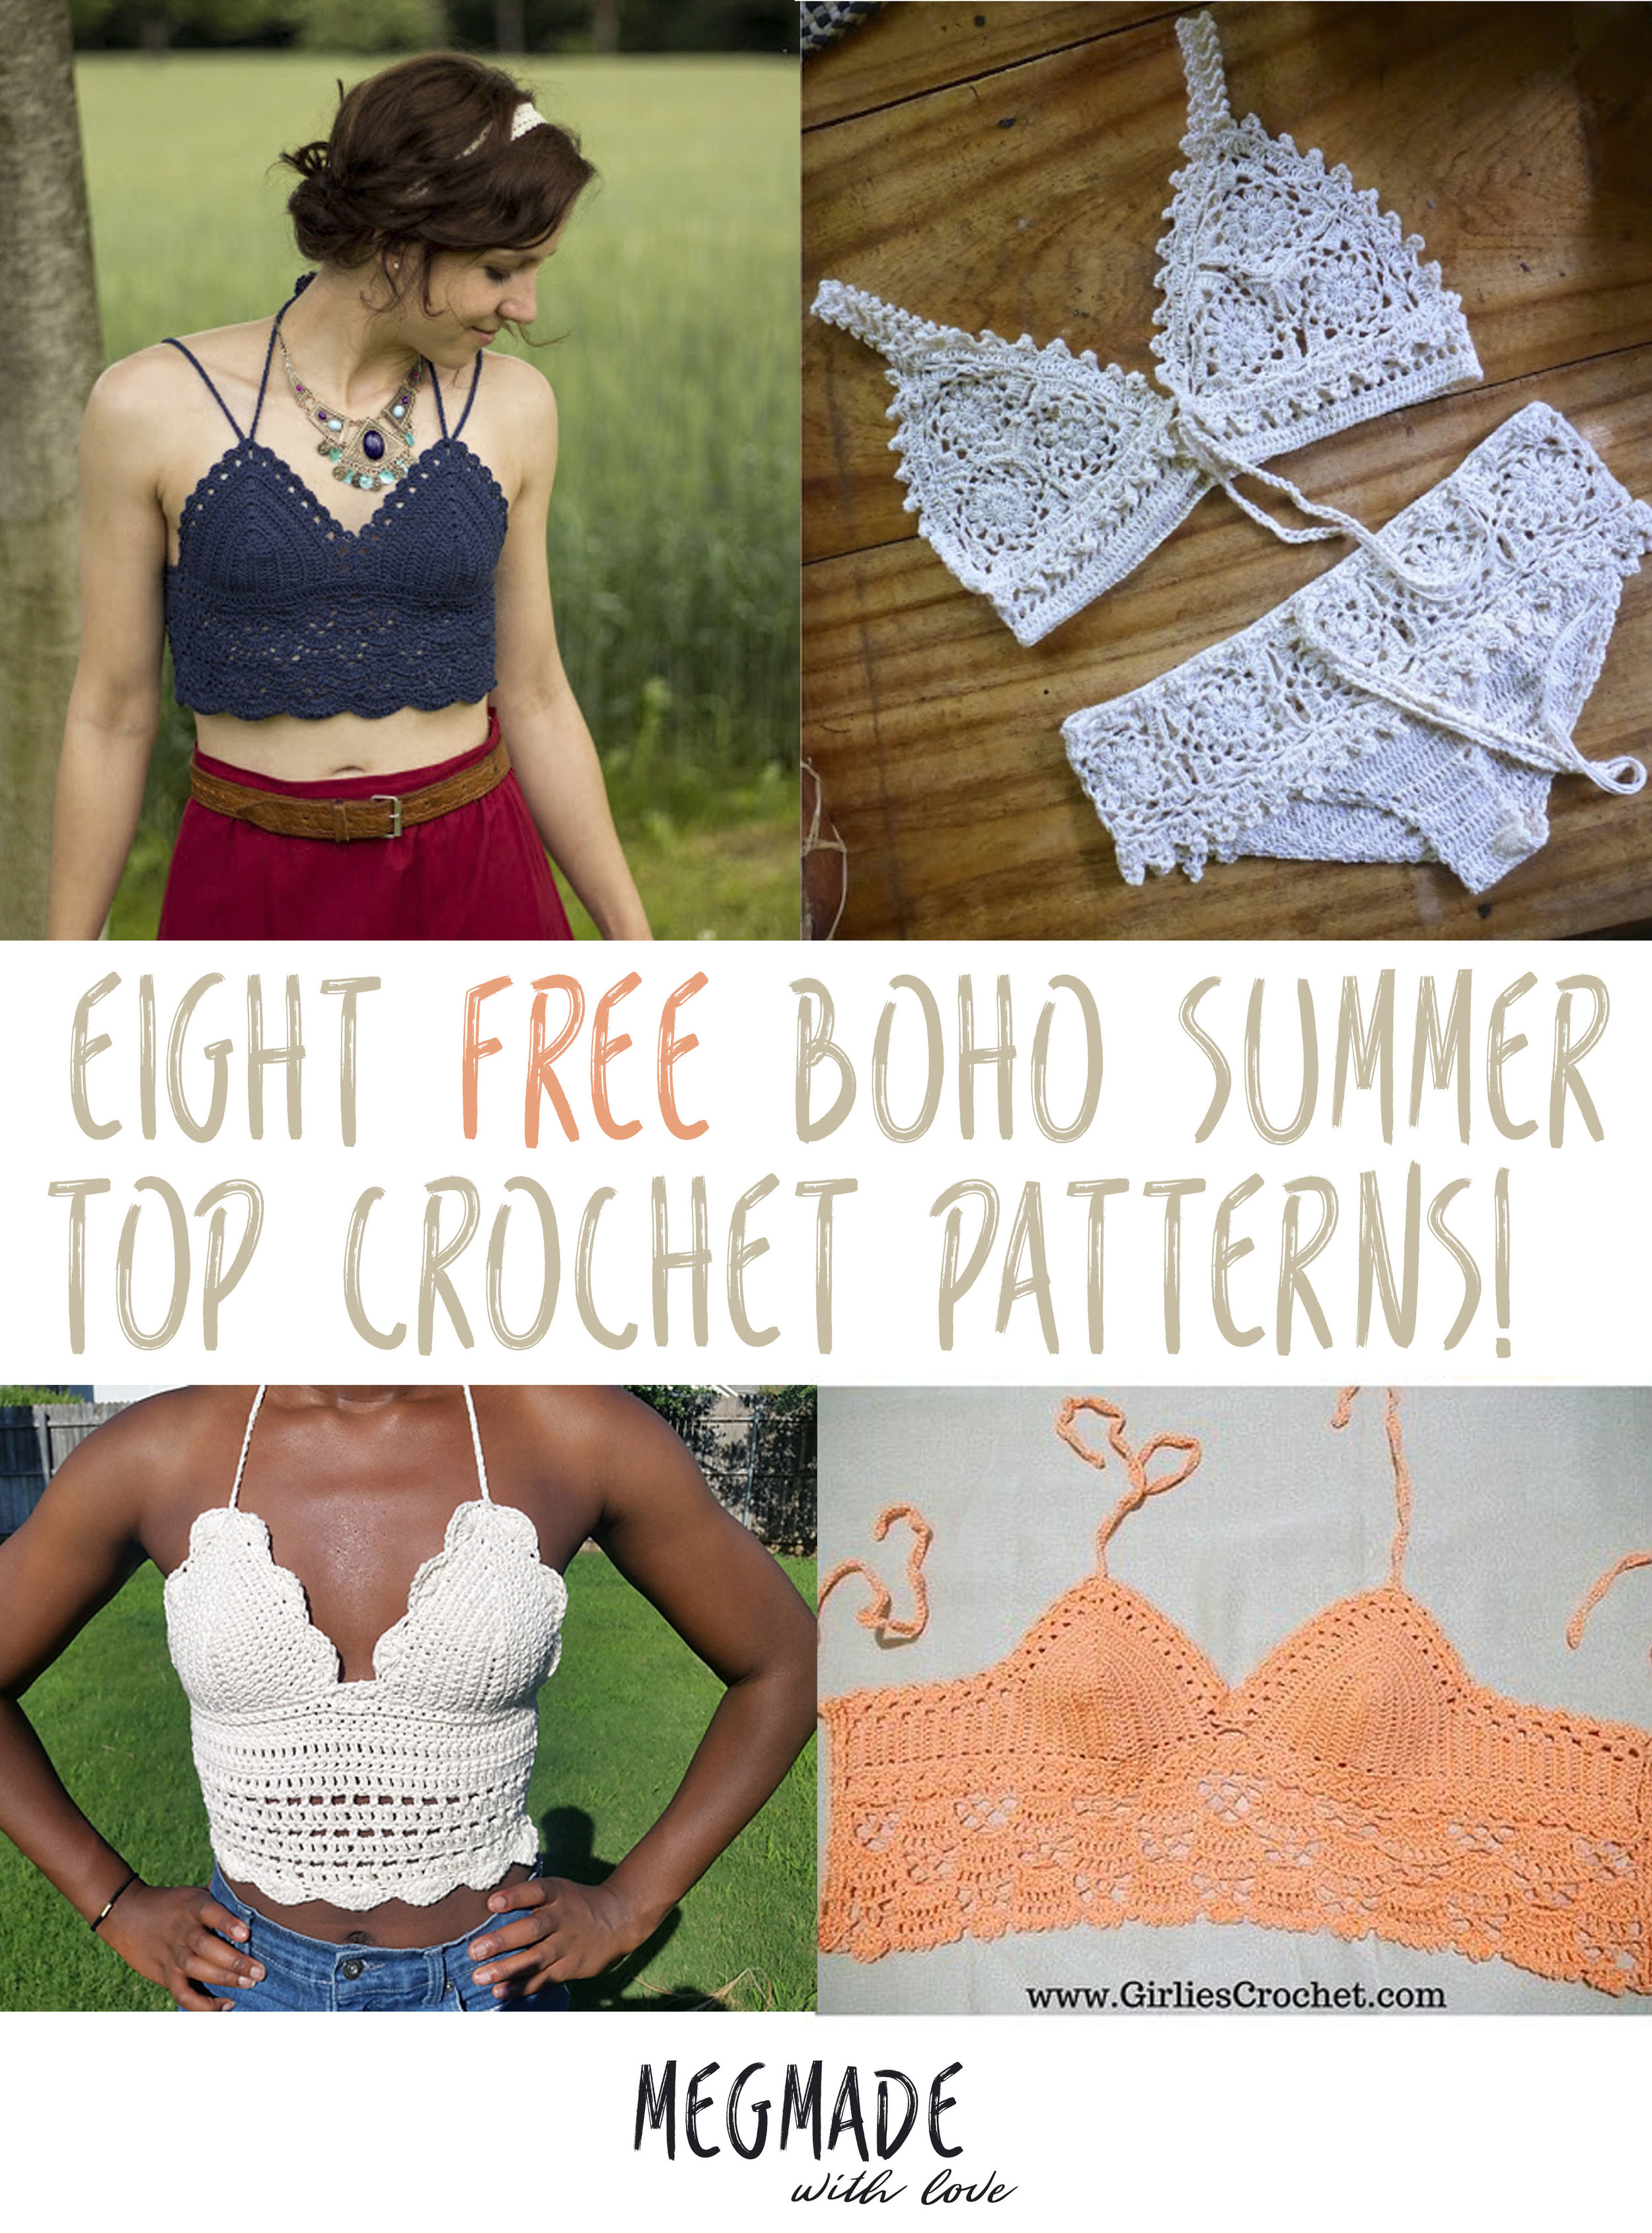
Hey guys. So the warm weather is finally makin' it's way into my world over here in good ol' Kansas. And it's got me itchin' to make some cute summer garments! I've been tossing around the idea of making a swimsuit cover, and here recently I've seen so many inspirational crochet tops I thought I'd compile a list of a few FREE crochet patterns for some freaking adorable tops. 

I'm thinking I'm going to design a top of my own this summer, yet I have some things that I'm having to consider. Like have you noticed how basically everyone that rocks these things has not very big boobs? (no way around just saying that, ha!) I'm gonna keep it real and say that ever since I became pregnant with Sawyer, my boobs are just not what they used to be. lol So I'm needing something with lots of support. Along with a good lining. All while being cute. So we'll see how that goes. And if you struggle with that sorta thing  also, keep an eye out for that pattern! 

Anyways, lets get to the free patterns. I think you'll love them. Every one of these is brilliant. You can find the links for them underneath their photo.

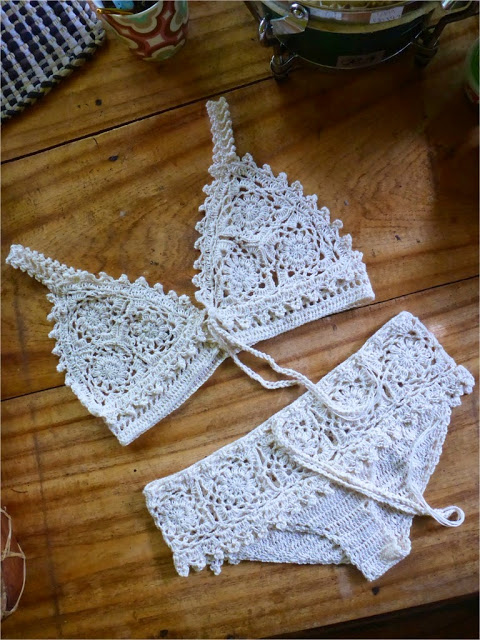
I put this pattern first, because well. I think this one might be my favorite. I saw it and thought no way!! I'm grateful for the person who made this pattern! It even comes with a pattern for the bottoms! Find it here.

I like this one by Drops Design, because it's super simple. I believe the skirt is in the pattern too, two for one, HOLLA! Find it here.

Ain't this one precious?? The little scallops on the top though! How cute. Find it here.

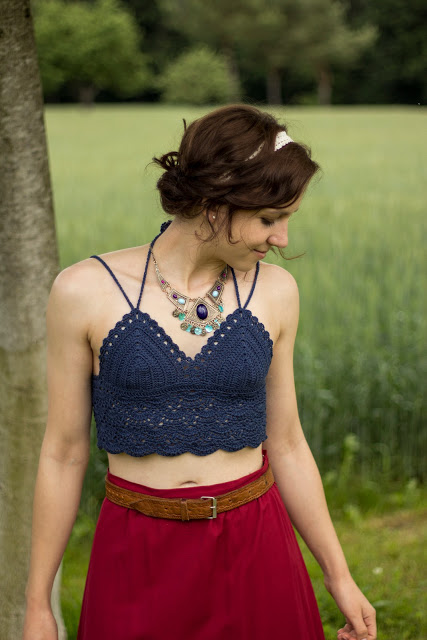
Guys.  This top is amazing. I think this one along with the first one were my favorites. It probably doesn't have anything to do with how great she styled it with that skirt and necklace! I love it. Find it here (will have to translate to English).

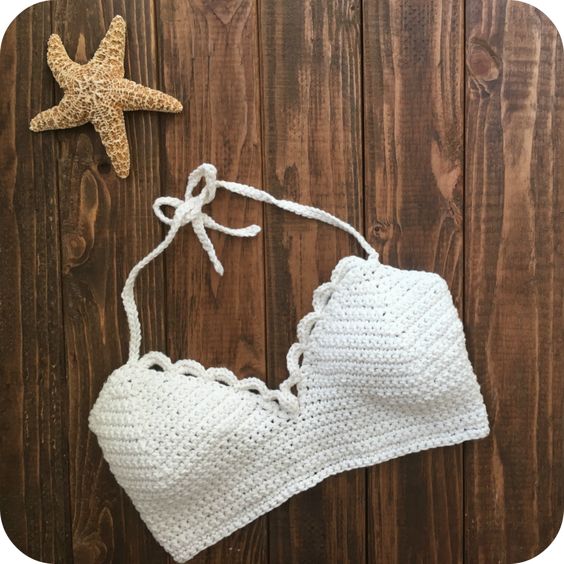
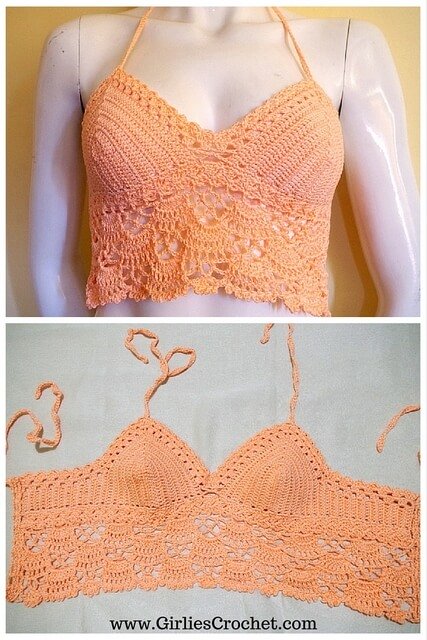
I love this one! Especially the edges on the bust. It seems like it wouldn't be hard to make at all! Find it here.

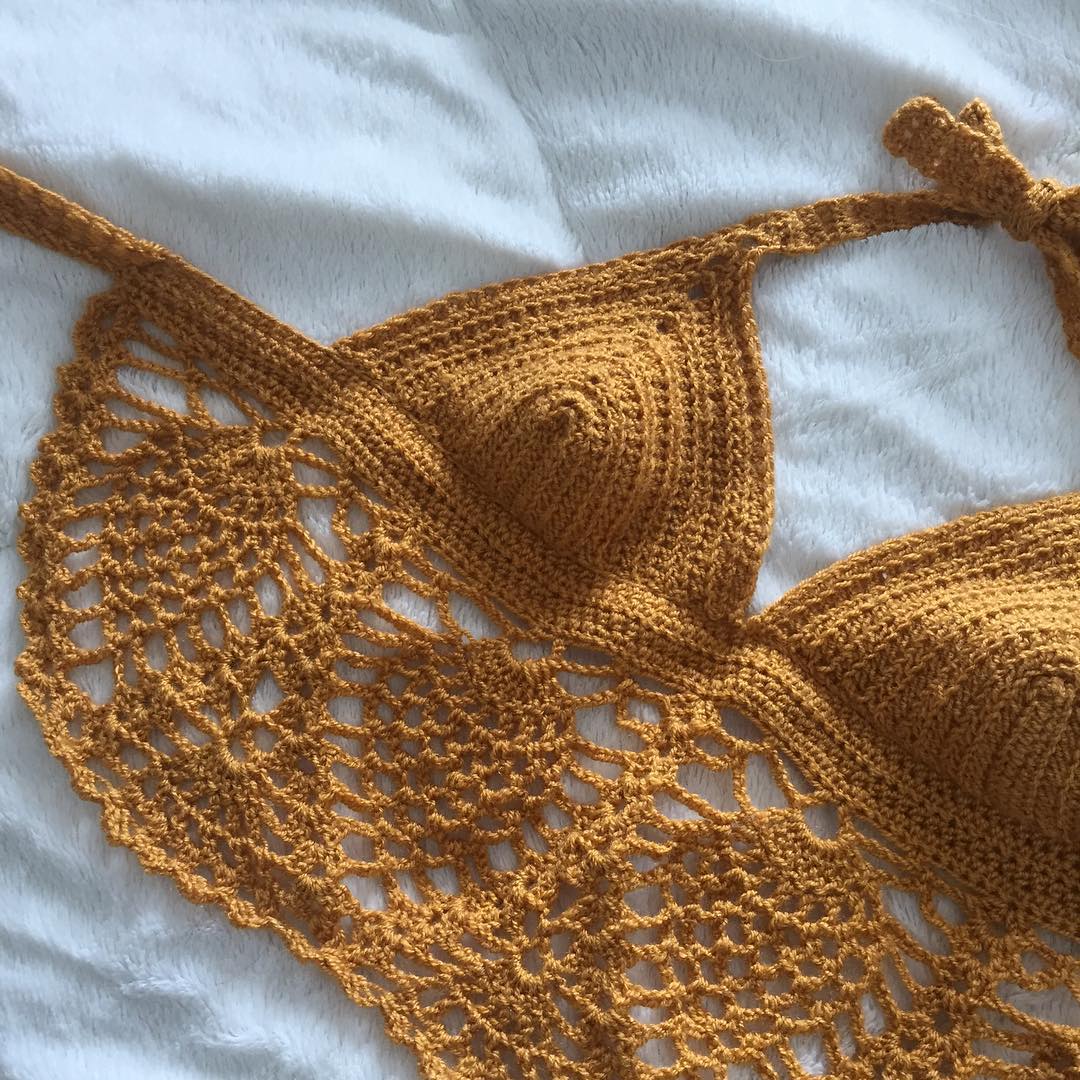
The little lacy design on the bottom got me on this one. I even think the color they used was perfect! Find it here. (There are lots of photos for along the way-- so helpful!)

Okay I know I said I had other favorites, but this one!!!!! Oh my word. I love everything about it. Especially the color. Perfection. You can find the photo here and the pattern here.

The pattern for this one is actually a video tutorial, which some people actually prefer to follow along that way. I absolutely love the little fringies on this one. Find it here.

Well, there's a list of the coolest and cutest crochet tops (and all of them free!). I don't think you have any excuse for putting away your crochet stuff for the summer!! Go make one of these!

Also if you're looking for more warm weather crochet inspiration and free patterns go check out my post by clicking here.

Happy making people, and bring on the summer weather!!

-Meg

Crochet Pattern for a Doily Rag Rug Made from Bed Sheets

 ***You can find the PDF version of this pattern in my shop by clicking here. Great for easy printing!***

Let me start this post by saying that I am SO excited to get this rug out into the world. Ever since I spotted those beige sheets in Walmart on sale for $4.50, I knew I could come up with a cool project with them. And so here I am!

Seriously, its just a killer rug, perfect for a little nook, corner or in an office. And guess what? It's totally not that hard to make. I think the most time consuming part of this project was simply cutting up the sheets. Which by the way I used two sets of 120 thread count TWIN bed sheets (see below).

If you've never cut sheets or fabric to make your own yarn, I explain how to do it in this post. I cut my fabric at two inches wide, and used a 15 mm hook (find one here on Amazon).

Seriously, is this not just the coolest thing?? I think you need to make one. It's like rustic meets bohemian. And not to mention that you can say, "Yeah, I made that!" when someone swoons over it (am I the only one who gets a lot of satisfaction out of saying that when someone compliments a thing you made?).

Doesn't my friend's little girl look cute on it? I thought so. :)

The rug measures roughly 34 inches in diameter. And don't let me forget to mention that it only cost me 9 bucks! Yeah, if you can't tell... I'm pumped. And you may have sheets ALREADY in your house that you have in mind to use for this, so it may cost you nothing!

My living room floor, mid-sheet yarn cutting.

My living room floor, mid-sheet yarn cutting.

Since I used two twin sheet sets (two flat sheets, two fitted sheets) I'm betting that you could get away with using one queen set if you didn't have twin sized sheets.

This is what one twin sheet looks like rolled into a ball. :)

This is what one twin sheet looks like rolled into a ball. :)

What you'll need:
two twin sheet sets, or equivalent in larger sheets cut into 2" diameter yarn (tutorial here)
good sharp pair of scissors (you could even rip your sheets for more of a shabby look if your fabric allowed)
15mm crochet hook

Dimensions:
Rug measures approximately 34 inches in diameter

Abbreviations:
st(s)=stitch(es), sc=single crochet, dc=double crochet, sp=space, ch=chain, sk=skip, 3dcl=3 double crochet cluster, 4dcl=4 double crochet cluster, yo=yarn over

Stitch Explanations:
3dcl= (yo, insert hook into next st, yo, bring back through st, yo, draw through first two loops on hook), repeat () 3 times, yo, draw through remaining four loops on hook

4dcl= (yo, insert hook into next st, yo, bring back through st, yo, draw through first two loops on hook), repeat () 4 times, yo, draw through remaining five loops on hook

Notes:
-To join the ends, you could always just join how you usually do. But I followed this way of joining together ends found over on Oh You Crafty Gal:

-ch at the beginning of the rounds DOES NOT count as a st, unless otherwise noted
-since the yarn is so large, I found I had to change the way I held onto it while crocheting to make it more comfortable. Also, I found it kind of hard on the hands/wrists after awhile, and just took a little break when it became too much.
-I worked the majority of my stitches in the back loop only, only because I found it easier, I don't think it looks much different at all whether you do both or back only

Pattern
ch 10, join to 1st ch with sl st to form ring
1) sl st into the ring, ch 3, work 15 dc in circle (15)
2) ch 3, work 2 dc in each st around, join to 3rd ch with sl st (30)
3) ch 3, (2dc, dc) around, join to 3rd ch with sl st (45)
4) ch 5 (counts as dc, ch2), sk st, (dc, ch 2, sk st) around, join to the 3rd ch with sl st (23 total dc)
5) ch 3, (2dc, dc in next 3 sts) 16 times, 2dc, dc in last 2 sts (84)
6) ch 2, 3dcl (counts as 4dcl), ch 4, (4dcl, ch 4) 20 times, join to the st of the 3dcl with sl st (21 total clusters, 105 total sts)
7) ch 3, in same sp as ch 2: 2dc, dc in next 5 sts, (2dc, dc in next 5 sts) 16 times, 2dc, dc in last two sts, join to 3rd ch with sl st (123) 
8) ch 3, dc around, join to 3rd ch with sl st (123)
9) ch 7 (counts as sc, ch 6), sk 3 sts, sc in next st, (ch 6, sk 3 sts, sc in next st) 29 times, ch 6, sk 2 sts, join to 1st of beg ch

To weave in ends, I used my fingers and just wove them back and forth a few times, then tied a knot and cut the yarn. I tied the knot because you can't see it on the back side and for added assurance it won't come undone. 

You may have to stretch/block the rug to make it lay flat. You could use a little water, and tug it until it lays flat. All I had to do was tug it around a bit and it laid flat!

And there you have it! A beautiful new adorably shabby rug! I didn't even think it took that long to whip up. The massive size of yarn totally helped that out. 

What a cool project! I hope you enjoyed. :)

-Meg