Free Crochet Pattern for the Cutest Plaid Pumpkin
/
**You can find the PDF version of all THREE pumpkins in my Etsy shop by clicking here. Great for easy printing!**
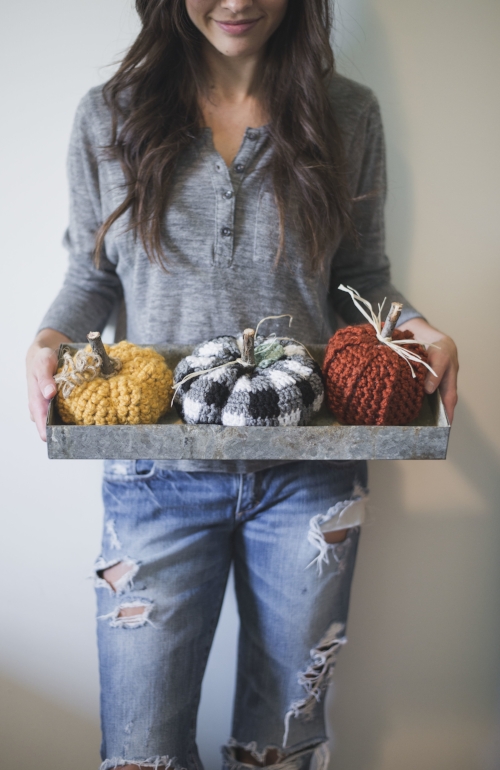
Guys. I am so pumped to bring this pattern to you!!
I've posted plenty of pics teasing these super cute pumpkins, and I've finally got all my ducks in a row to get them released! And just in time for you to make for your fall decor. :)

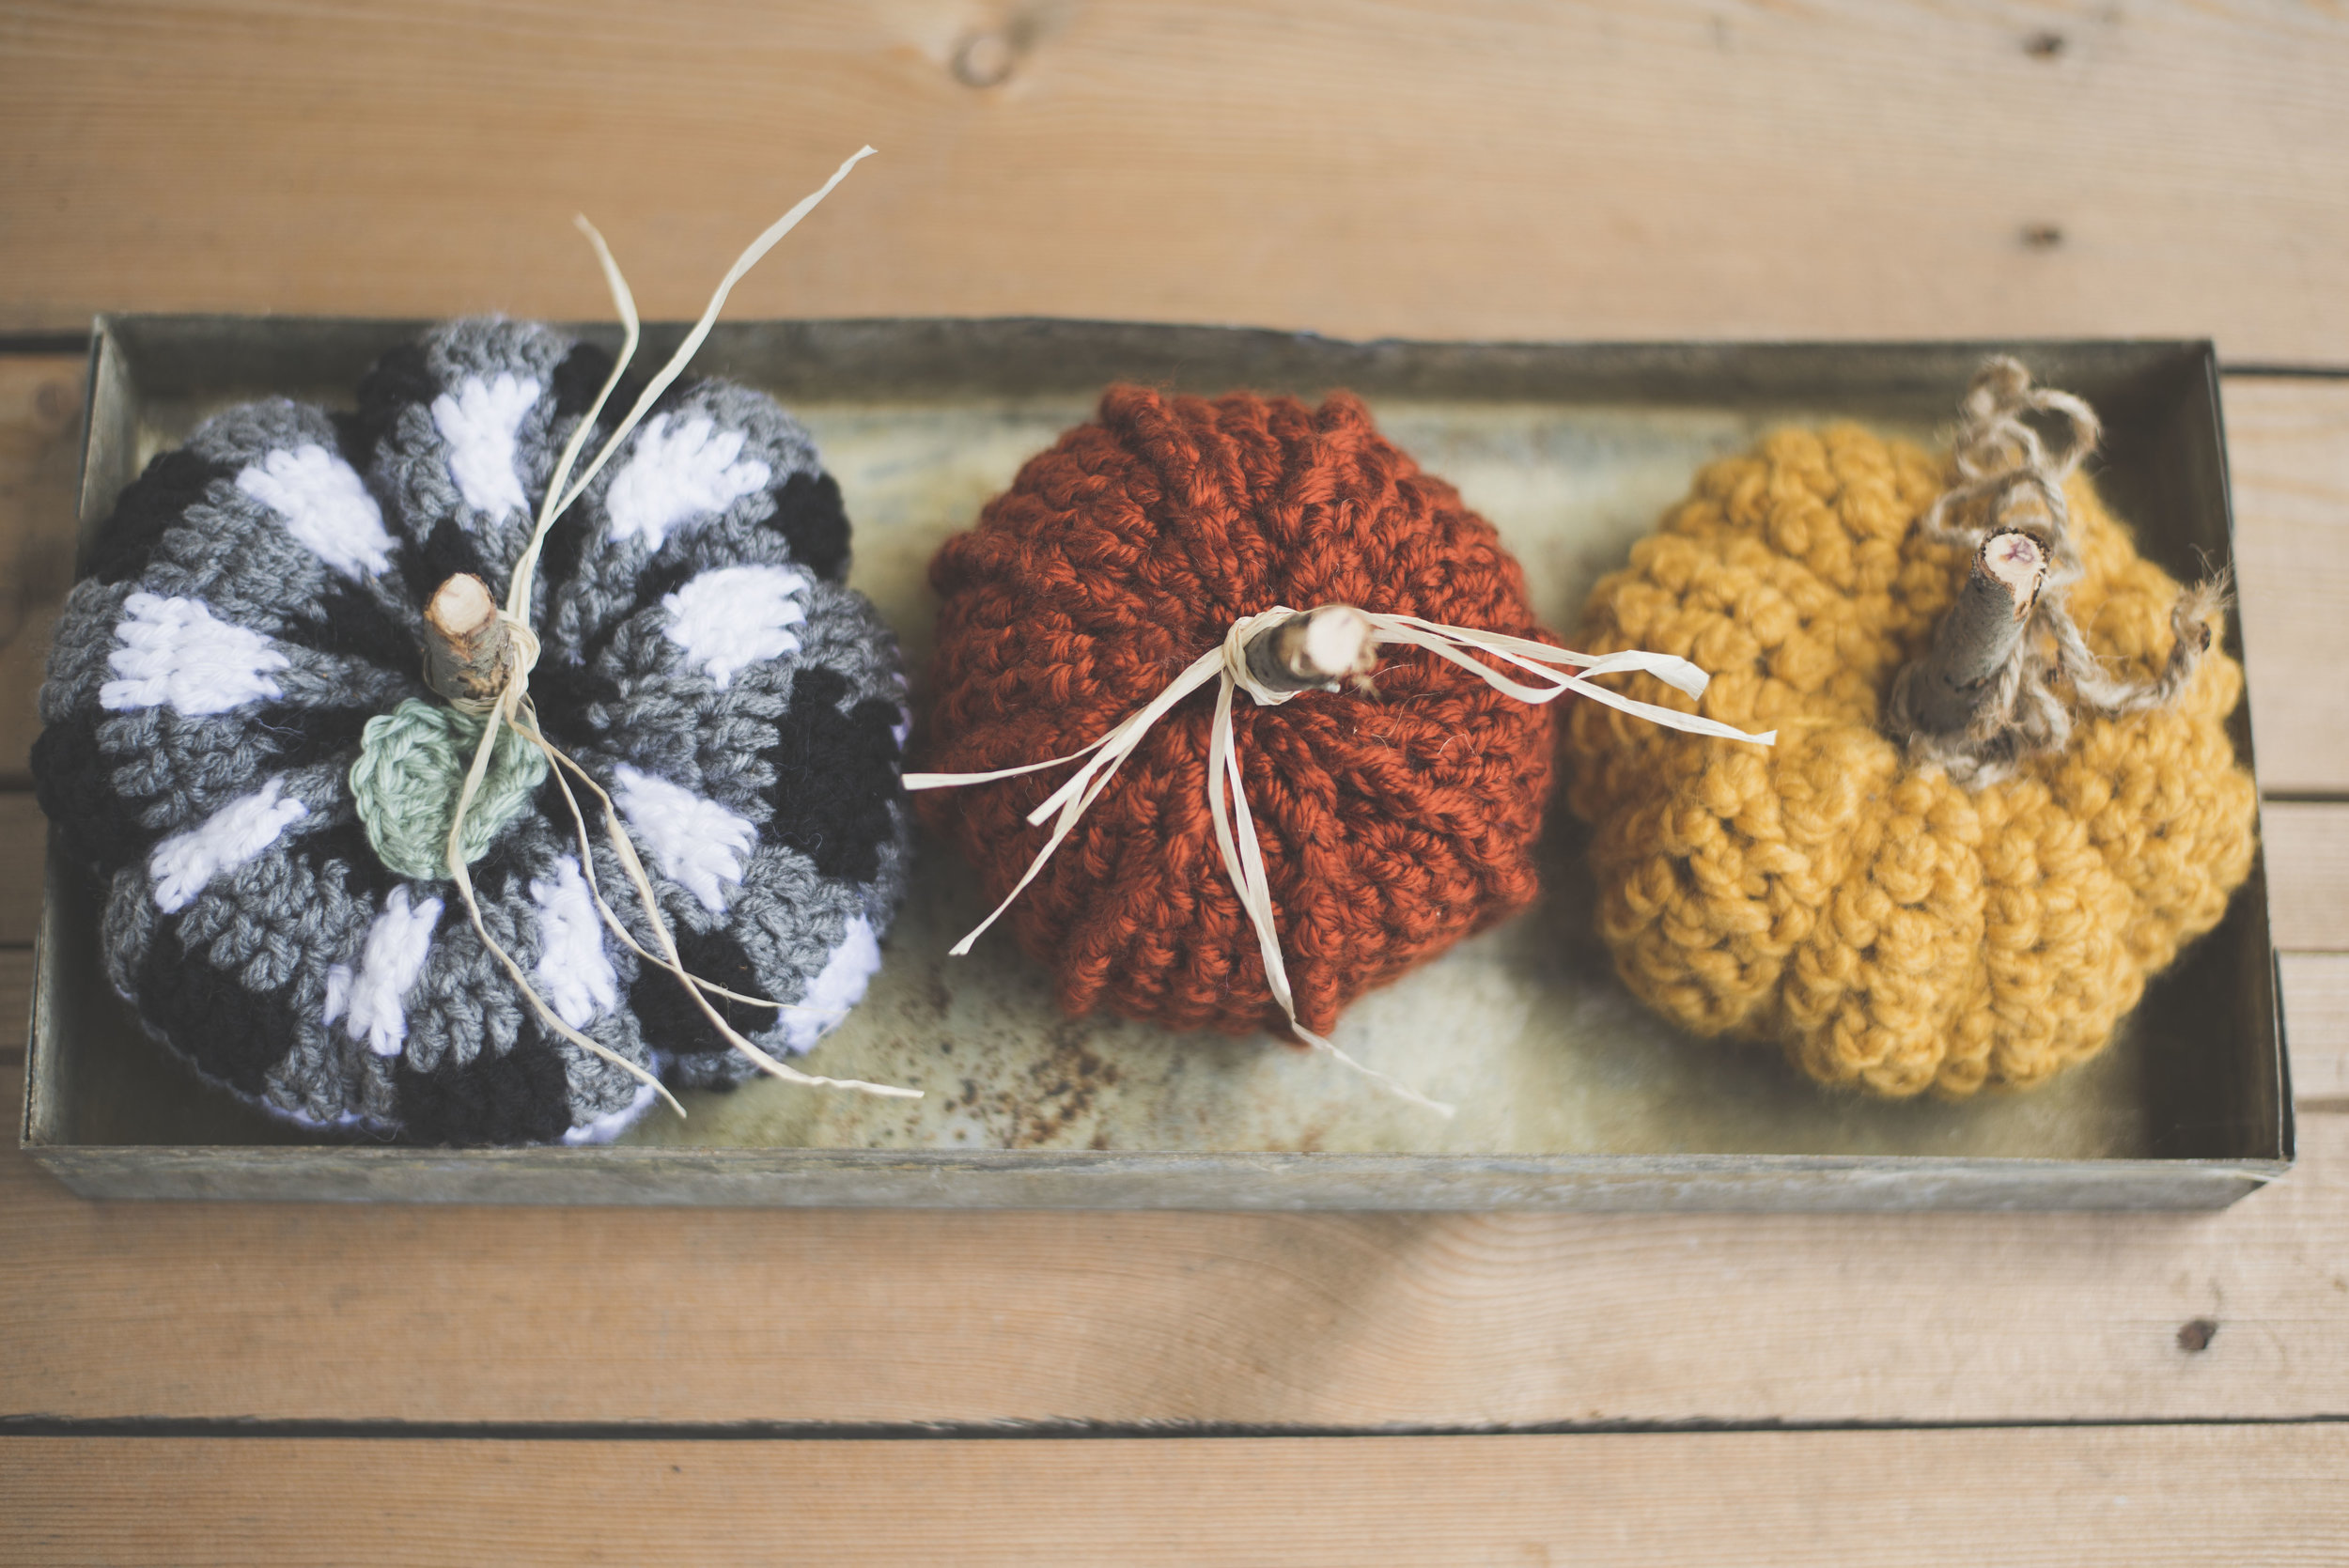
So for this post, I'm featuring the plaid pumpkin. This lil' sweetie is just the cutest. It goes perfect plopped on an entry-way table! It's also surprisingly very simple to make- just double crochet's (so it works up quickly!).
Stay tuned for the other two pumpkin patterns, they will be released next week. I'll post the links to them here on the blog when they do come out, because I'll be guest posting them on a couple of other really special websites. :)

What you'll need:
Worsted Weight Yarn (I used Red Heart Super Saver yarn in Black, White and Grey Heather, for the leaf I used Caron Simply Soft in Woodland Heather)
Size H hook(5 mm)
yarn needle
Big handful of poly-fill
2 inch (or so) stick
Hot glue gun
other adornments you'd like to tie around stem (I used raffia, ribbon, jute that was curled..)
Dimensions:
Approximately 7 inches wide by 3 inches tall
Abbreviations:
ch=chain, st(s)=stitch(es), sl=slip, dc= double crochet, tr=treble, sc=single crochet
Notes:
-ch's at the beginning of round do not count as stitch
-**continue using color until specified
-when changing colors, I just carried the yarn behind my work... without cutting it
Pattern:
PUMPKIN:
With black: ch 72, join to 1st ch with sl st
1) ch 2, then dc in same st that you sl st'd into, and in the next 3 sts, change to gray: dc into next 4 sts [change to black: dc into next 4 sts, change to gray: dc into next 4 sts] repeat [] around, sl st into 1st dc to join (72 total sts, and from here on out)
2) change to black: ch 2, dc into 4 sts, change to gray: dc into next 4 sts, [change to black: dc into next 4 sts, change to gray: dc into next 4 sts] repeat [] around, sl st into 1st dc to join
3-4) (still using gray) ch 2, dc into 4 sts, change to white: dc into next 4 sts, [change to gray: dc into next 4 sts, change to white: dc into next 4 sts], repeat [] around, sl st into 1st dc to join
5-6) follow same instructions as round 2 (using black and gray)
7-8) follow same instructions as round 3 (using gray and white)
9-10) follow same instructions as round 2 (using black and gray)
11-12) follow same instructions as round 3 (using gray and white)
13-14) follow same instructions as round 2 (using black and gray)
finish off and leave verrry long tail to sew up the ends (5 feet). You will need quite a bit to finish the pumpkin
LEAF:
with green: ch 6
working in back loop only: in 2nd ch from hook, sc, sc, dc, dc, 3 tr in last st
now working on the other side of your base chain: 3 tr in first st, dc, dc, sc, sl st into the last st
finish off and sew in ends

Once your piece is complete, you'll sew up the open ends. Take your needle and thread the tail of your project. Then make a running stitch through one of the open ends on the very outer row of stitches. You can see in the above photo that I sewed long strides (a loose running stitch) I did this so it would be easy to gather.

After you've gone all the way around, you'll pull your yarn tight to gather. Then secure with a knot. I didn't cut the yarn or unthread the needle. I just let it hang out so I could use it to sew up the other side, just pull it through the inside.
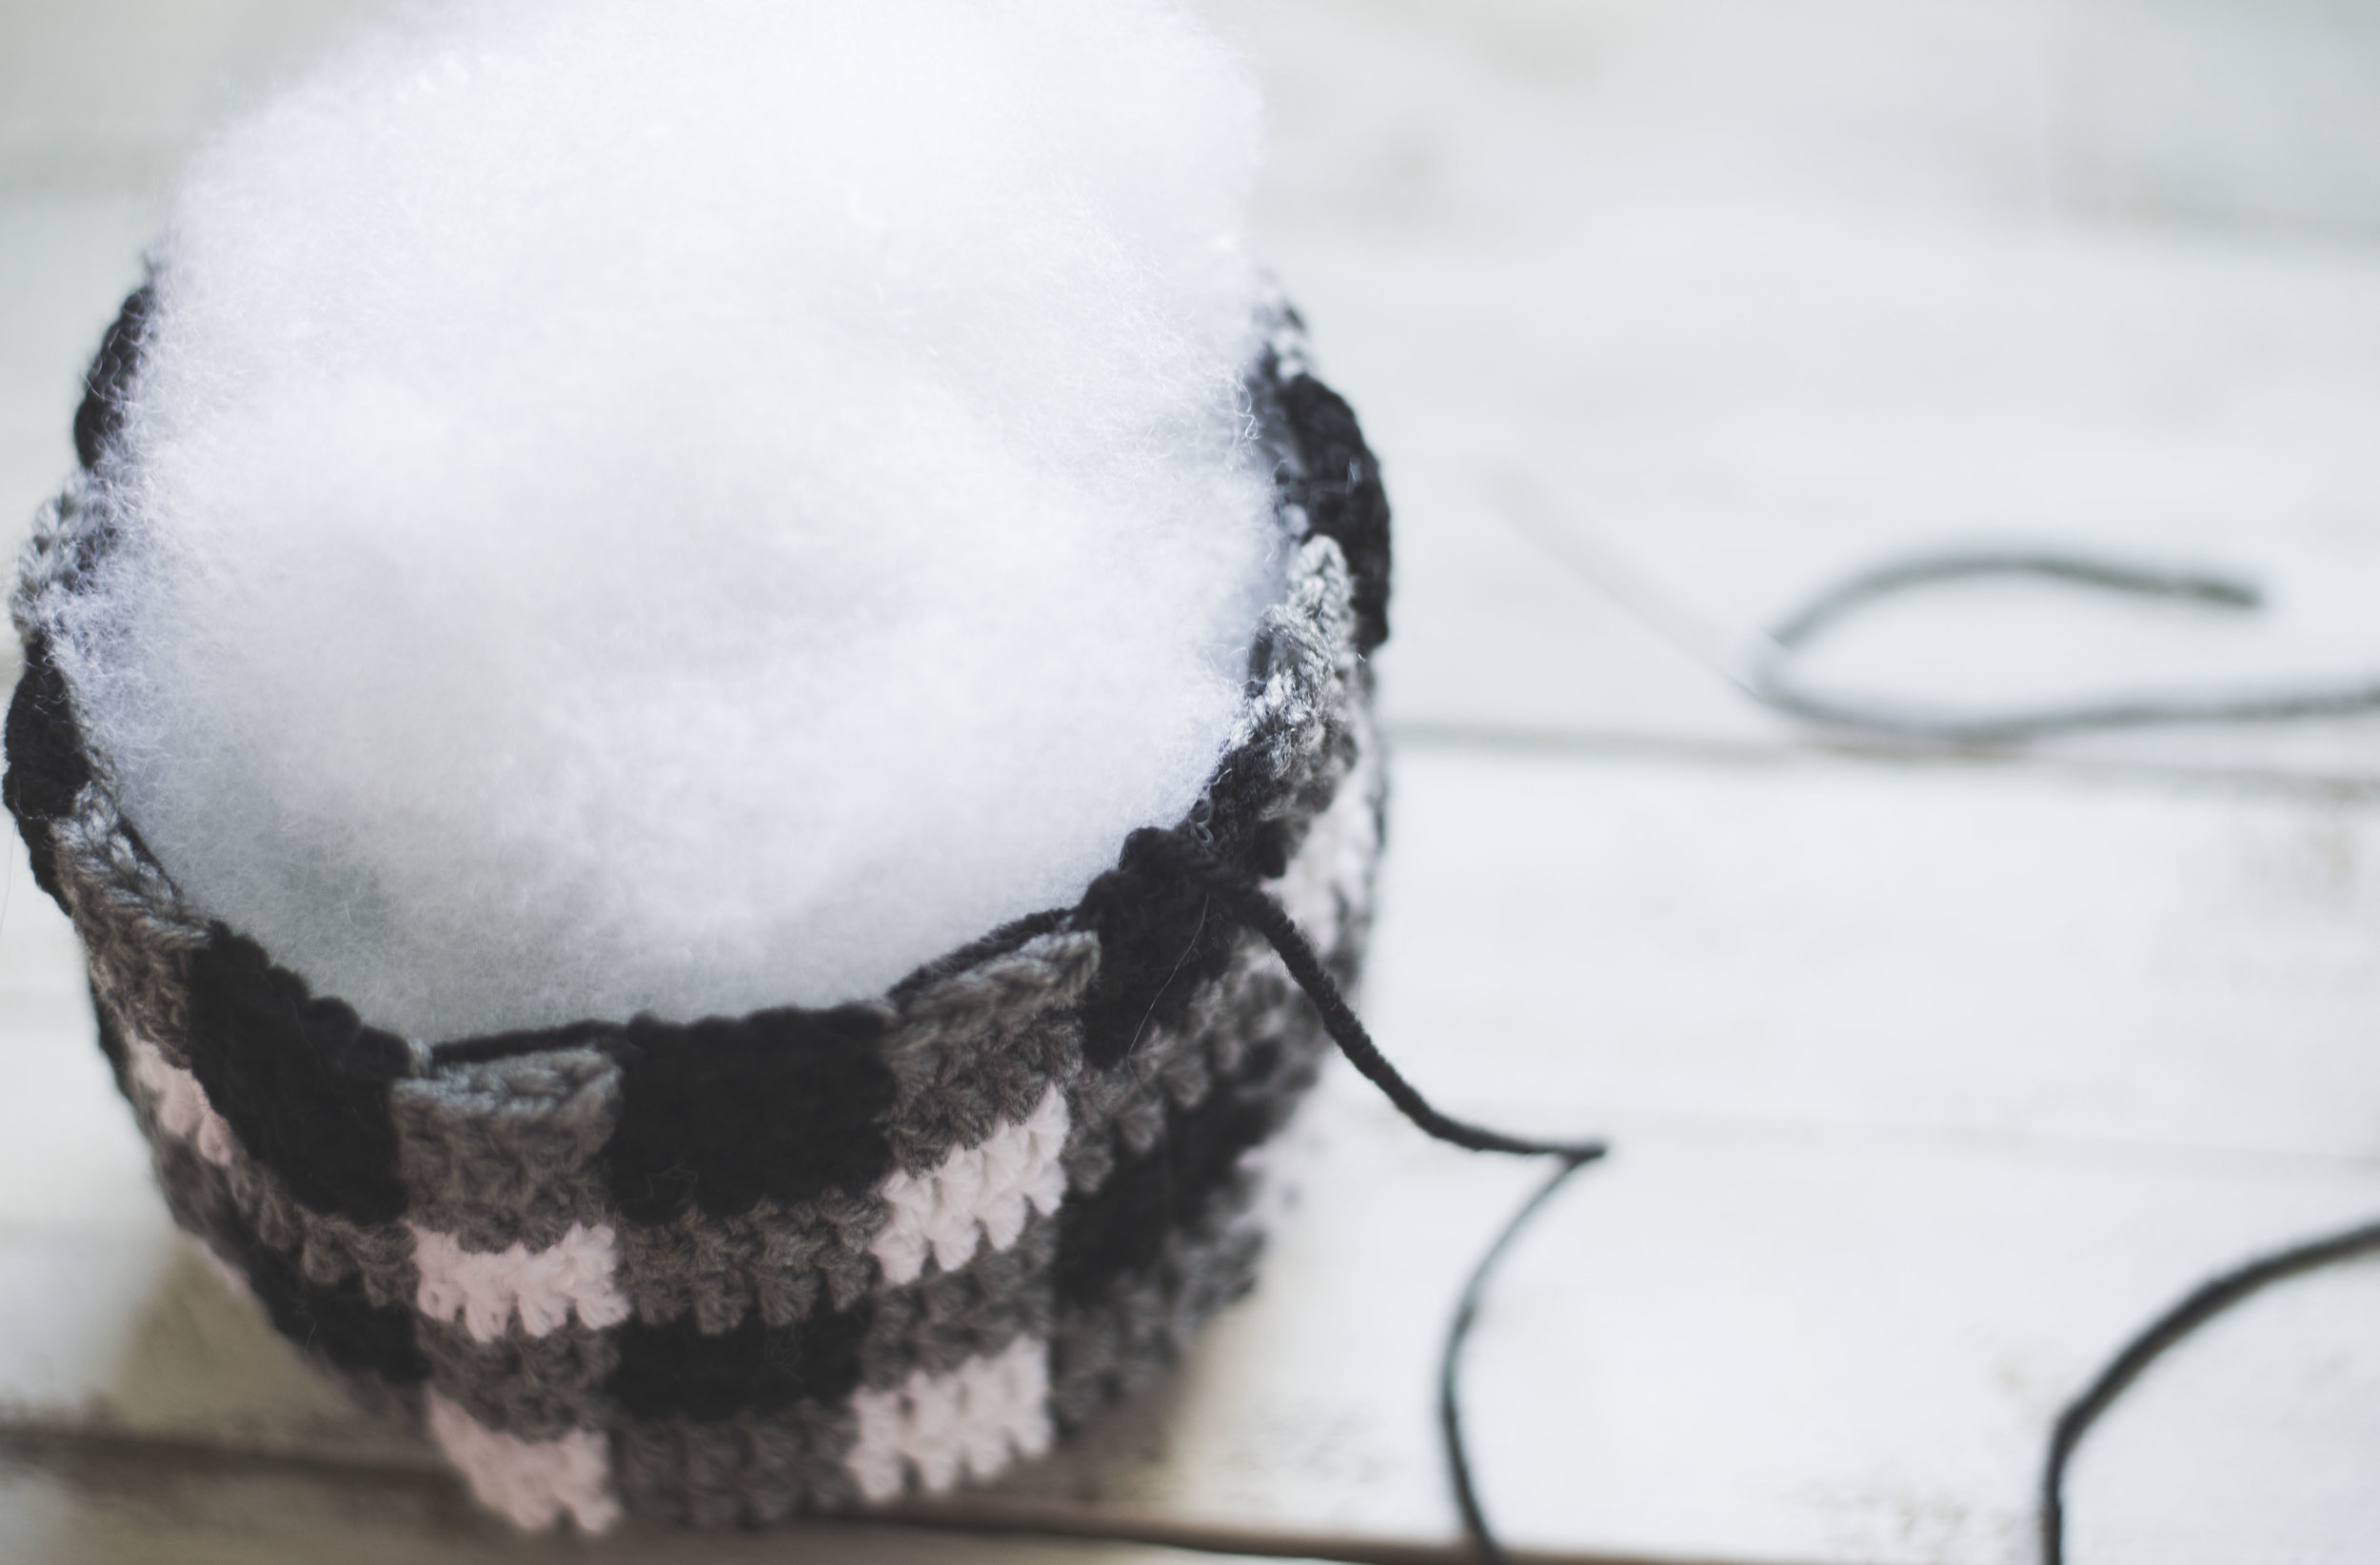
Then stuff your punkin' plum full of poly fill..

You'll do the same thing with your yarn and needle to the other open end. Sewing in and out to gather the top, and knot again to secure.

Next you'll make the indentions of the pumpkin by taking your yarn, putting it over to the other side of your pumpkin. And then inserting your needle through the middle of that other side.

I did that seven times, just spacing them however I thought looked good. It doesn't have to be perfect! Tie another knot after you're done with the indentions, and weave your end in.

Next you'll put a dab of hot glue in the center of your pumpkin, to attach the stick.

Then press firmly to set, until the glue is cooled.

Then you can either hot glue your leaf or sew it on, then add any adornments you'd like to finish off this lovely little fall piece!
If you make this pumpkin I would LOVE to see your rendition.. Tag me over on Instagram :)
I hope you enjoy making these cuties. Again, keep an eye out for the other two patterns next week.

*Also! I've created these cute little gift tags that look perfect on top of these pumpkins. You can find the free download for them here.
Enjoy!
-Meg