Painted Floral Sneakers Tutorial
/
Hey all! I'm taking a little break from the crochet world to bring you this cool little DIY. While perusing the shoes at Walmart recently I came across these cute little plain jane sneakers that looked similar to Keds.

My psycho creative brain went into overdrive as I wondered what I could possibly do to make those things look cute and personalize them. I thought if I could take these $6 (!!) shoes and make them fab, I could have a cool new pair of kicks for the summer. And they'd be made by me! Which, makes them about 100% cooler.
So I grabbed them, and headed home to find some inspiration. I had plenty of images of floral designs I had in mind, so I decided painting these shoes was the way to go. Plus it'd be a fun adventure.
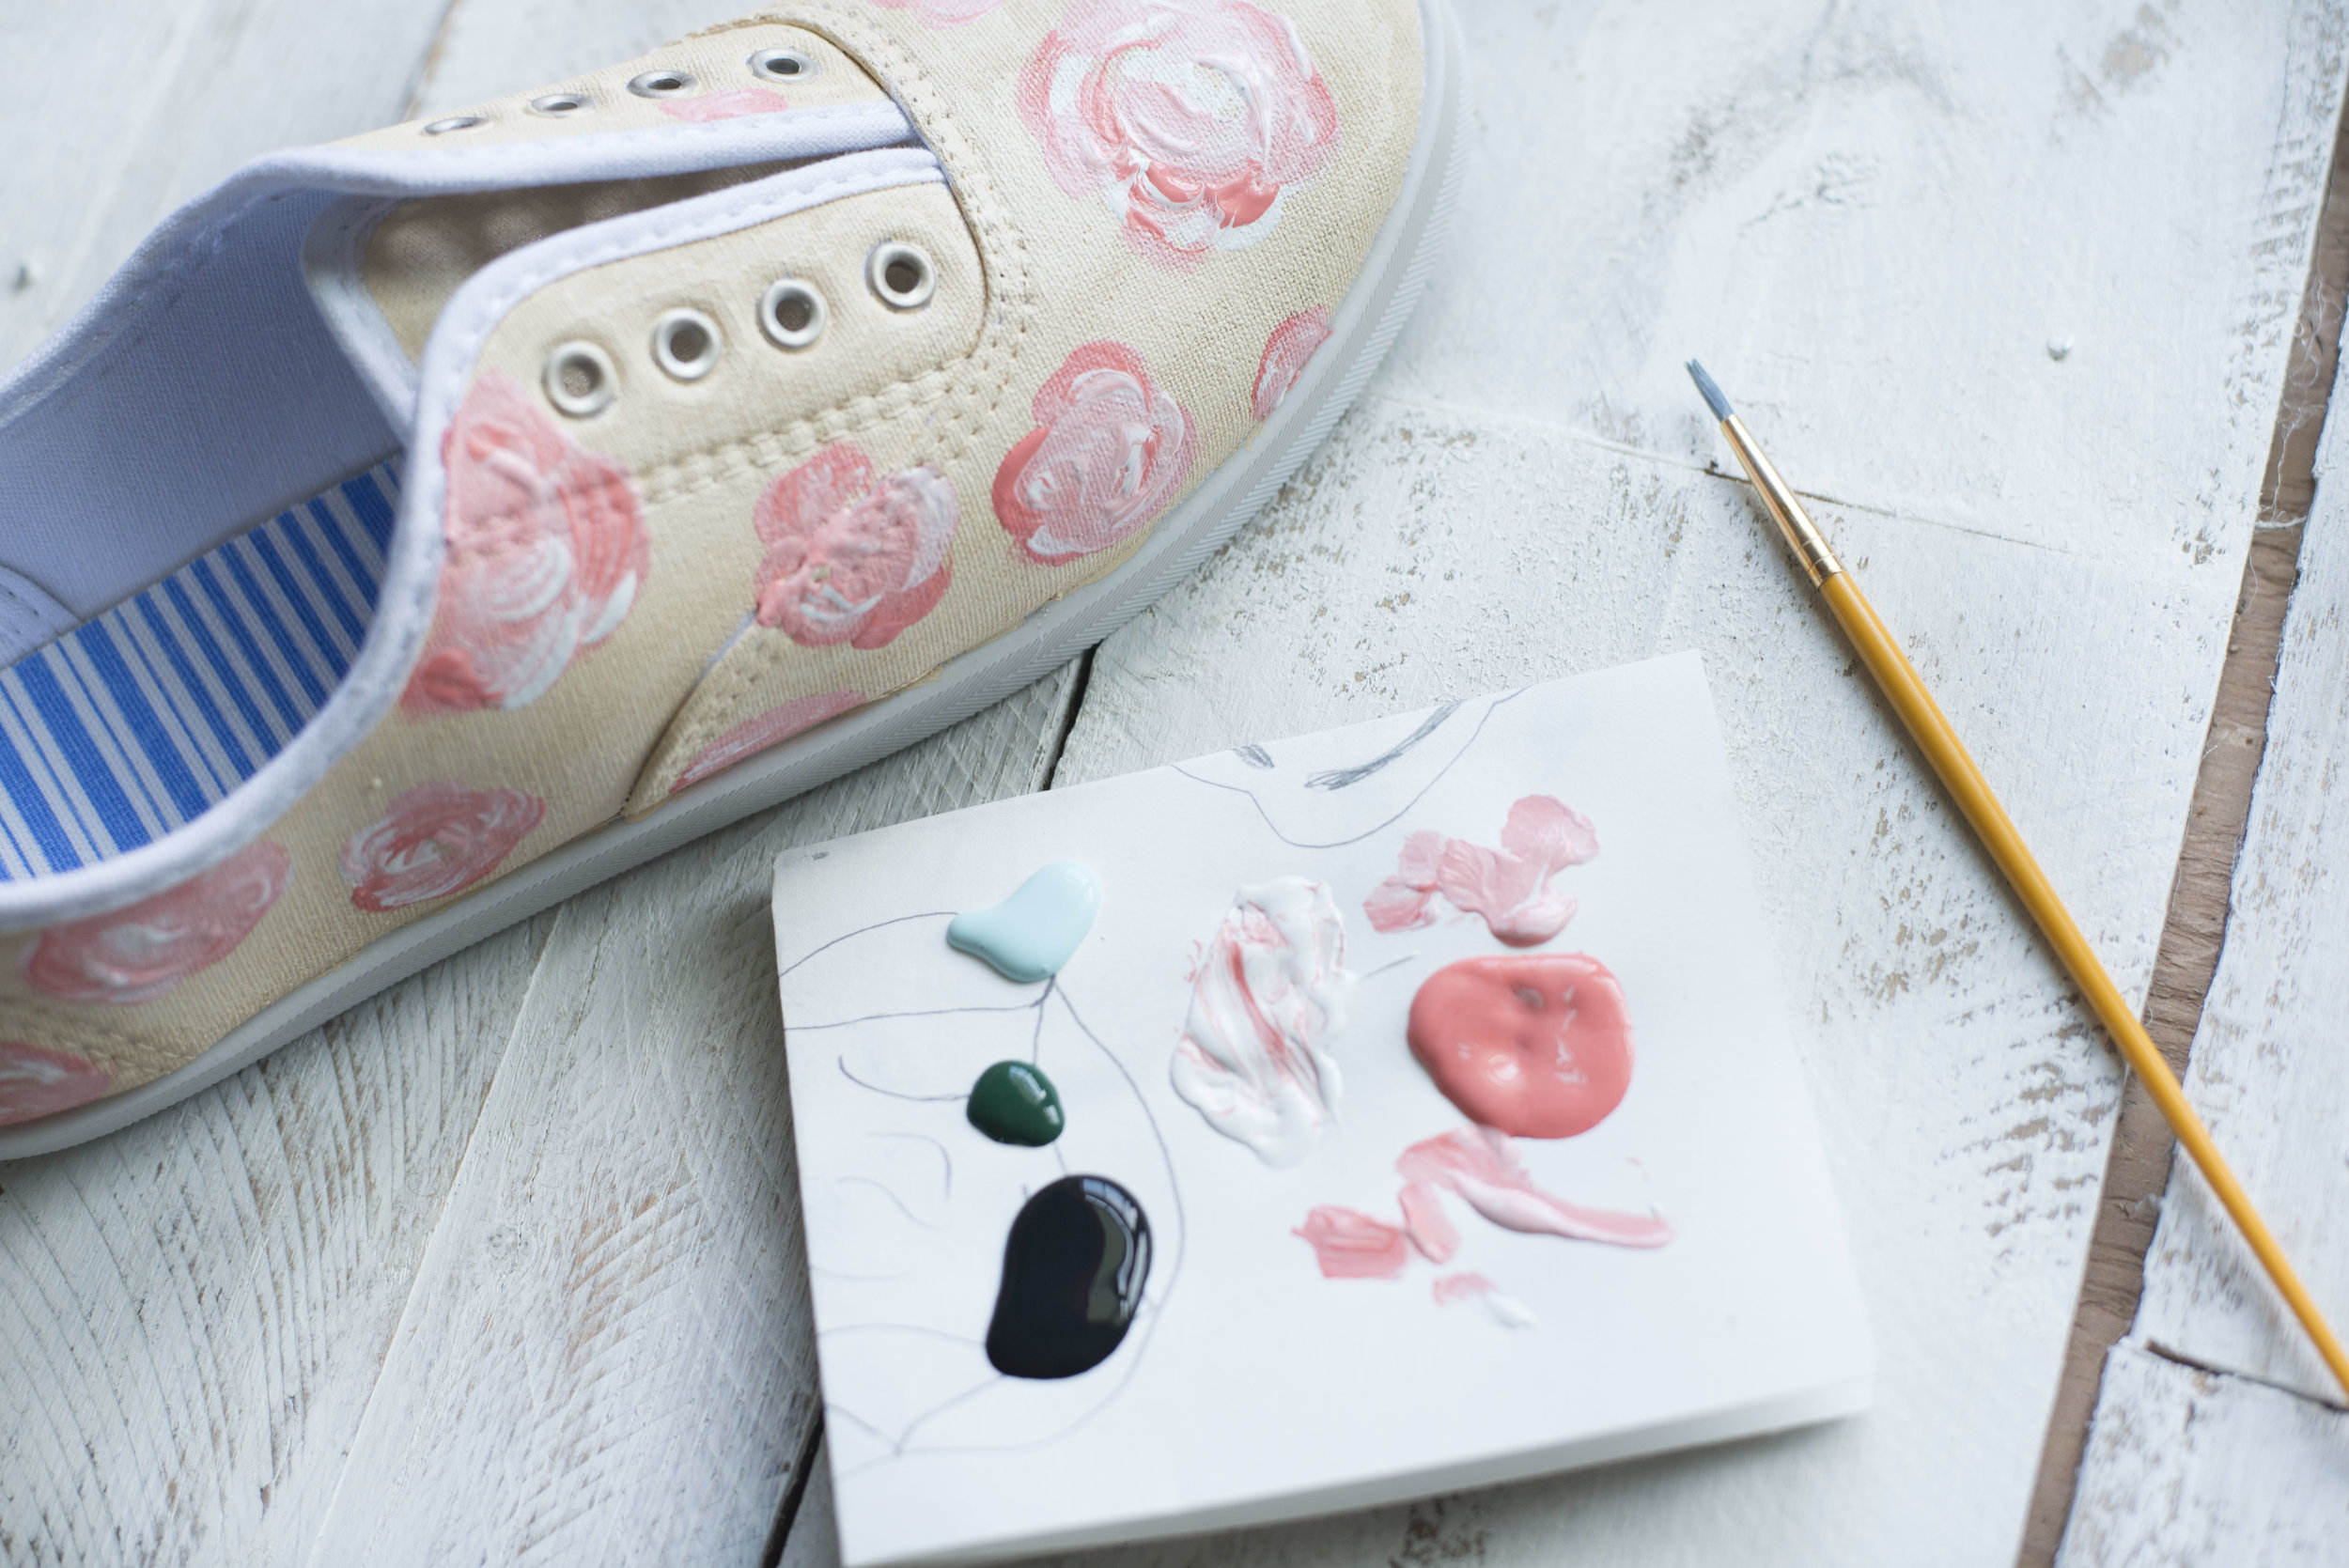
So I grabbed my paints, and practiced a bit on paper, what the design would look like. I started out thinking I wanted a white background, but then experimented with the cream color you see on them now and decided I had to paint them that color!

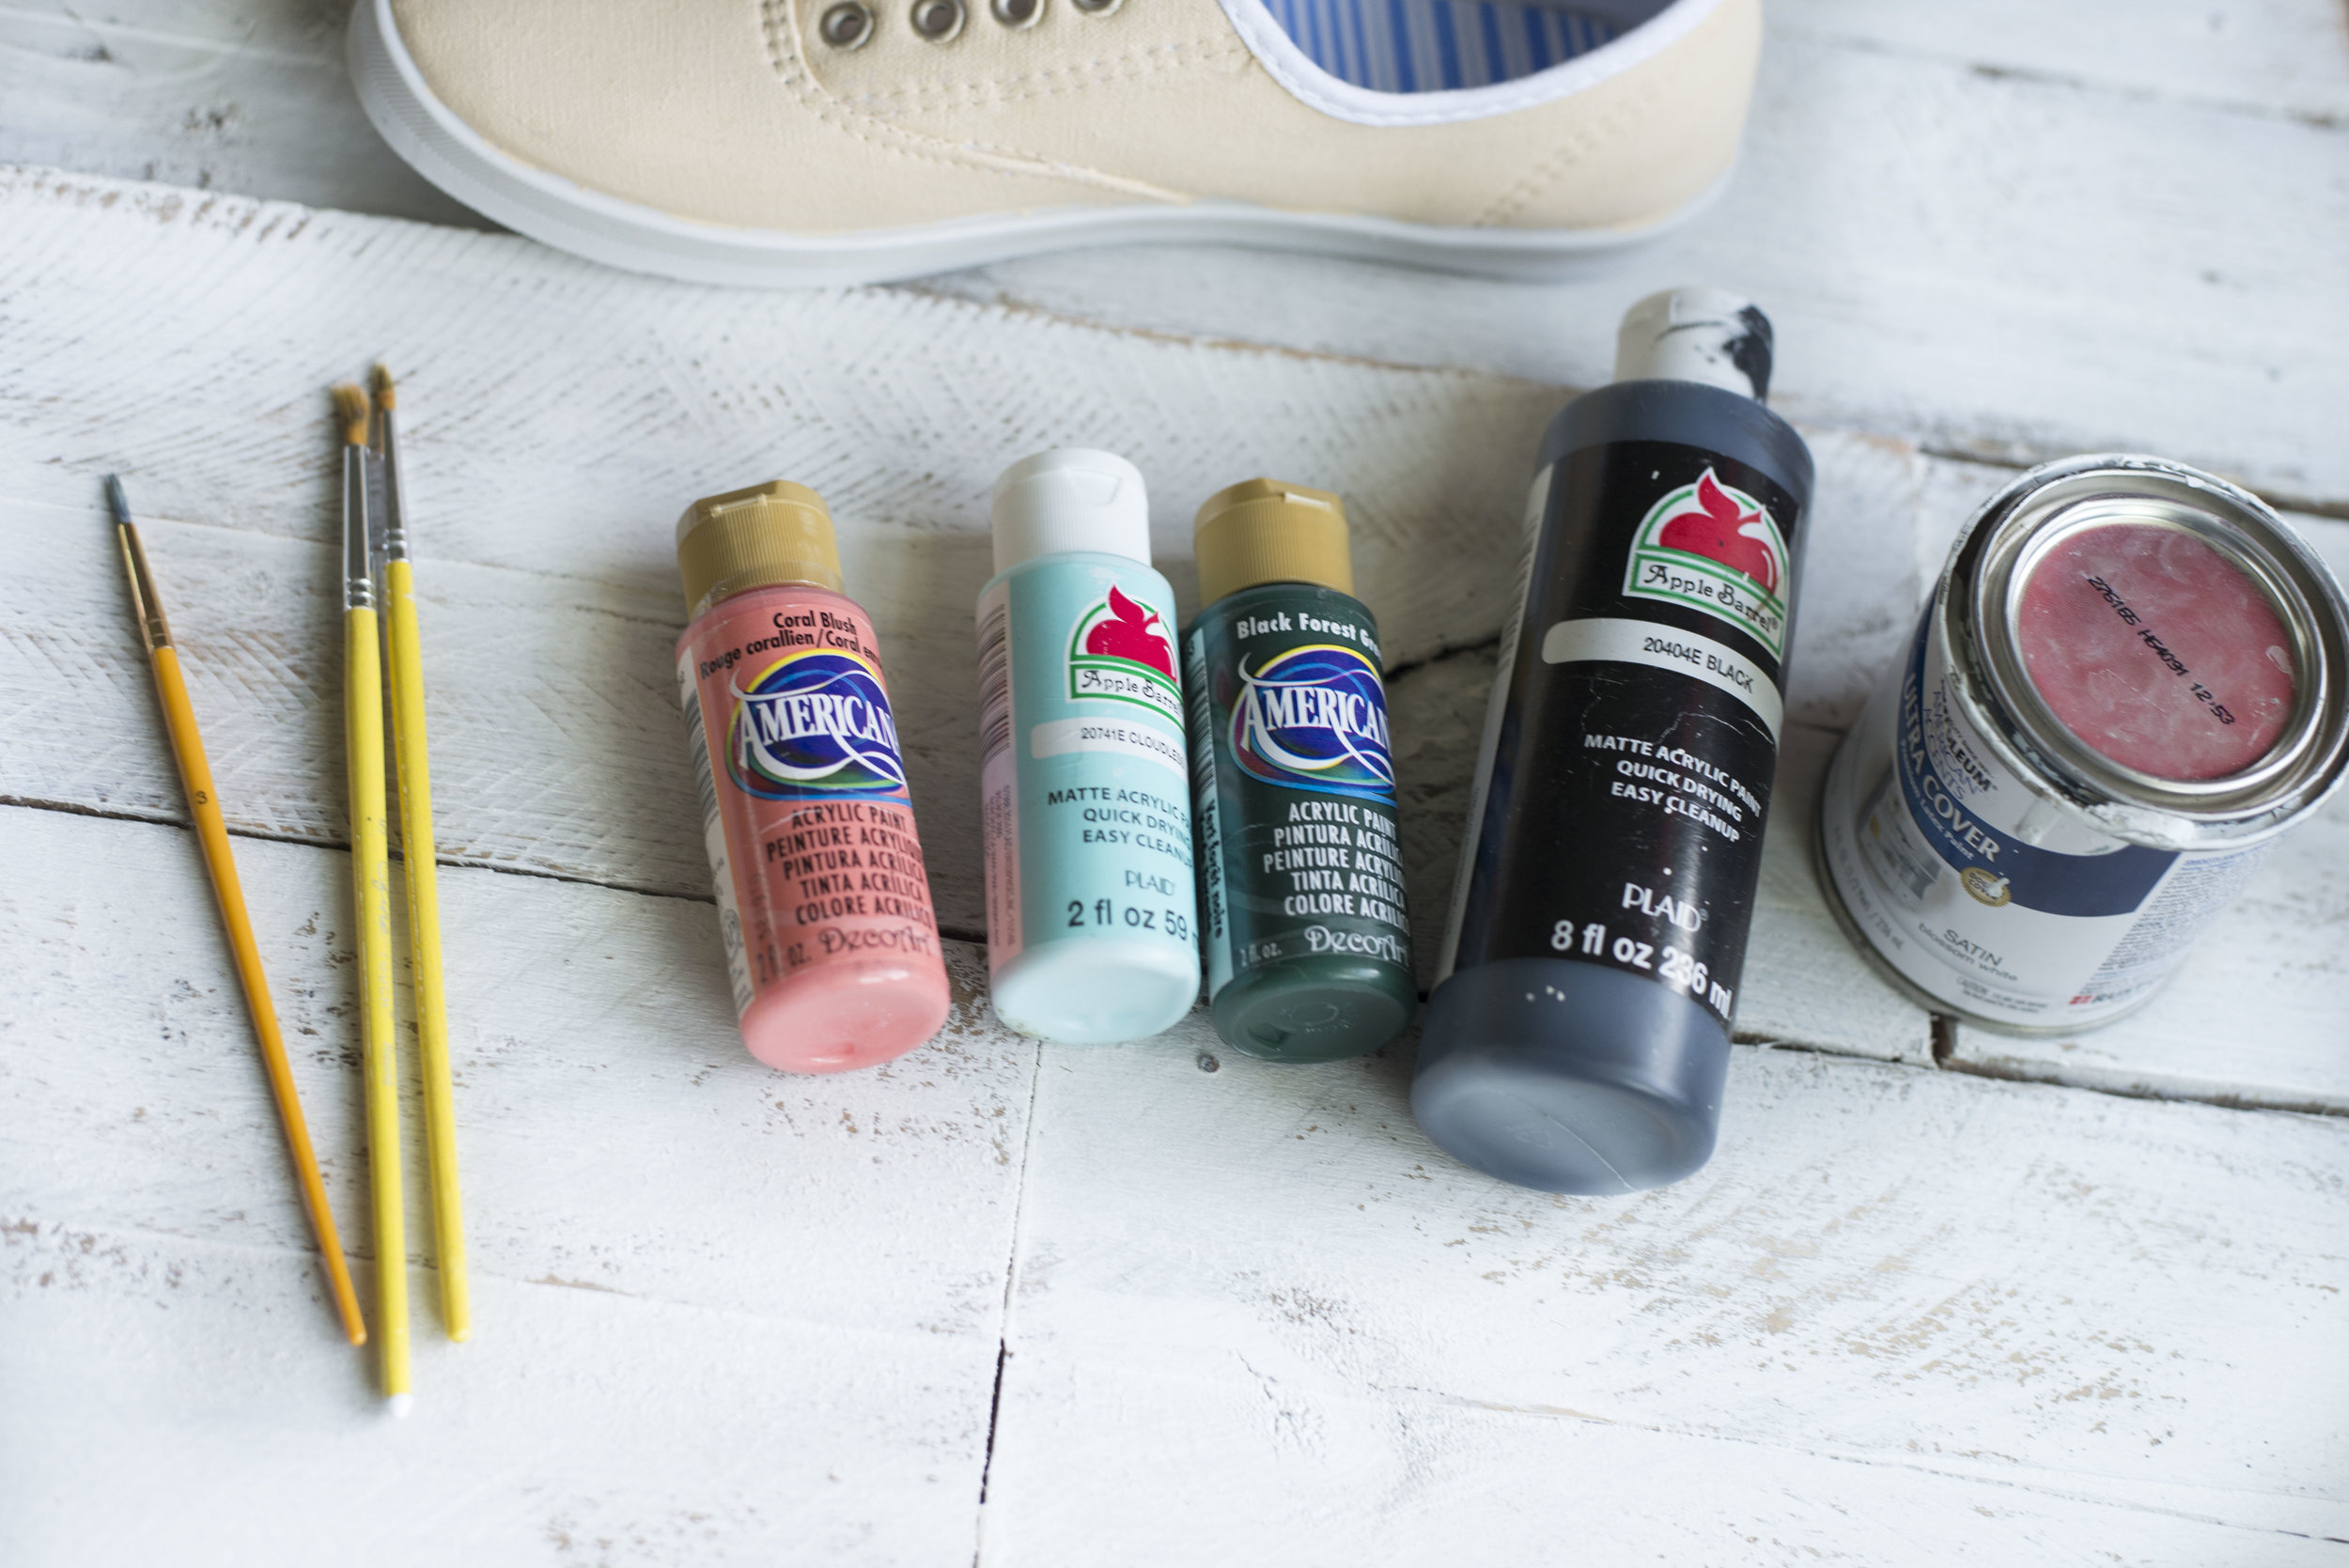
For the shoes I used various paints. I had a paint sample I bought from Lowes some time back, and that's what I used for the background. For the flowers I just used good ol' cheap acrylic paints you can get from the craft store. Basically just stuff I had lying around.
The paint colors were:
Valspar Color Sample in "Bread Basket"
Rustoleum Color Sample in "Blossom White"
Apple Barrel in "Black' and "Cloudless"
Americana in "Black Forest Green" and "Coral Blush"
For brushes, I made sure to use a stiff-bristled brush when painting the background color, it also had a straight edge so I could get up against the soles nicely. I also used two different sizes of fine-tipped brushes for the flowers and leaves. Just cheap ones from Hobby Lobby.
If you don't live near a WalMart there are also some cheap ones over on Amazon you can find here.

So like I said, I first went after it with the cream color and my coarse bristle brush, making sure to get a good coat on there and cover all the white fabric. Also if you get paint on the sole, no biggie, just swipe it off with your nail-- that's what I did!
Then after letting those dry for maybe an hour or so, I got my stuff ready for the flowers. I used a folded up piece of paper for a palette, but you could use anything.

I put about a quarter-size glob of the coral and white paint on my palette and then started in on the flowers.

I went in first with the white with my brush and kinda loosely formed the shape of the flower. I left the paint thicker in some places, so it added some texture.

Next (while the white paint was still wet--this is key) I went in, just using the same brush, and added in some of the coral. I just added some here and there, kind of swirling it in making sure not to mix it too much or you'll get a muddled mess. I wanted there to be distinct details of both the white and the coral while also having the "mixed color" of the two in there also. I think it's important to note that I am definitely not neat about how I do the flowers, it's kinda just swirl it around until it looks good. If it got too muddled, then I'd grab a glob of white or coral and go at it again.

Then I just painted a smaller flower about a half an inch away from the first, using the same technique. I'd do a couple of flowers at a time, all varying in size, so I could work with wet paint.

I made sure to put some "half flowers" on the edges to make it look more natural.

Then I just continued around both the shoes with the flowers. Ain't they pretty??
Next up was the leaves. Again, I put some little globs of the black, green, and light blue color on my palette and got my finer tipped brush.

For the flowers I did kind of the same technique for the flowers: I formed the shape of the leaves I wanted with my black paint first.

Then I took the dark green color and added just a tad to the black. Almost layering it on top of the black some.

Then came the light blue color. I blended in the blue on top and at the end of the leaves. Which by the way I was using the same brush. Not caring too much about the colors mixing. Just like the flowers, if the color got too muddled, I would grab a glob of whatever color was lacking and go back in with it, trying not to mix too much.

Then I just continued the same process around the shoe, putting a couple leaves around each flower. Some of the smaller flowers I would put one leaf. I didn't want it to be too crowded.
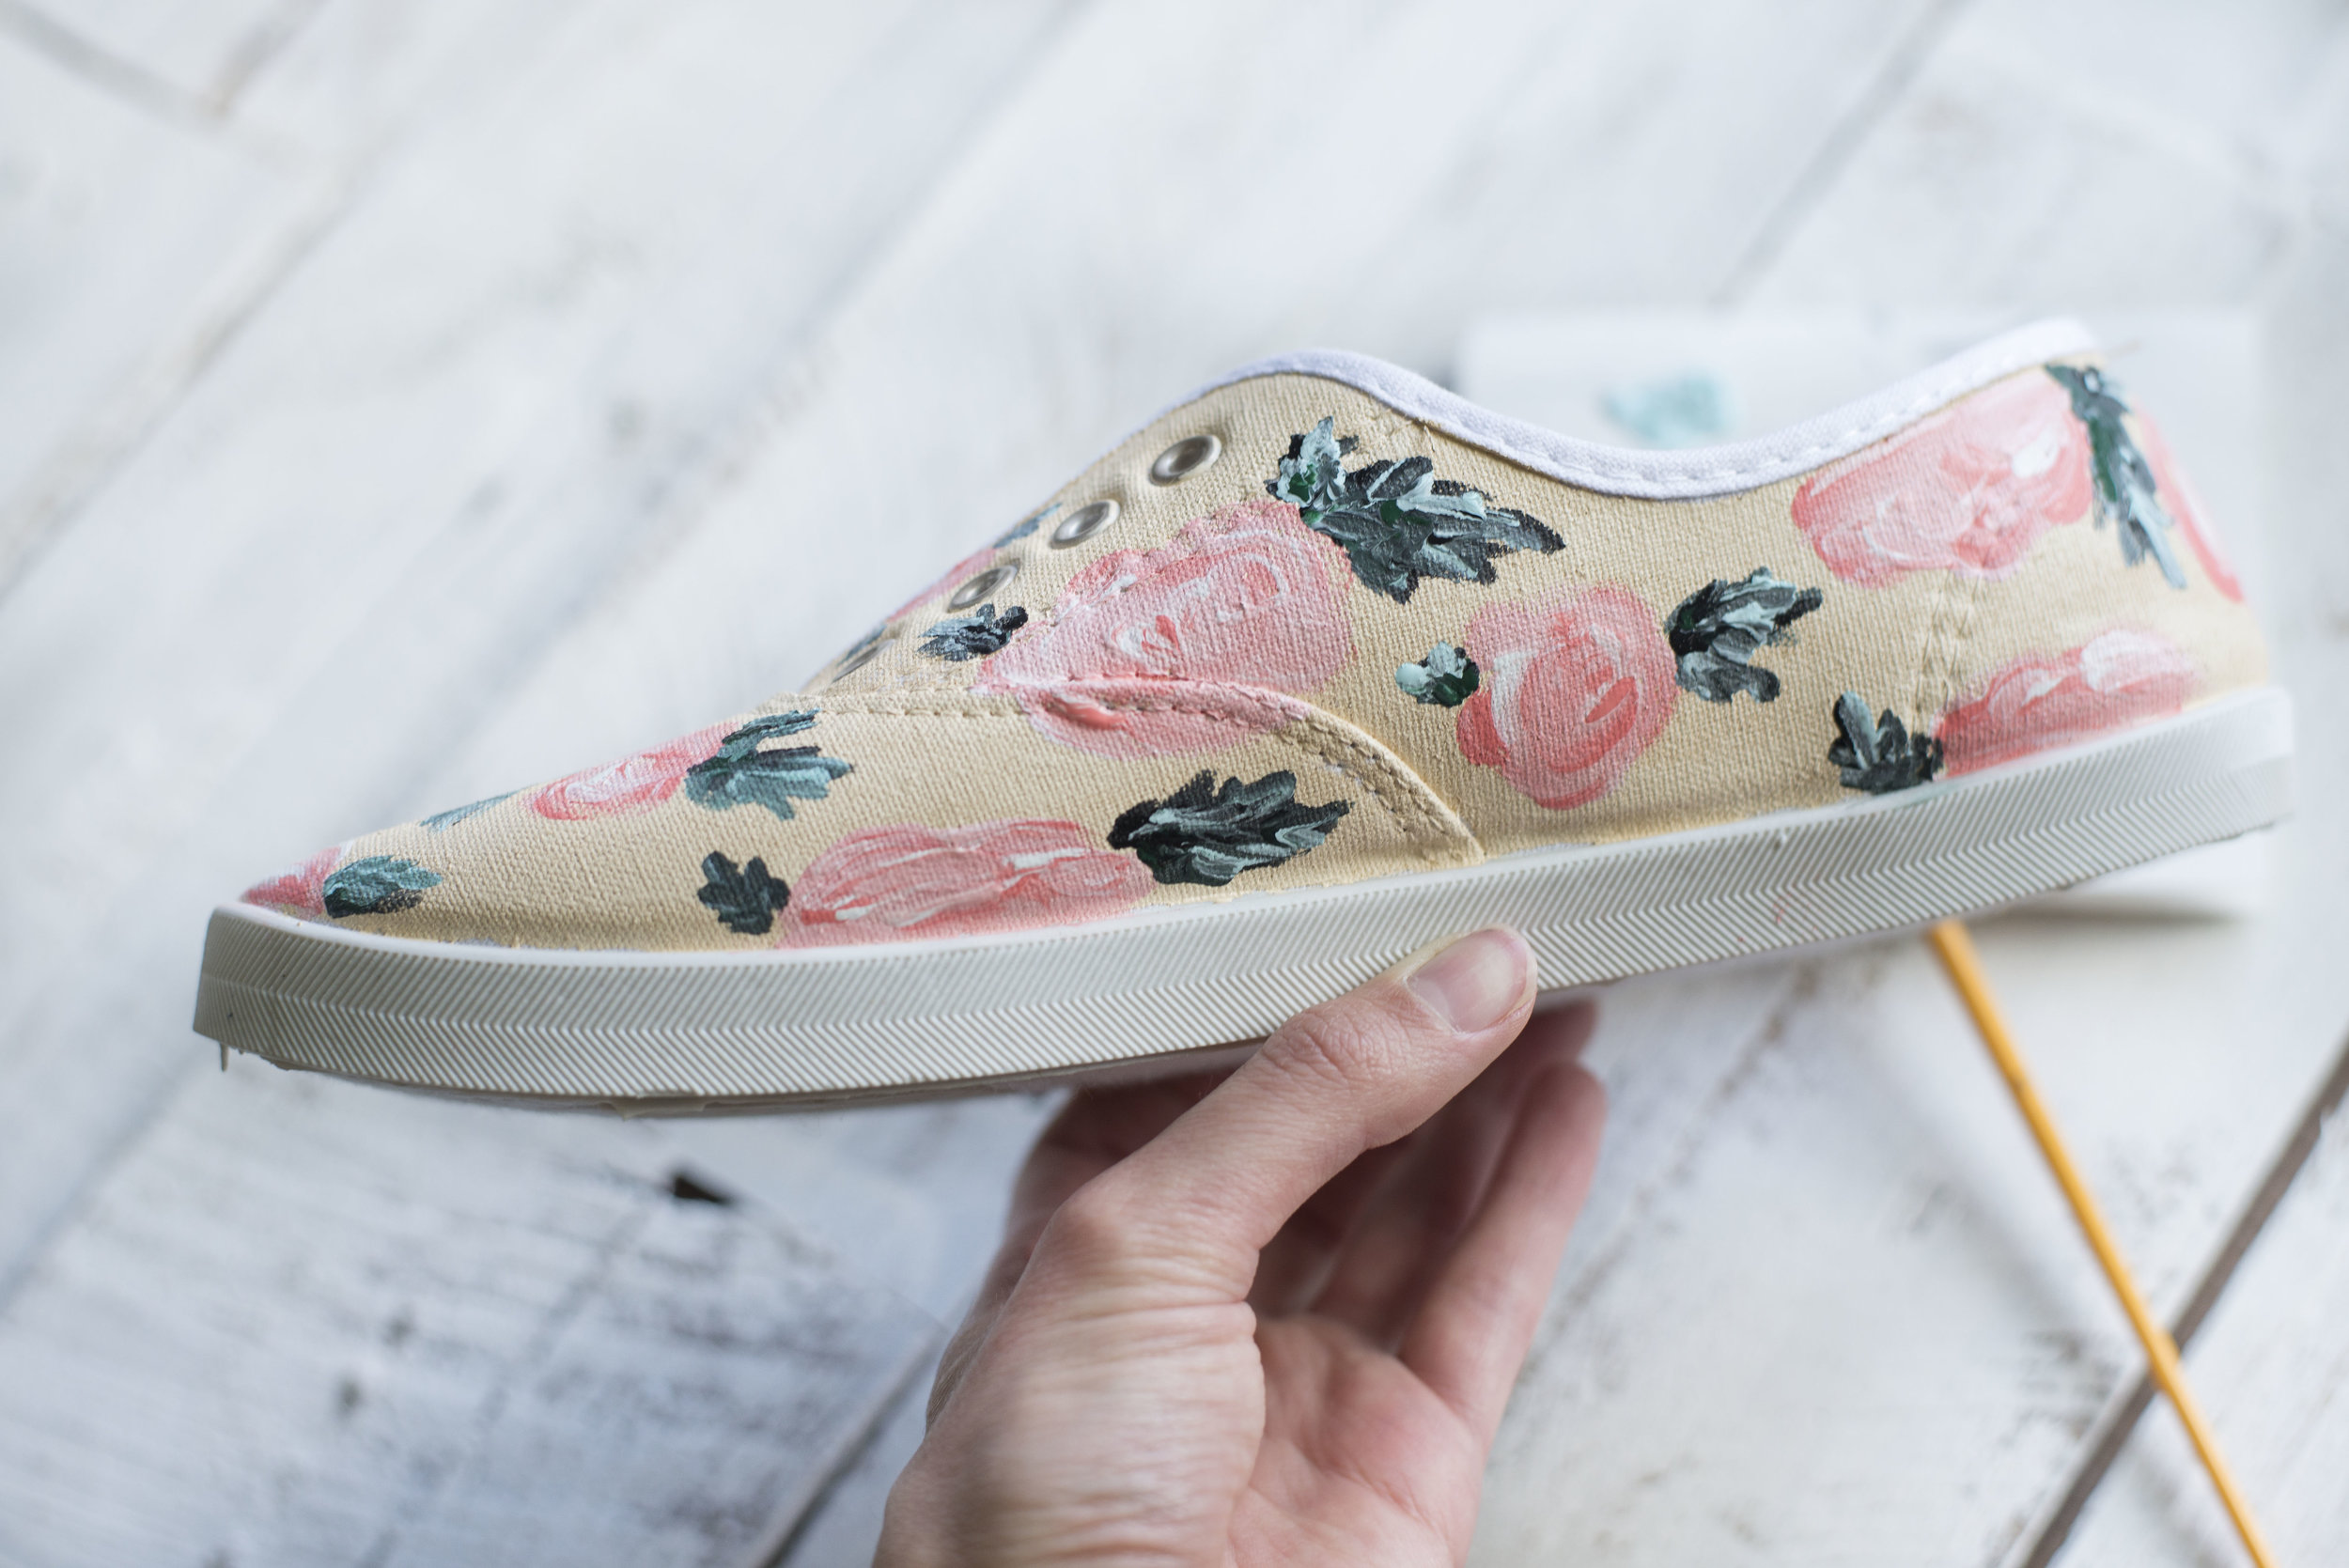
Do that with both your sneaks, and you've got the most precious floral design (made by you!!).

As far as sealing them goes, I just chose not to seal them at all. If you wanted to you could spray some Scotch Guard or even Mod Podge outdoor grade. I just didn't find it necessary, just cause!

And there you have it, after your shoes dry rock those cute thangs! They're adorable. I personally love them, and now I want to make more. ha!

I hope you enjoyed this DIY! Get out there and make yourself some cute sneaks!
-Meg