Free Crochet Pattern for the Pillow Cardigan
/
***You can find the PDF version of this pattern in the shop by clicking HERE. Great for easy printing!***
So I’m pretty stoked to bring today’s pattern to you, mooooostly because I was able to team up with Red Heart and use their amazing yarn, Chic Sheep by Marly Bird! This yarn made the perfect material for what I’m calling the “Pillow Cardigan”… a cozy sweater—but for your pillow. ha!

It features such a great textured stitch pattern, with a ribbed center that holds four oversized buttons. It’s so simple, yet so lovely! And the best part?? It’s worked up in one piece— yessssssss.

I think what makes this pillow, though, is the yarn. You guys. If you haven’t tried out Chic Sheep yet… you’ve gotta. I think what sets it apart from other big brand yarns is the luxurious feel of it. It is hands down the sleekest yarn I’ve used. You can tell when working with it, that it’s such good quality. It’s 100% superwash merino wool, and washable— hayyyyy! Another thing I noticed while working with Chic Sheep was the “bounce” it had to it. Like it seemed really springy and squishy. Does that make sense?! lol
This project is actually a part of a blogger tour that features lots of amazing projects created with Chic Sheep by other super talented designers! You can read more about the tour HERE and swoon over all the other awesome designs. There’s lots of great garments and accessories in the lineup!

I chose to use the color “Linen”, which is exactly what I used for The Slopes Headband this past Winter. There’s such a nice selection of colors for this yarn too… a good mix of vibrant tones plus some good neutral options.

I hope you enjoy making this pillow cardi! It’s sure to cozy up any corner of your home :)
What you’ll need:
-worsted weight (4) yarn, approximately 700 yards (for this project I used four skeins of Red Heart Chic Sheep in color “Linen”, linked HERE)
-size i (5.5 mm) hook or size needed to obtain gauge
-18 x 18 inch pillow insert
-four 1 3/8 - 1 1/2 inch buttons (the ones I used can be found HERE)
-thread for buttons
-yarn needle
-sewing pins
Finished Dimensions:
Pillow cover measures approximately 16.5” x 17”
Gauge:
15 hdc by 12 rows equals a four inch square
Abbreviations:
ch(‘s)=chain(s), hdc=half double crochet, BLO= back loop only, sc=single crochet, sk=skip, dc=double crochet, st(s)=stitch(es)
Notes:
-pattern is written in US terms
-whether or not ch’s count as sts will be clarified in the pattern
-the pillow cover is worked up in one piece, starting with the ribbing (that includes button holes) then working sts along the long side of the ribbing. It’s designed to wrap around the pillow and be buttoned in the center, then the two sides are sewn.
-the finished cover measures a tad smaller than the 18” pillow, but since it stretches it fits nicely
***You can find the PDF version of this pattern in the shop by clicking HERE. Great for easy printing!***
Pattern:
-Ribbing (chains at the beginning of ribbing rows do not count as st):
Row 1) ch 9, hdc in 2nd ch from hook and across (8 total sts)
Rows 2 - 10) ch 1, turn, hdc in BLO across row (8 total sts)
Row 11) ch 1, turn, hdc in BLO of first 2 sts, ch 4, sk 4 sts, hdc in BLO of last 2 sts (4 total sc, 4 total ch’s)
Rows 12 - 23) ch 1, turn, hdc in BLO across row (8 total sts)
Row 24) repeat instructions from row 11
Rows 25 - 36) ch 1, turn, hdc in BLO across row (8 total sts)
Row 37) repeat instructions from row 11
Rows 38 - 49) ch 1, turn, hdc in BLO across row (8 total sts)
Row 50) repeat instructions from row 11
Rows 51 - 60) ch 1, turn, hdc in BLO across row (8 total sts)
-do not finish off
-Body of the pillow
Row 1) to begin the body of the pillow you will start by working into the side of the ribbing, from where you left off in row 60. You will ch 1 (does not count as st), then work one sc into the side of each row of the ribbing, working sc’s all along the long side of ribbing. You can see a visual of this in the photo below. (60 total sc’s)

Row 2) ch 1 (counts as sc), sk first st, dc, [sk next st, work 1 sc and 1 dc in next st] across until last st of row— in that last st, only work 1 sc, not a dc (59 total sts)
Rows 3 - 135) ch 1 (counts as sc), dc in first st, [sk next st, work 1 sc and 1 dc in next st] across until last st of row— in that last st, only work 1 sc, not a dc (59 total sts)
-Finish off
Assembly:

To assemble your pillow cover, you will fold up your piece like shown in the photo above— bringing both ends to the middle and overlapping them, with the ribbed side on the under side, because you will flip it inside out once it’s sewn and will want the ribbed side on the outside. You will want the middle overlapped part to be in the very center.

Make sure to overlap in the middle only just up to the top of the ribbing, like shown in the photo above. You can pin your pillow together on the sides, to keep it from shifting around while you sew.
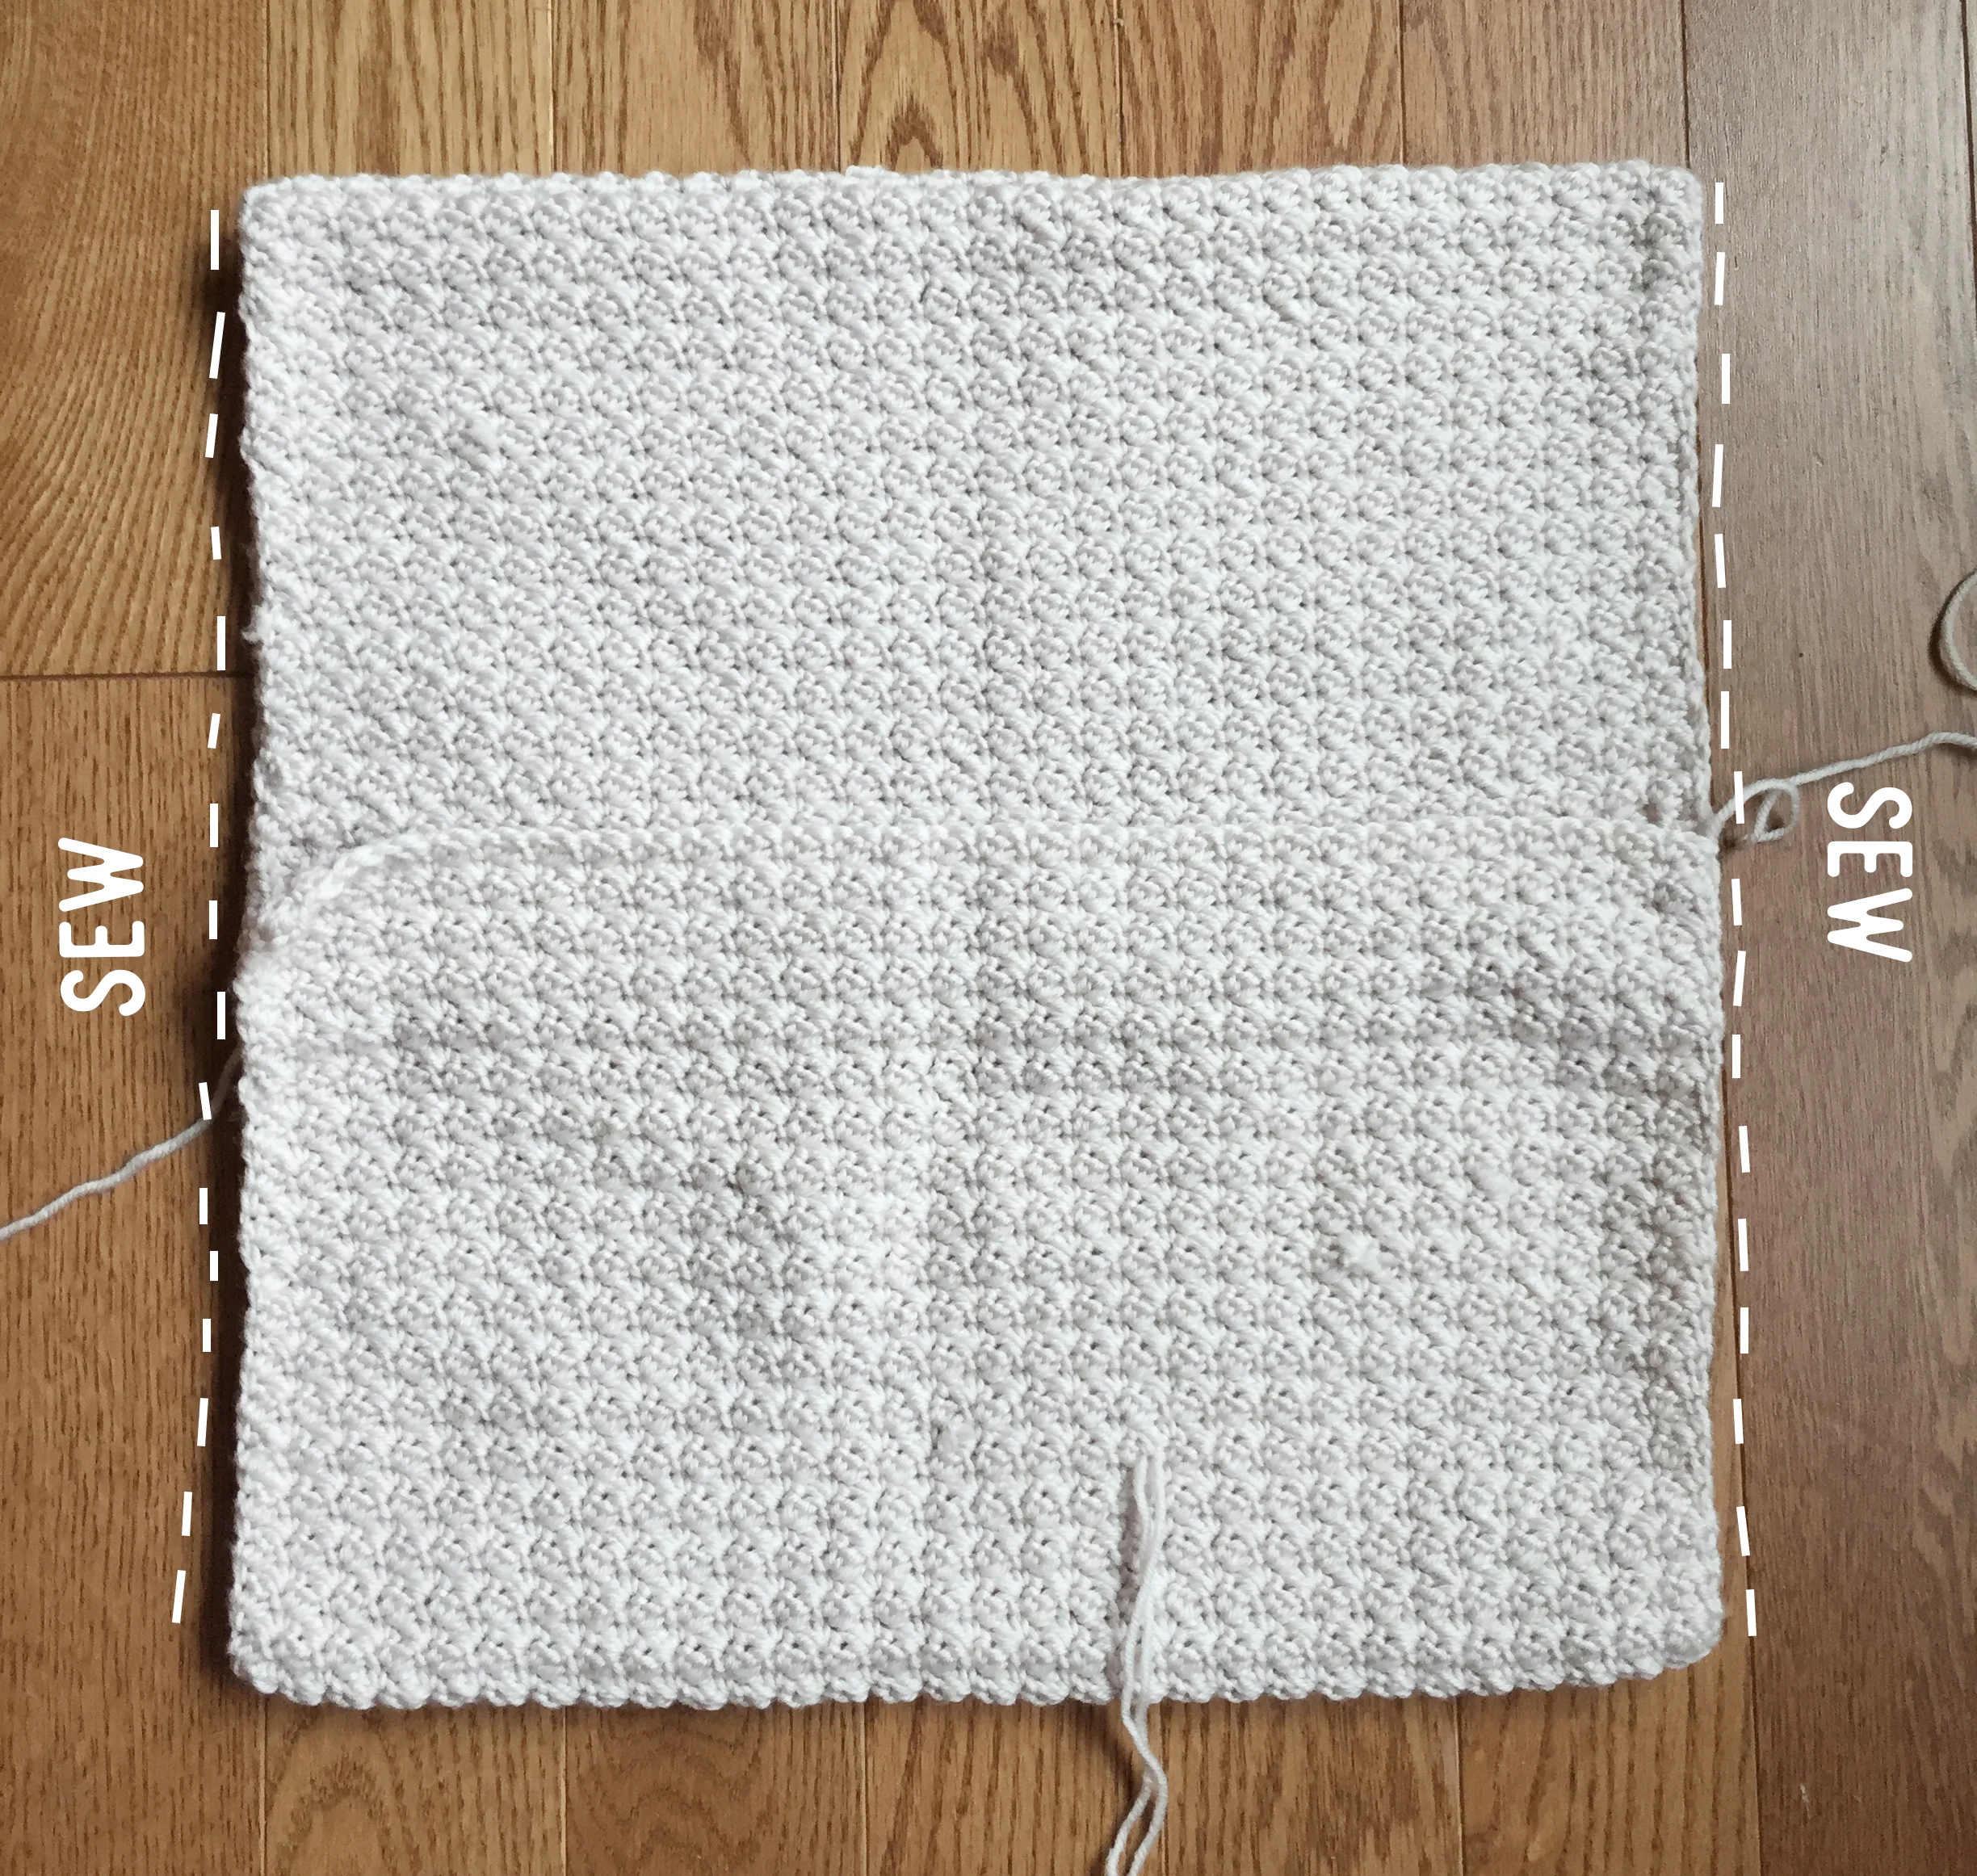
Then using a long piece of yarn and yarn needle, sew along the very edge of the two open sides using a whip stitch. When you sew the middle part that is overlapped be sure to include all the layers when sewing— very important! Then you can weave in all ends.

Once your pillow is sewn, flip it right side out. Now you’re ready to sew on your buttons. How I attached each button was by going one at a time and aligning the button with each button hole to where it should be placed on the under piece.
After all buttons are sewn on, you can stuff in your pillow insert, button up the center and you’ve got yourself a cozy little sweater just for your pillow! Teehee.

I really really love this pillow pattern… Dare I say it’s my new favorite?! I love the simplicity and the durability of it. And those buttons are the perfect touch…
If you make one of these bad boys yourself, be sure to tag me over on Instagram. I’d love to admire! Thanks for following along with my makes, and I hope you have a great weekend!
-Meg